
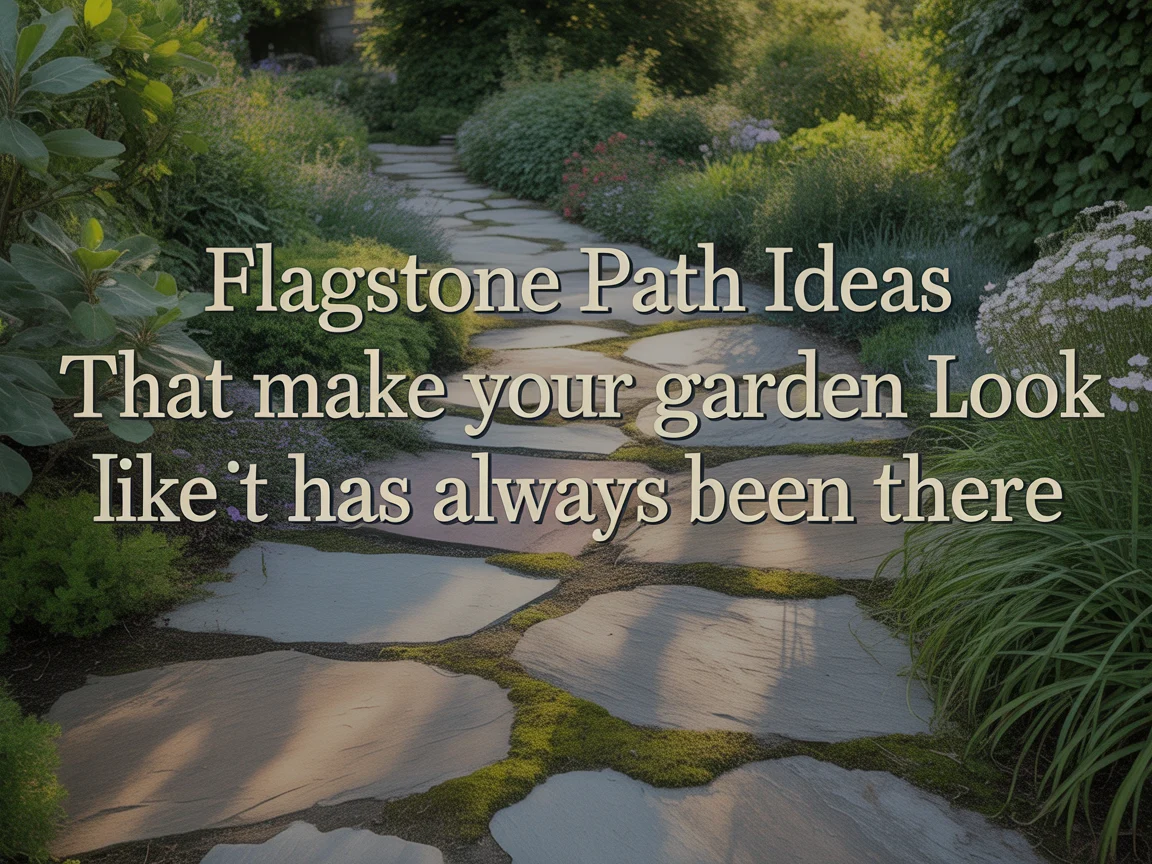
Flagstone Path Ideas That Make Your Garden Look Like It Has Always Been There
I laid my first flagstone path the summer I moved into a house with a back garden that was entirely concrete. I ripped the concrete out, sourced a load of reclaimed sandstone flags from a local reclamation yard, and spent a weekend setting them into a curved path through the new planting beds. When it was finished, my mother visited and asked how long the path had been there. I told her I had just laid it. She did not believe me. That is the particular quality of a well-laid flagstone path that no other paving material replicates quite as naturally.
Flagstone path ideas use flat, irregularly shaped natural stone pieces including sandstone, limestone, slate, and bluestone to create garden walkways that suit a wide range of styles from formal to completely naturalistic, and the irregular character of the stone gives every flagstone pathway a handmade, timeless appearance that manufactured paving units cannot produce. The natural surface variation, the organic shapes, and the way the stone ages and weathers over time all contribute to a path that looks more established with each passing year rather than less.
Since that first reclaimed sandstone project, I have designed, laid, and studied flagstone paths across dozens of properties and garden styles. I have seen simple flagstone path ideas executed perfectly on the smallest front gardens, and I have also seen elaborate modern flagstone path ideas covering hundreds of square feet of large estate grounds.
In this article, I am sharing the best flagstone path ideas that I have either created myself or researched thoroughly enough to recommend with complete confidence.
Random Irregular Flagstone Pathway Through a Garden
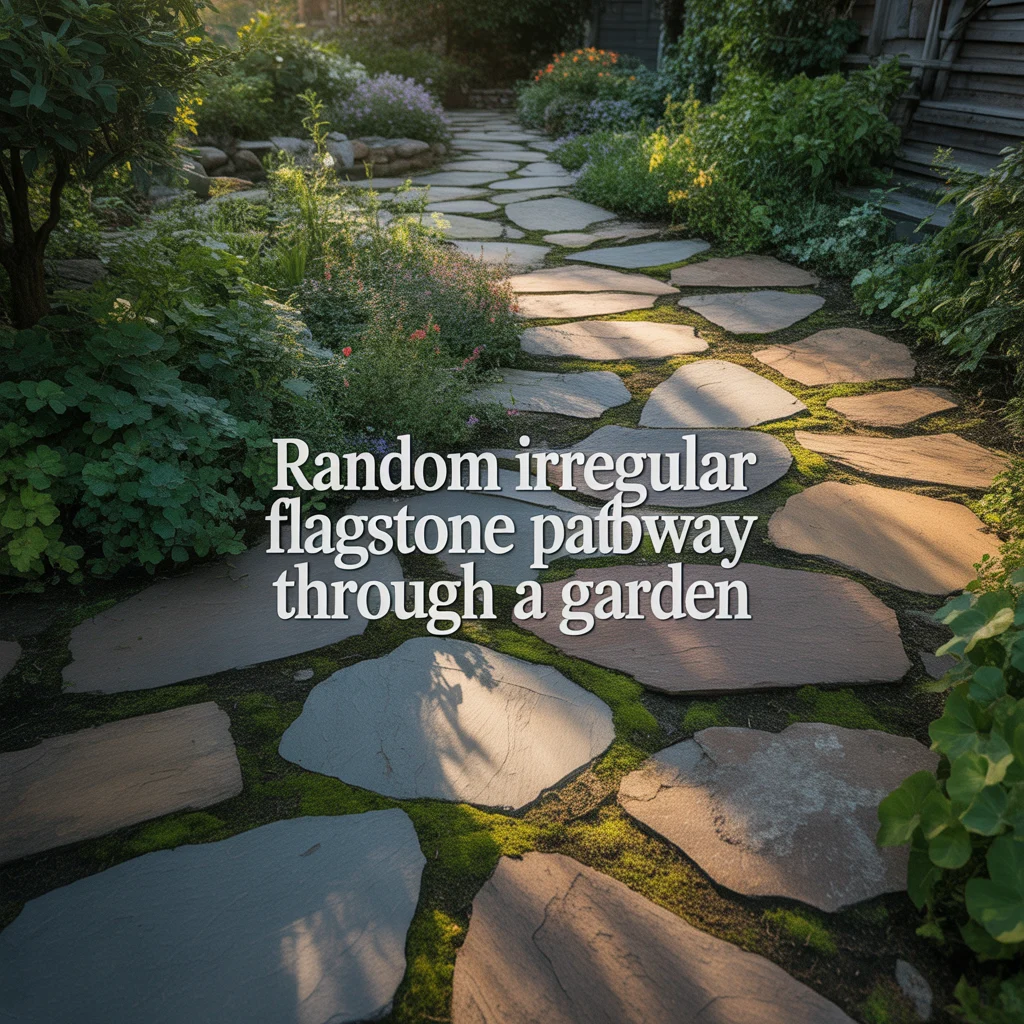
A random irregular flagstone pathway uses natural stone pieces of varying shapes and sizes laid in a jigsaw arrangement where the gaps between stones are minimized by selecting pieces that fit together as closely as possible. This is the most traditional and widely used of all flagstone path ideas, and it produces the most naturally organic-looking result because the irregular shapes of the individual stones read as though they were simply found and placed rather than manufactured. I laid this design using reclaimed Yorkstone at a period cottage property, and the finished path looked as though it had been there since the house was built in 1890. The key is spending time selecting which stone fits where before committing to any bedding mortar. A wider range of layouts and stone types for this style of path is covered in these stunning stone garden path designs with flagstone.
How to Lay a Random Irregular Flagstone Path
A random irregular flagstone path is laid by dry-fitting all available stone pieces on the prepared sub-base before any bedding mortar is applied, selecting adjacent pieces that fit together with gaps of 10 to 20mm and removing or cutting any pieces that create excessively wide gaps above 25mm in the layout. I always start the dry fit from the most visible end of the path, working toward the less visible sections where cutting waste and less perfect fits are acceptable. The sub-base consists of 4 inches of compacted hardcore topped by a 1-inch mortar bed of 5:1 sharp sand and cement, on which each stone is pressed firmly and checked level before the adjacent piece is positioned.
Best Stone Types for a Random Flagstone Pathway
Yorkstone, sandstone, and limestone are three natural stone types suited to a random irregular flagstone pathway. Yorkstone, a buff-grey millstone grit quarried in West Yorkshire, produces the most naturally flat and consistently thick flag of any British natural stone, making it the easiest material to lay level on a random flagstone path without excessive bedding mortar adjustment per stone. Sandstone in honey, buff, or autumn blend tones produces a warmer surface color and suits a cottage or country garden flagstone path where warm stone tones complement the surrounding planting. Limestone in pale grey or cream produces the most formal appearance of the three options and suits a contemporary or period property flagstone walkway where a cooler, more refined stone color is appropriate.
Flagstone Walkway to Front Door
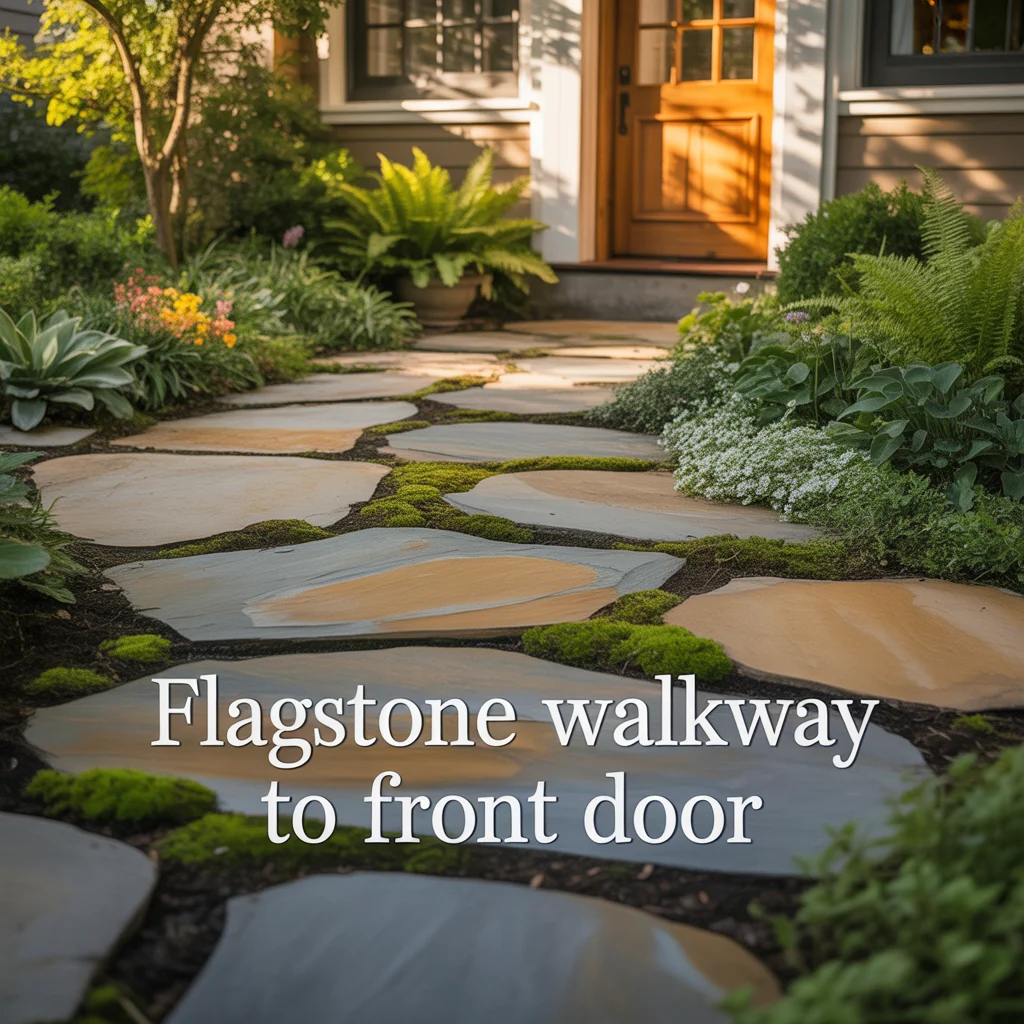
A flagstone walkway to the front door is the most impactful application of any flagstone path idea for a residential property because it is the first surface every visitor walks across and the element of the property visible from the street. I have redesigned more front garden paths than any other path type in my design work, and the change from concrete or block paving to a natural flagstone walkway to the front door produces the most dramatic improvement in a property’s street appearance of any single garden change I have observed. The key is selecting a stone that complements the property’s building material, which in most UK properties means matching warm limestone or sandstone to stone or brick-built houses.
Flagstone Walkway to Front Door Width and Layout
A flagstone walkway to a front door measures most effectively at 3 to 4 feet in width for a standard residential property, which provides comfortable walking space for two people side by side while keeping the path proportional to the scale of a standard domestic entrance. A width below 2.5 feet feels restrictive as a front door approach and makes the path appear secondary to the surrounding garden rather than the primary route to the entrance. I design front door flagstone walkways at 36 inches as the standard width for most semi-detached and terraced properties, and 48 inches for detached properties where the wider entrance scale suits a more generous path width on the approach to the door.
Flagstone Walkway to Front Door Surface Finish
Riven, sawn, and thermal are three surface finishes suited to a flagstone walkway to a front door. Riven flagstone has a naturally split, slightly uneven surface produced by cleaving the stone along its natural grain, providing the most traditional and rustic appearance for a flagstone path idea with a slip resistance rating of R11 to R12 on a wet surface. Sawn flagstone has a smooth, flat face produced by machine cutting, providing the most contemporary appearance for a modern flagstone path idea and a slip resistance rating of R10 to R11. Thermal, also called flamed, flagstone has a textured surface produced by rapid heating and cooling that opens the stone grain, providing a slip resistance rating of R11 to R12 and a more refined appearance than riven but more texture than sawn.
Simple Flagstone Path Ideas Through Grass

Simple flagstone path ideas through grass place individual flat stones directly into an existing lawn surface as flush stepping stones, creating a defined path route through the turf without excavating or removing the surrounding grass. I created this design as the most straightforward flagstone path idea I know, setting six 24-by-24-inch sandstone flags flush with the lawn surface on a curved route from the patio to the garden shed, and the entire installation took three hours including the excavation, sand bedding, and leveling of each stone. The grass grows right up to the edge of each flag, and a standard mower passes over the stones without any edge trimming required.
Setting Flagstones Flush in a Grass Lawn
Flagstones set flush in a grass lawn are installed by cutting the turf to the exact outline of each stone using a sharp spade or half-moon edger, removing the cut turf section, excavating to the stone thickness plus 20mm for a sharp sand bed, spreading and leveling the sand, placing the stone, and tamping it down until the top face sits 5mm above the surrounding turf level. The 5mm above-turf height at installation accounts for the grass growing back to the stone surface level within four to six weeks, producing a genuinely flush finish. I set flagstones 5mm above turf on every lawn path project because stones set exactly flush at installation always settle below turf level within one growing season.
Flagstone Spacing for a Grass Garden Path
Flagstone spacing on a simple grass garden path is determined by the natural walking stride of the path user, typically 18 to 24 inches for an adult measured from the center of one footfall to the center of the next. I measure the stride length by asking the intended path user to walk naturally on flat grass and measuring between heel marks at a comfortable pace before positioning any stones. For a 24-by-24-inch flag, the stone center-to-center spacing equals the stride length, which places the leading edge of each stone at the correct landing position for each step on the flagstone path. Children’s paths use 14 to 18-inch center spacing to suit the shorter stride of a child aged 4 to 10.
Modern Flagstone Path Ideas
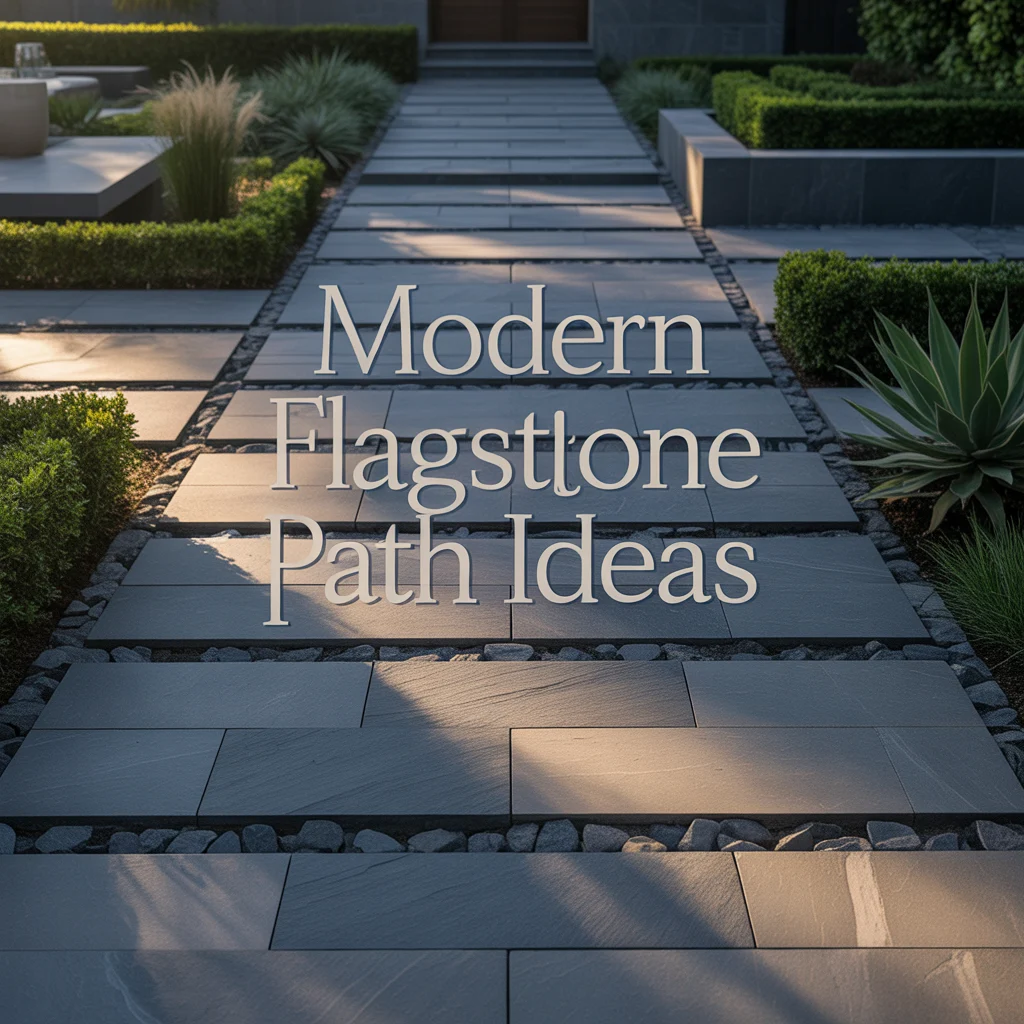
Modern flagstone path ideas use large-format cut flagstones in a regular grid or linear pattern rather than the random irregular layout of a traditional flagstone pathway, creating a contemporary stone path with clean geometric lines that suits modern architecture, new-build properties, and designed outdoor living spaces. I specified this design at a contemporary residential project using 600mm by 900mm sawn limestone flags in a staggered linear pattern, and the long, rectangular stone format combined with tight 8mm joints produced a flagstone path that read as entirely contemporary while retaining the natural stone material quality that manufactured alternatives cannot replicate.
Large Format Flagstone Sizes for a Modern Path
600mm by 600mm, 600mm by 900mm, and 600mm by 1200mm are three large format stone sizes suited to a modern flagstone path. The 600mm by 600mm format produces a square grid pattern that suits a symmetrical modern path of formal character and costs $12 to $25 per slab depending on stone species. The 600mm by 900mm format produces a rectangular pattern with a 2:3 proportion that suits a contemporary path of 3 to 4 feet width where the stone length runs across the path direction. The 600mm by 1200mm format produces the most dramatic large-format rectangular pattern and suits a wide contemporary flagstone path of 4 to 5 feet width where the full slab length spans the path from edge to edge in a single piece.
Stone Species for a Modern Flagstone Path
Honed limestone, charcoal slate, and grey sandstone are three stone species suited to a modern flagstone path idea. Honed limestone in pale grey or cream provides a smooth, refined surface suited to a minimalist modern path where the subtle natural variation of the stone provides the only decorative detail. Charcoal slate in a sawn and honed finish produces the darkest, most contemporary flagstone surface and suits a modern path alongside dark metal furniture, rendered walls, and contemporary planting schemes. Grey sandstone in a sawn finish provides a mid-tone grey surface that bridges contemporary and traditional garden styles and suits a modern flagstone path at a property where a purely contemporary material palette would look out of place.
Flagstone Walkway With Border
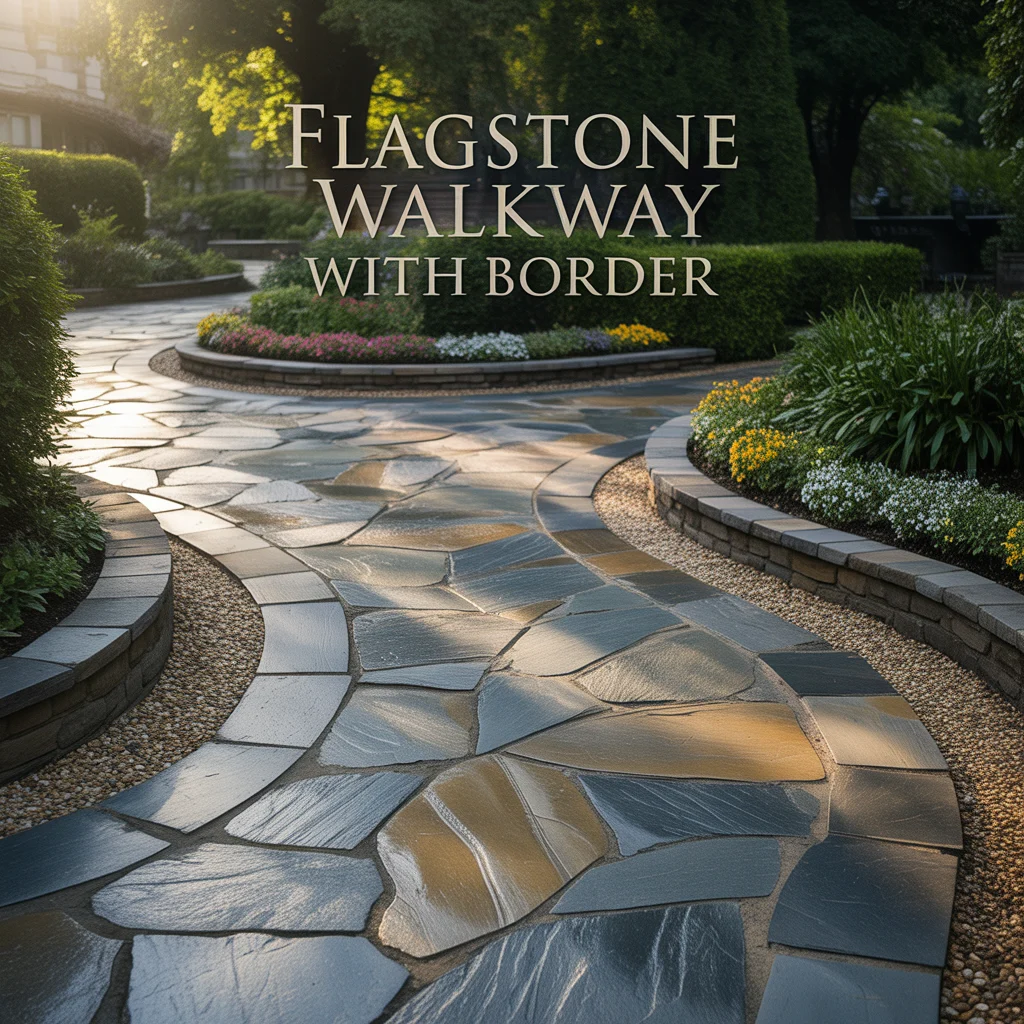
A flagstone walkway with a border uses a defined edge treatment of brick, setts, or contrasting stone along one or both sides of the flagstone path surface to create a structured boundary that separates the flagstone walkway from the adjacent lawn or planted area and adds a decorative detail that strengthens the overall appearance of the path. I added a single row of blue-black engineering brick soldier course on both sides of a random Yorkstone flagstone path at a period property project, and the contrast between the warm buff Yorkstone field and the dark engineering brick border produced a flagstone walkway with borders that looked architecturally composed rather than simply paved.
Border Materials for a Flagstone Walkway
Brick soldier course, granite setts, and contrasting stone species are three border materials suited to a flagstone walkway with borders. A brick soldier course using red or blue-black engineering bricks provides the most defined and formal border edge for a flagstone walkway and costs $2 to $5 per linear foot in materials, suiting a period, Victorian, or formal garden flagstone path design. Granite setts at 100mm by 100mm provide a durable, natural stone border that coordinates with the flagstone material and suits both formal and informal flagstone walkway designs at a cost of $4 to $8 per linear foot. Contrasting stone species, such as a grey slate border alongside a warm sandstone flagstone field, produces a material contrast within the natural stone palette that suits a contemporary flagstone path idea.
Border Width for a Flagstone Walkway
A single row border of bricks or setts measuring 4 to 6 inches in width suits a flagstone walkway of 3 to 4 feet total width, where a wider border would reduce the visible flagstone field area disproportionately. A double row border of 8 to 10 inches suits a wide flagstone walkway of 4 to 6 feet where the increased border width remains proportional to the larger stone field. I measure the border proportion as a maximum of 15% of the total path width on each side, which produces a border that defines and frames the flagstone field clearly without dominating the visual appearance of the path surface from above.
Dry Laid Flagstone Path
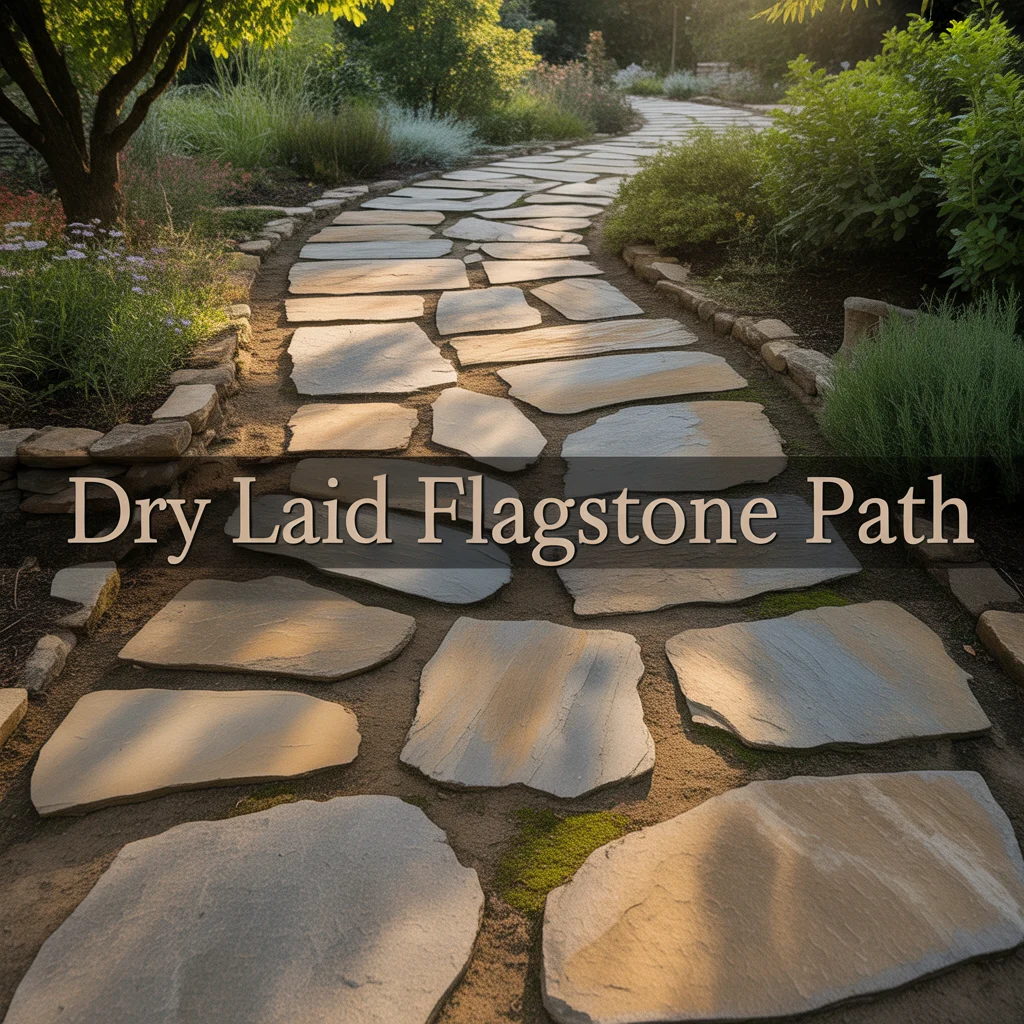
A dry laid flagstone path sets individual flagstones directly on a compacted gravel or sand base without any mortar bedding or joint pointing, creating a permeable, flexible path that allows rainwater to drain freely through the stone joints, accommodates ground movement without cracking, and can be lifted and relaid without specialist tools if any stone shifts or a new path layout is needed in the future. I dry laid a random flagstone path in my own back garden using reclaimed limestone on a 3-inch compacted granite chipping base, and the path has remained stable and level through three winters without any movement at any stone position.
Sub-Base Options for a Dry Laid Flagstone Path
Compacted granite chippings, compacted gravel, and sharp sand are three sub-base options suited to a dry laid flagstone path. Compacted granite chippings at 20mm size and 3-inch depth provide the most stable and permeable base for a dry laid flagstone path, with the angular chip shape interlocking under compaction to produce a firm base that resists stone movement. Compacted gravel at 20mm size and 3-inch depth provides a slightly less stable but more permeable alternative that suits a dry laid flagstone path in a high-rainfall position where maximum drainage is the priority. Sharp sand at 2-inch depth provides a free-draining bed for smaller flagstones of below 18 by 18 inches that do not carry enough stone weight to require the deeper chipping base needed for larger, heavier flags.
Advantages of Dry Laying a Flagstone Path
Permeability, flexibility, and accessibility are three advantages of a dry laid flagstone path over a mortar-set flagstone pathway. A dry laid flagstone path allows 100% of rainfall to drain through the stone joints and into the ground below, which prevents surface water runoff onto adjacent lawn or planted areas and reduces the risk of icy surface conditions in winter. A dry laid path accommodates ground movement due to frost or tree root activity without cracking or dislodging the stone joints, because each individual flag can move independently without the fixed mortar joint of a mortared path transmitting stress to adjacent stones. A dry laid path allows individual stones to be lifted and repositioned without breaking mortar bonds if any stone settles unevenly after heavy use.
Flagstone Path With Planting in the Gaps
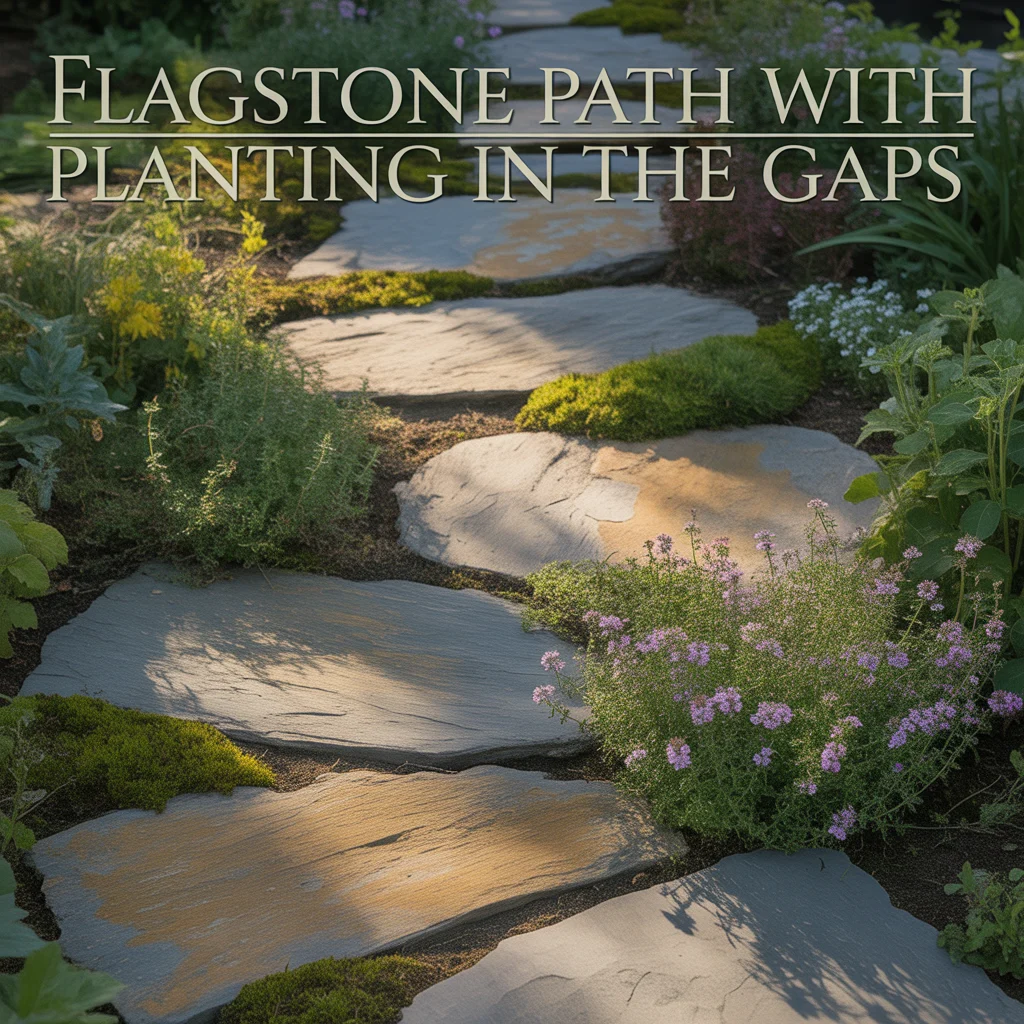
A flagstone path with planting in the gaps uses the spaces between individual flagstones as planting positions for low-growing ground cover plants, producing a path surface where the stone and the living plant material share the visible area equally and the path takes on a naturally integrated character that becomes more attractive as the planting establishes and fills the gaps over successive growing seasons. I planted Thymus serpyllum in all the gaps of a random sandstone flagstone path at a residential project, and the path by the end of its second summer had a carpet of tiny pink flowers across the full joint surface in June that made the flagstone pathway look completely different from any hard-surfaced path.
Plants for Flagstone Path Gaps
Thymus serpyllum, Erigeron karvinskianus, and Acaena inermis are three plants suited to the gaps of a flagstone path idea. Thymus serpyllum, creeping thyme, stays below 2 inches in height, tolerates light foot traffic, produces pink flowers from June to August, and releases a herbal fragrance when stepped on, making it the most multi-sensory gap planting for a flagstone path. Erigeron karvinskianus produces small white and pink daisy flowers from May to November and self-seeds freely into path joints after the first season, spreading throughout the flagstone path gap network without any further planting. Acaena inermis Purpurea produces a flat, bronze-purple mat of foliage at 1 inch height and tolerates regular foot traffic better than most other gap plants for a flagstone walkway.
Gap Width for Planted Flagstone Path Joints
Flagstone path gaps for planting measure most effectively at 20 to 50mm between stone faces, which provides enough soil volume for plant root systems to establish while keeping the individual stone pieces visually dominant over the planting. Gaps narrower than 15mm provide insufficient soil depth and width for most ground cover plants to establish a viable root system in the first growing season. I fill all gaps in planted flagstone paths with a 50/50 mix of sharp sand and garden compost pressed firmly into the joint to 10mm below the stone surface level, which provides a free-draining, nutrient-sufficient growing medium that suits all recommended flagstone path gap plants without promoting excessive growth.
Flagstone Walkway Pictures Style: Curved Informal Path

A curved informal flagstone pathway follows a sweeping, natural curve through the garden rather than a straight geometric route, producing a path that feels organic and relaxed in character and suits cottage gardens, country properties, and informal planting schemes where the natural meandering line of the flagstone walkway coordinates with the surrounding planting rather than imposing a formal geometric structure on the garden space. I created this style of flagstone path at several properties and find the curved layout consistently produces more positive comments from garden visitors than a straight path of identical stone because the curve invites the user forward and creates an element of discovery as the path destination reveals itself gradually.
Marking a Curved Flagstone Pathway
A curved flagstone pathway is marked using a garden hose or rope laid on the ground to establish the desired curve before any excavation begins. I lay the hose along the intended path centerline and adjust the curve from multiple standing positions until the route looks natural from both the path entrance and from within the garden, then mark the inner and outer path edges using sand poured along lines parallel to the hose at 18 inches on each side for a 36-inch path. The sand line guides the excavation of the curved path area before the sub-base is prepared. Marking the curve with a hose before cutting turf prevents the most common curved path mistake, which is cutting a curve that looks correct when viewed from one direction but appears awkward from other angles in the garden.
Cutting Flagstones for a Curved Path Edge
Flagstones on the inside edge of a curved flagstone walkway require cutting to the curved boundary line using an angle grinder with a diamond disc, which produces a clean curved edge cut at the correct angle to follow the inner and outer path curves. The inner edge of a curved flagstone path requires the most cutting because the tighter radius means more stones require trimming to fit within the curve line. I cut the inner edge stones on all curved flagstone path projects before laying any field stones, fitting the cut edge pieces first and then filling the remaining field area with whole and minimally cut stones that require the fewest cuts for the main path surface.
Reclaimed Flagstone Path
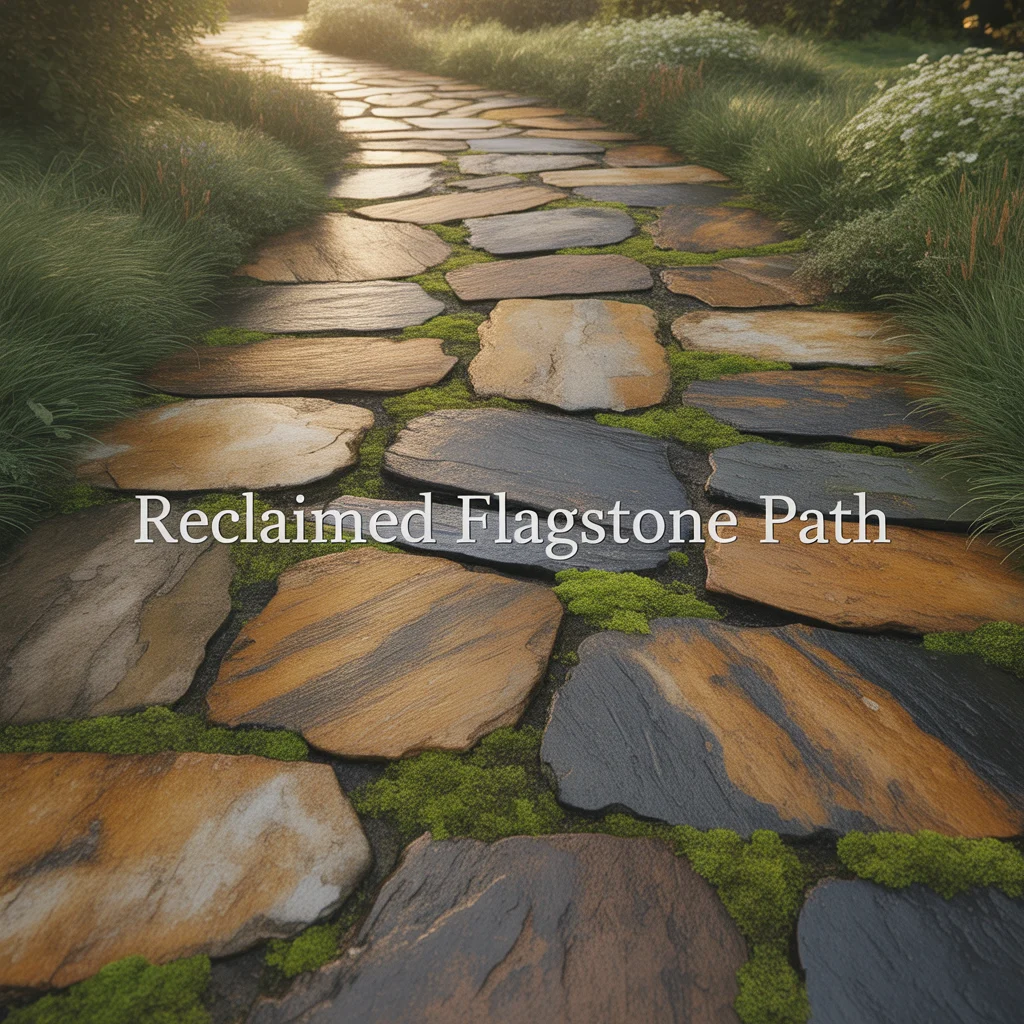
A reclaimed flagstone path uses salvaged stone pieces from demolished buildings, old garden features, or reclamation yards to create a flagstone pathway with an aged, weathered appearance that new quarried stone cannot replicate immediately. I have sourced reclaimed Yorkstone, reclaimed limestone, and reclaimed granite flags from local reclamation yards on multiple projects, and the surface character of reclaimed flagstone, including the natural weathering marks, the lichen patches, and the worn edges from decades of previous use, gives the finished path an established quality that new stone develops only after 10 to 15 years of outdoor installation.
Sourcing Reclaimed Flagstone for a Garden Path
Reclamation yards, online marketplaces, and demolition contractors are three sources for reclaimed flagstone suited to a garden path. Reclamation yards provide the most reliable source of cleaned, graded reclaimed flagstone with consistent thickness and condition, stocking species including Yorkstone at $8 to $20 per square foot, reclaimed limestone at $6 to $15 per square foot, and reclaimed granite at $10 to $22 per square foot. Online marketplaces including eBay and local selling platforms list reclaimed flagstone from private sellers at $2 to $10 per square foot, though consistency of thickness and stone condition is less guaranteed than reclamation yard stock. Demolition contractors occasionally offer reclaimed flags free or at very low cost from site clearances.
Cleaning Reclaimed Flagstone for a Garden Path
Reclaimed flagstone for a garden path requires cleaning to remove old mortar, surface staining, and biological growth before installation. Old mortar is removed using a brick bolster and club hammer to knock off the bulk of the material, followed by a wire brush to clean the residual mortar from the stone face and bed surfaces. Lichen and biological growth is removed using a diluted sodium hypochlorite solution at 10% concentration applied with a stiff brush and left for 20 minutes before scrubbing and rinsing. I clean reclaimed flagstone in batches before any installation begins and find that clean stone reveals the natural color and surface character of the material more clearly than uncleaned stone, which often looks dull and grey until cleaned.
Flagstone Path With Gravel Infill
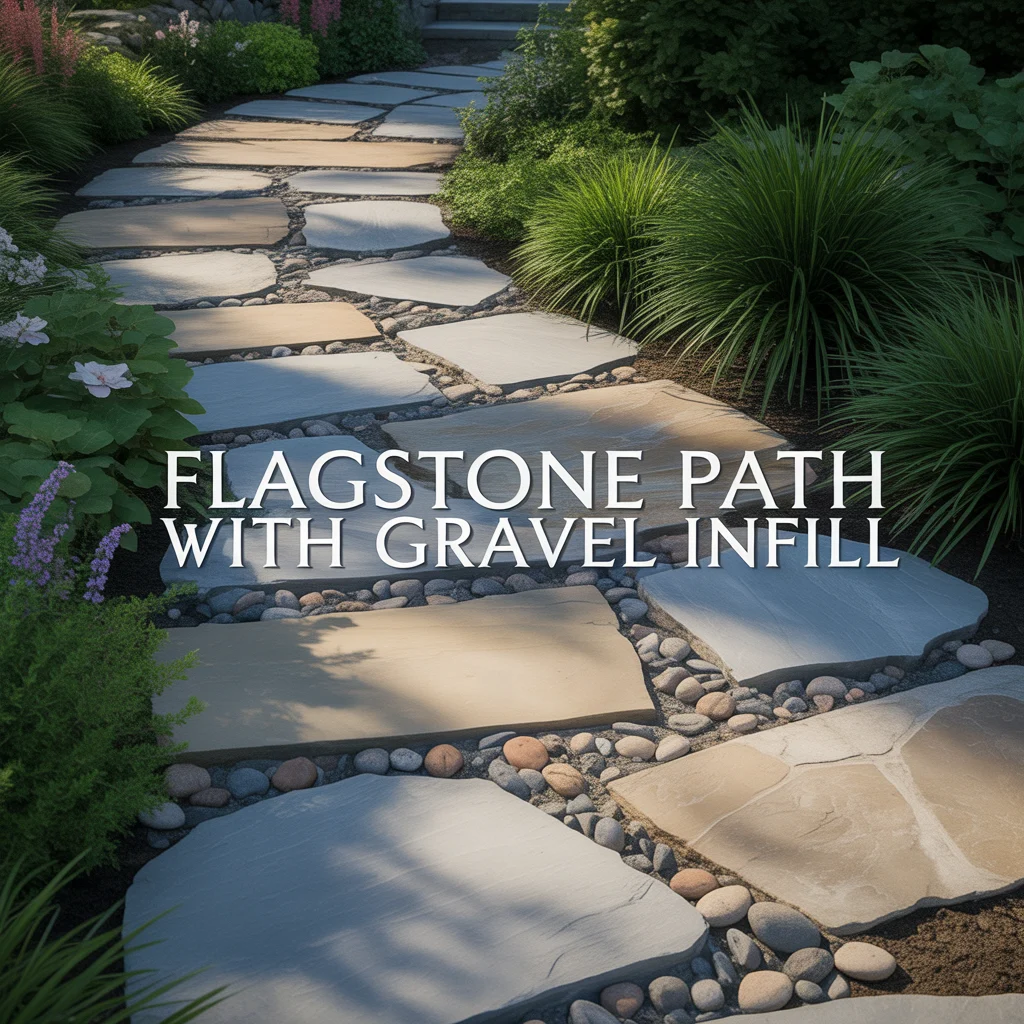
A flagstone path with gravel infill uses individual flagstone pieces set in a field of loose gravel rather than tight against each other, with the gravel filling the full gap between each stone rather than a narrow mortar or planted joint. This flagstone path idea produces a path that combines the visual weight and stepping surface of the individual stones with the light, informal character of a gravel path, creating a design suited to Mediterranean, Japanese, and contemporary garden styles where the visual balance between hard stone and loose material is a deliberate design intention rather than a practical necessity.
Gravel Depth for a Flagstone and Gravel Path
Gravel on a flagstone path with gravel infill requires a depth of 2 to 3 inches around the base of each flagstone, which brings the gravel surface level to within 10 to 20mm of the flagstone top face and provides enough depth to prevent the flagstones from appearing to float on a surface film of gravel rather than being integrated into the path material. I set all flagstones in a gravel infill path on a 1-inch sharp sand bed excavated to the combined depth of the stone thickness plus the sand bed, then spread the gravel around the positioned stones to the required surface level. The flagstone top face sits 10 to 15mm above the finished gravel level, which provides a clear stepping surface distinction between the stone and the loose infill.
Gravel Types for a Flagstone Path Infill
White marble chippings, golden gravel, and grey granite chippings are three gravel types suited to a flagstone path with gravel infill. White marble chippings at 10 to 20mm create the strongest visual contrast between the gravel infill and the stone flags in the path, suiting a contemporary flagstone path idea where bold material contrast is the design intention. Golden gravel at 14 to 20mm produces a warm infill color that complements sandstone and limestone flagstone species and suits a cottage or Mediterranean garden flagstone walkway where the warm gravel tone coordinates with the stone color. Grey granite chippings at 10 to 20mm provide a neutral infill tone that suits all flagstone species and coordinates with the cool grey tones of contemporary architectural materials surrounding the path.
Flagstone Path With Moss Between Joints
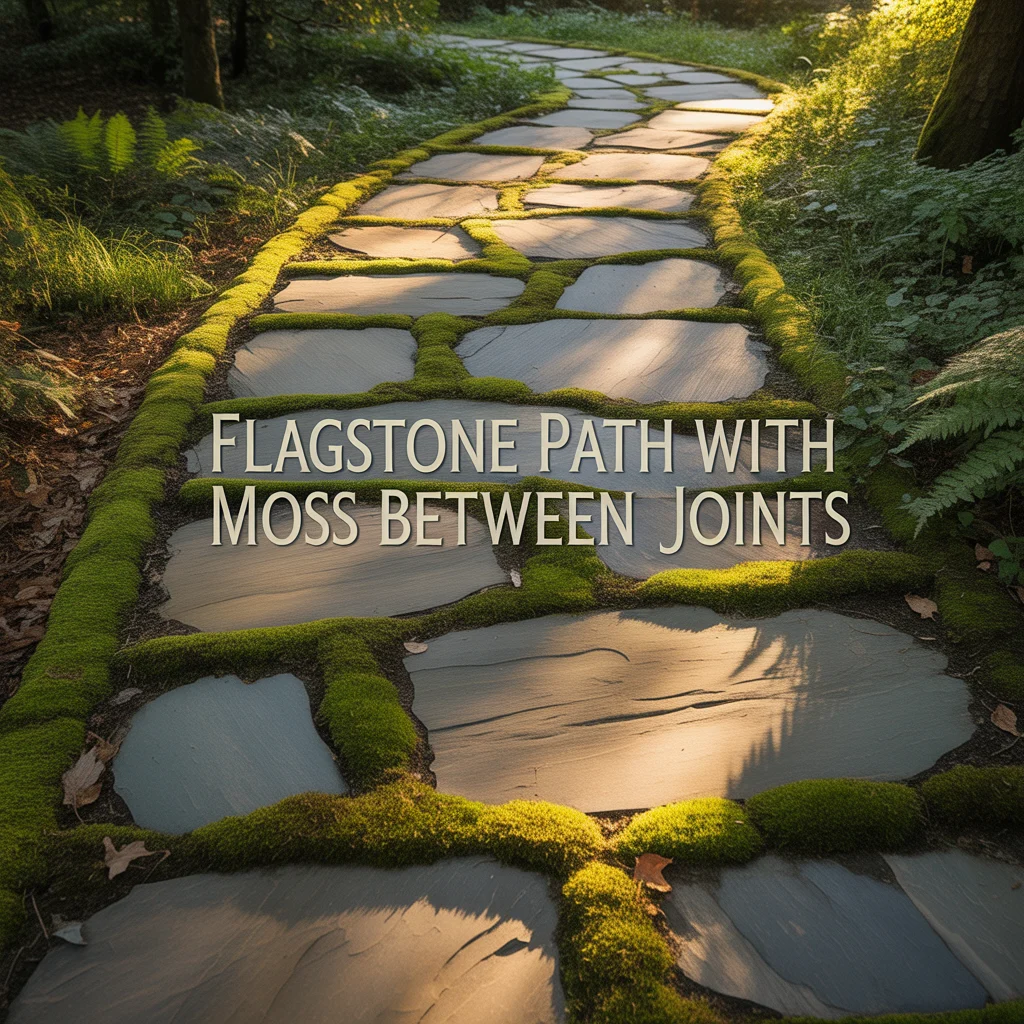
A flagstone path with moss between joints uses naturally establishing moss or deliberately planted moss as the joint material between individual flagstones, creating a path surface where the dark green, soft moss in the joints contrasts with the warm stone surface to produce one of the most photographed flagstone walkway pictures in domestic garden design. I observed this design at several heritage gardens where established flagstone paths had developed a full moss joint covering naturally over decades, and the visual effect of the green-filled joints against the pale stone surface was consistently the most-photographed path feature by garden visitors at every property I studied.
Encouraging Moss to Grow in Flagstone Path Joints
Moss establishes in flagstone path joints by applying a moss slurry made from blended fresh moss mixed with buttermilk to the prepared joint surface between the stones, spreading the slurry into the joint at 2mm depth and keeping the joints moist for 4 to 6 weeks while the moss spores establish root contact with the joint substrate. The best conditions for moss establishment in flagstone joints are partial to full shade, consistent moisture, and a joint substrate of soil or fine grit rather than compacted mortar. I apply moss slurry to flagstone path joints in spring between March and May and find visible moss growth within 3 weeks in shaded joint positions and within 6 weeks in slightly brighter positions.
Flagstone Species Best Suited to Moss Joint Paths
Yorkstone, reclaimed limestone, and Welsh slate are three flagstone species that suit a moss joint path most effectively. Yorkstone provides a warm buff-grey surface that creates the most visually harmonious contrast with dark green moss joints because the stone’s mid-tone color balances the depth of the moss color without either element visually overpowering the other in the finished path. Reclaimed limestone weathers to a soft grey surface that suits moss joint paths in formal walled gardens where the pale stone and dark moss combination produces a particularly refined period aesthetic. Welsh slate in blue-grey riven surface provides a darker stone background against which the green moss reads most clearly, suiting a shaded woodland or naturalistic garden flagstone path.
Flagstone Patio Path Combination

A flagstone patio path combination uses matching or complementary flagstone species on both the patio seating area and the adjacent garden path to create a unified natural stone surface that connects the outdoor living space to the garden through a consistent material language. I designed this combination at a residential project using the same Caithness slate on a 3-by-4-meter patio area and the connecting 20-foot flagstone pathway to the garden boundary, and the use of the same stone across both surfaces produced a connected outdoor space that read as a single designed area rather than two separate paved zones joined by a path.
Matching Patio and Path Flagstone Species
Using identical stone species on a patio and connecting flagstone path produces the most unified outdoor space because the color, texture, and aging behavior of the material is consistent across both surfaces. I source all stone for patio-path combination projects from the same supplier batch where possible to ensure the stone color and surface character matches between the two areas. When an exact species match is not available, I select a complementary stone with a similar color tone and surface finish, for example using buff sandstone on the patio alongside honey sandstone on the connecting flagstone path, which produces a close enough color relationship to read as a coordinated material choice.
Transition Detail Between a Patio and Flagstone Path
The transition between a flagstone patio and a connecting flagstone path is handled most effectively by maintaining the same joint width and joint material across both surfaces, which removes the visual break at the transition point and allows the eye to read the patio and path as a continuous stone surface. A change in joint width from 10mm on the patio to 20mm on the path creates a visible discontinuity at the transition point that draws attention to the join between the two areas. I specify the same joint width and same jointing material throughout both the patio surface and the connecting flagstone path on all combination projects to maintain the unified surface character from the house terrace to the garden.
Raised Flagstone Pathway

A raised flagstone pathway uses low retaining walls of brick, stone, or timber to create a path surface set 6 to 12 inches above the surrounding garden level, producing a defined, elevated walkway that provides clear drainage away from the path surface and creates a visual distinction between the path and the adjacent planting beds. I designed a raised flagstone path at a property with heavy clay soil that made a conventional ground-level flagstone walkway impractical due to poor drainage and surface water pooling, using two courses of reclaimed brick as the retaining wall and random limestone flags as the raised path surface, and the raised design solved the drainage problem completely while producing a more architecturally interesting path than a flat ground-level alternative.
Retaining Wall Options for a Raised Flagstone Path
Brick retaining walls, natural stone dry-stone walls, and timber sleeper walls are three retaining wall types suited to a raised flagstone pathway. Brick retaining walls of two to three courses provide 150 to 225mm of raised path height and suit a formal flagstone path design where the brick material coordinates with the surrounding garden boundary walls or building material. Natural stone dry-stone walls of 150 to 300mm height suit an informal or cottage garden raised flagstone path where the unpointed stone wall character coordinates with the natural flagstone path surface above it. Timber sleeper walls using one 200mm-deep sleeper on edge provide a 200mm raised height and suit a contemporary or kitchen garden raised flagstone path where the timber character coordinates with other timber elements in the garden.
Drainage for a Raised Flagstone Path
A raised flagstone path requires a French drain of 4-inch perforated pipe laid at the base of the retaining wall on the inner face, running to a soakaway at the lowest point of the path to collect and redirect the surface and sub-surface water that would otherwise pond against the wall base and undermine the raised path structure. I install a French drain on all raised flagstone path projects regardless of the soil drainage quality, because the raised structure creates an artificial catchment area between the walls that collects more water than the surrounding open soil during heavy rain events.
Flagstone Path With Lighting
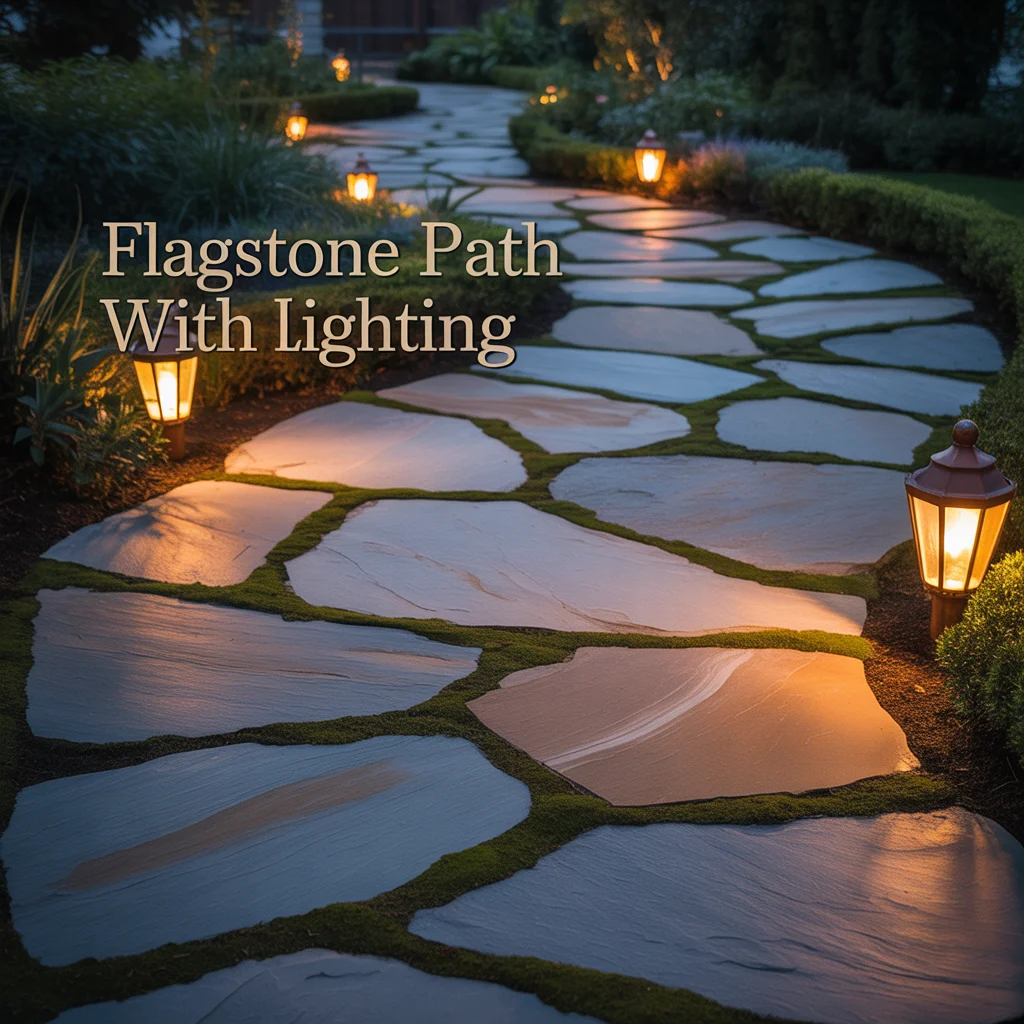
A flagstone path with integrated lighting uses low-voltage LED ground recessed lights, surface-mounted spike spotlights, or LED strip lighting beneath path edging to illuminate the flagstone walkway after dark, creating a path that is both safe to navigate in the evening and visually attractive as a lit garden feature from the house. I installed four ground-recessed LED uplighters set into the flagstone field at 5-foot intervals on a formal limestone flagstone pathway, and the upward light through the stone surface produced a pattern of warm light and natural stone texture after dark that the homeowner described as the most impressive version of the path, superior to its daytime appearance.
Ground Recessed Lights for a Flagstone Path
Setting ground-recessed lights into a flagstone pathway requires cutting a circular recess of 60 to 80mm diameter into individual flagstones using a diamond core drill bit, which allows the LED fitting to sit flush with the stone surface. I cut the recesses before the stones are laid, working on a stable surface with the stone face-down to prevent chipping the visible upper surface during drilling. The light body drops into the drilled recess and connects to a 12-volt cable run beneath the path in a conduit. I specify IP67-rated fittings for all flagstone path in-ground lighting to provide complete waterproofing for a fitting in direct contact with the damp conditions present beneath a natural stone path surface throughout the year.
Spike Spotlight Lighting for a Flagstone Pathway
Surface-mounted spike spotlights positioned 12 to 18 inches from the flagstone path edge and angled at 30 to 45 degrees toward the path surface illuminate the flagstone texture and the path walking surface effectively at a lower installation cost than ground-recessed options. Spike spotlight fittings at $25 to $60 per unit in a 12-volt low-voltage system require no stone drilling and suit a flagstone path where installing recessed lights within the stone field is not practical. I position spike spotlights on alternating sides of the flagstone path at 4 to 5-foot intervals, which produces overlapping light pools that illuminate the full path width without creating visible dark sections between individual fitting positions.
Natural Stone Flagstone Path With Wildflower Borders

A natural stone flagstone path with wildflower borders plants native annual and perennial wildflowers along both sides of the flagstone walkway to create a naturalistic, ecologically rich path design that suits rural properties, cottage gardens, and gardens where the natural character of the flagstone material is extended into the surrounding planting scheme. I designed a wildflower-bordered flagstone path at a rural property using random limestone flags on a 24-foot path with ox-eye daisy, field scabious, and common knapweed borders on both sides, and the combination of the pale limestone path surface and the mixed wildflower borders in June and July produced the most naturally resolved flagstone walkway design I have created.
Wildflower Species for a Flagstone Path Border
Leucanthemum vulgare, Knautia arvensis, and Centaurea nigra are three wildflower species suited to a border alongside a natural stone flagstone path. Leucanthemum vulgare, ox-eye daisy, produces white flowers with yellow centers from May to July at 24 to 30 inches height, providing the most visually dominant and recognizable wildflower border alongside a pale limestone or sandstone flagstone path. Knautia arvensis, field scabious, produces lilac-blue pincushion flowers from July to September at 24 to 36 inches height, extending the border flower display beyond the ox-eye daisy period. Centaurea nigra, common knapweed, produces purple thistle-like flowers from July to September and tolerates the drier soil conditions common alongside an open flagstone path in a sunny position better than most wildflower species.
Edging Between a Flagstone Path and Wildflower Border
The edge between a flagstone walkway and an adjacent wildflower border requires a physical separator to prevent the loosening soil of the wildflower area from spreading onto the flagstone surface after rain and to prevent the wildflower root systems from undermining the path sub-base through root penetration. A steel lawn edging strip at 100mm depth set flush with the flagstone surface provides a clean, permanent separator between the path and the wildflower border at $3 to $5 per linear foot. I install steel edging on all flagstone paths adjacent to loosely cultivated border areas because the edging eliminates the ongoing maintenance task of manually clearing soil and organic material from the flagstone surface after every rain event.
Related
best border plants for framing a flagstone garden path
how to add lighting along a flagstone garden walkway
backyard pathway ideas using flagstone for large spaces
Frequently Asked Questions
What is the best stone for flagstone path ideas?
Yorkstone is the best stone for flagstone path ideas because it produces naturally flat, consistently thick flags of uniform quality that are straightforward to lay level, develop an attractive weathered patina over time, and suit the widest range of garden styles from formal to completely informal. Sandstone is the best choice for a warm-toned flagstone path in a cottage or country garden where the honey and buff tones of the stone coordinate with traditional planting and building materials. Limestone is best for a formal or contemporary flagstone path where a cooler, more refined stone color suits the architectural character of the garden and property.
How do I lay a simple flagstone path?
A simple flagstone path is laid in five steps: mark the path route, excavate 6 inches of soil, compact a 4-inch hardcore sub-base, spread a 1-inch mortar or sand bedding layer, and press each flagstone firmly into the bed checking level before moving to the next stone. For a dry laid simple flagstone path on stable soil, the mortar layer is replaced with 2 inches of compacted sharp sand, which allows the stones to be repositioned if any settle unevenly after the first winter. I always complete the dry fit of all stones before committing to the final bedding layer to ensure the layout and spacing looks correct before any mortar is mixed.
What is the difference between a flagstone pathway and a regular paved path?
A flagstone pathway uses flat irregular or large-format natural stone pieces as the walking surface, while a regular paved path uses manufactured concrete, clay, or porcelain units of uniform size and shape. The primary difference is in the visual character of the finished surface: flagstone paths have natural color variation, organic surface texture, and irregular joints that give the path a handmade, aged appearance from the day of installation. Regular paved paths use manufactured materials with consistent color and shape that produce a more uniform, predictable surface appearance. Flagstone paths typically cost $15 to $35 per square foot installed, compared to $8 to $20 per square foot for standard concrete or clay paving.
How do I keep a flagstone walkway looking good?
A flagstone walkway is maintained by annual washing with a pressure washer at medium pressure, re-pointing any loose or missing joints every 3 to 5 years, and applying a penetrating natural stone sealer every 5 years to reduce water absorption and staining. Annual pressure washing removes biological growth including moss, algae, and lichen that accumulate on the stone surface and make the flagstone path slippery in wet conditions. Re-pointing with a 4:1 sand-to-cement mix on any joints showing cracking or erosion prevents water penetrating the sub-base and undermining individual stones. I apply a penetrating sealer rather than a surface-coating sealer on all natural stone flagstone paths because penetrating sealers do not change the visual appearance of the stone surface or create a slippery film in wet conditions.
Can I lay a flagstone walkway myself?
A flagstone walkway is a practical DIY project for a homeowner with basic landscaping skills when the path is dry laid on sharp sand or when mortar-set stones are laid on a pre-prepared sub-base, though the physical effort required for handling and positioning large flagstones should not be underestimated. Individual flagstones of 24 by 24 inches in 50mm sandstone or limestone thickness weigh 40 to 60 pounds each, which requires careful manual handling and assistance from a second person for the heaviest stones. I recommend hiring a professional landscaper for mortar-set flagstone paths above 20 square feet in area, for paths requiring significant cutting or curves, and for all flagstone paths set on slopes where correct drainage falls require precise leveling at every stone position.