
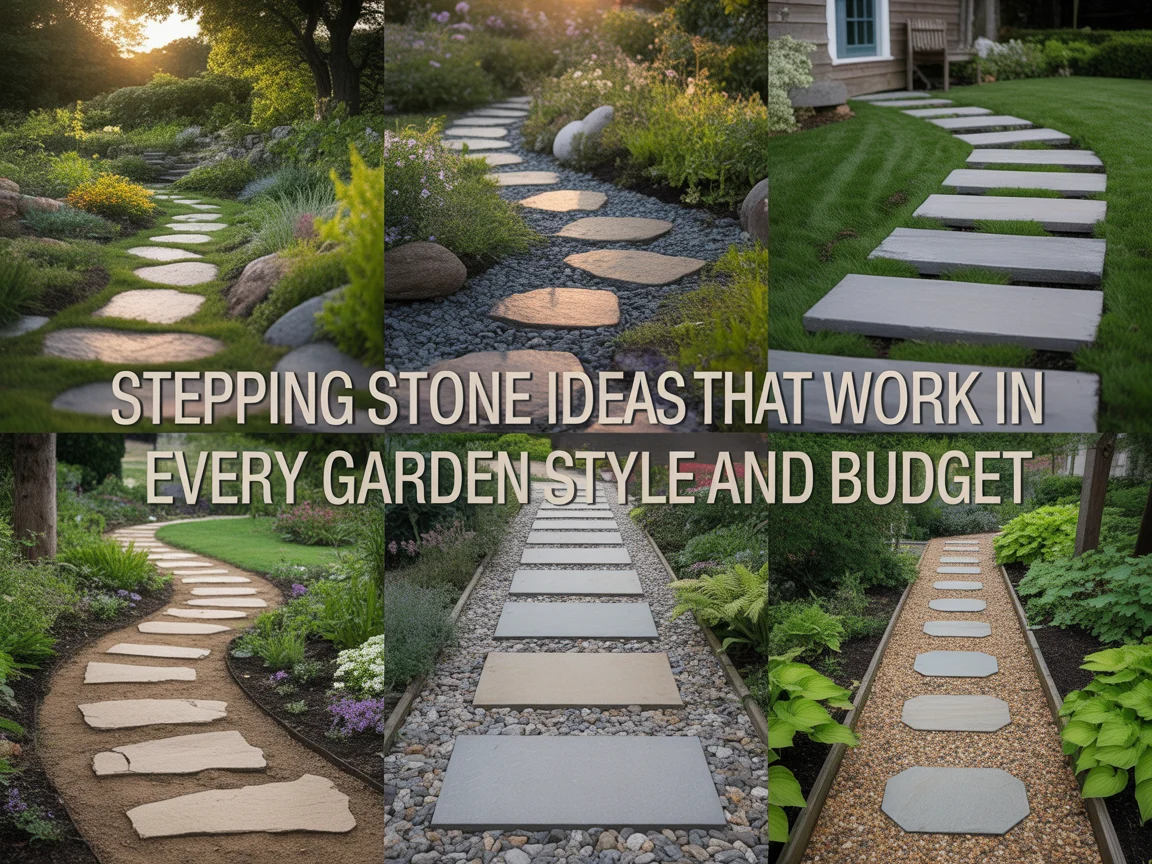
Stepping Stone Ideas That Work in Every Garden Style and Budget
I installed my first stepping stones on a Saturday morning using six reclaimed concrete slabs I found stacked against my garage wall. I had no plan, no special tools, and no prior experience. I walked across the lawn to the shed, looked down at my footprints in the wet morning grass, and placed each slab at exactly those footfall positions. By midday, I had a perfectly usable stepping stone path that cost me nothing and took four hours including the tea breaks. A garden designer friend visited the following week and asked who had laid them. That question told me everything about how well-placed stepping stones read in a garden.
Stepping stone ideas use individually placed flat stone or stone-effect pieces at regular intervals across a lawn, gravel, bark, or planted surface to create a defined walking route that provides firm, dry footing without the full cost and permanence of a continuous paved path. Each stone acts as a single foot placement point, and the sequence of stones creates the path without connecting mortar, sub-base excavation, or specialist installation skills in the simplest versions.
Since that first Saturday project, I have installed, designed, and studied stepping stone ideas across dozens of properties in every garden style from formal to completely wild. I have seen stepping stone ideas on a budget produce results equal to expensive installations, and I have also seen DIY stepping stone ideas executed with simple materials achieve genuinely impressive visual results.
In this article, I am sharing the best stepping stone ideas that I have either installed myself or researched thoroughly enough to recommend with complete confidence.
Natural Sandstone Stepping Stones in a Lawn
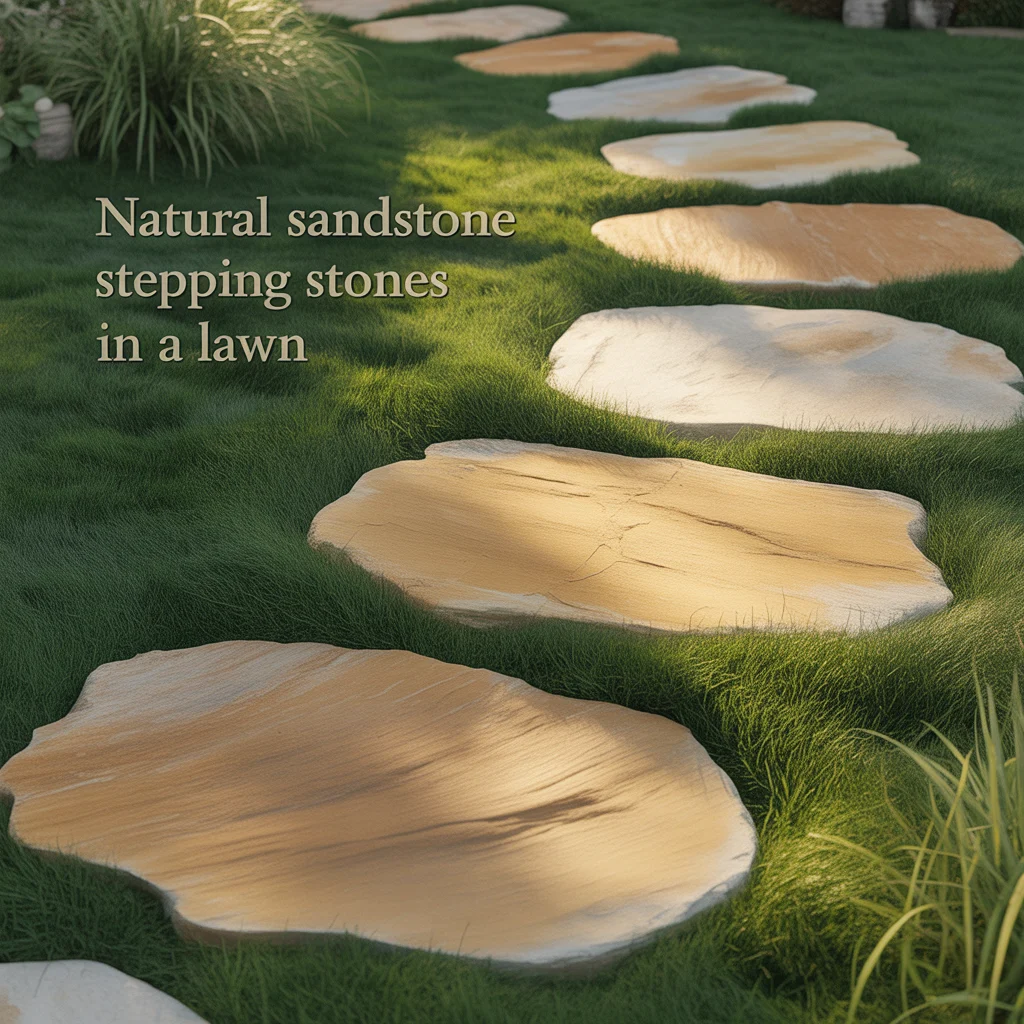
Natural sandstone stepping stones set flush in a lawn surface are the most widely used and most photographed stepping stone idea in domestic garden design, combining the warm, organic color of natural stone with the clean simplicity of a grass surface to produce a path that looks completely at home in almost any garden style. I set six 20-by-20-inch buff sandstone stepping pads in my back lawn on a curved route from the patio to the garden boundary, and every visitor since has walked the stepping stone route rather than crossing the open lawn, which confirms that a well-placed stepping stone path instinctively directs people without any signage or instruction. For anyone considering a larger continuous stone surface rather than individual stepping pads, alternative layout and material options are covered in these flagstone path ideas as a larger stepping stone alternative.
How to Set Sandstone Stepping Stones in a Lawn
Sandstone stepping stones are set in a lawn by cutting the turf to the exact stone outline using a half-moon edger, removing the cut turf section, excavating the soil to stone thickness plus 20mm for a sharp sand bed, spreading and leveling the sand, placing the stone, and tamping it to sit 5mm above the surrounding turf level. The 5mm above-turf position accounts for grass growing back to the stone face level within four to six weeks, producing a genuinely flush finish that a mower passes over without any manual edge trimming. I set all lawn stepping stones at 5mm above turf because stones set exactly flush at installation always drop below turf level after one growing season as the grass thickens.
Sandstone Stepping Stone Sizes for a Lawn Path
18-by-18-inch, 20-by-20-inch, and 24-by-24-inch are three sandstone stepping stone sizes suited to a lawn path. The 18-by-18-inch size suits a narrow garden path of 2.5 feet where a single stone provides a confident foot placement without the stone looking disproportionately large relative to the path width. The 20-by-20-inch size is the most versatile and widely used stepping stone dimension for a standard domestic lawn path, providing a comfortable foot placement for adults and older children at 14 to 18-inch stride spacing. The 24-by-24-inch size suits a formal or wide lawn path of 3.5 feet or more where the generous stone dimension reinforces a more structured design intention.
Stepping Stone Ideas on a Budget Using Concrete Slabs
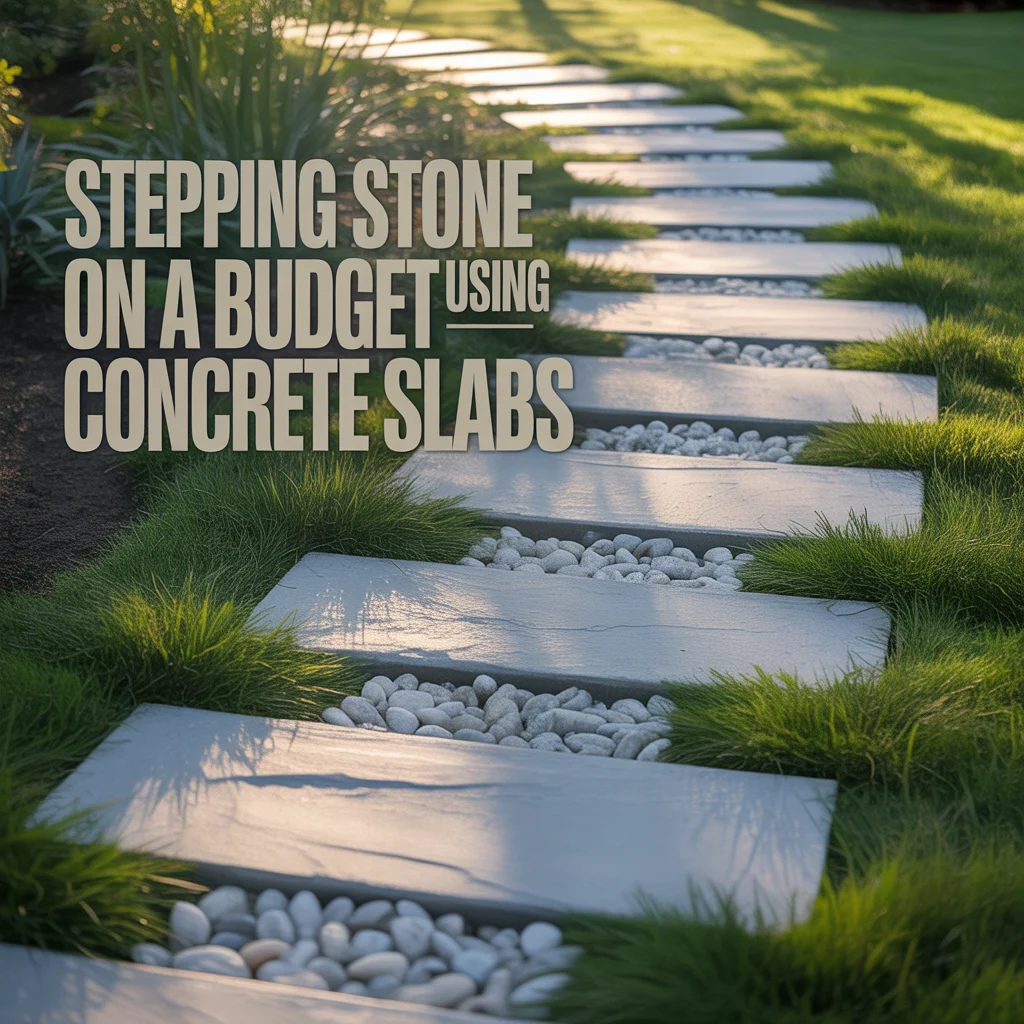
Stepping stone ideas on a budget use standard concrete paving slabs of 18 by 18 inches or 24 by 24 inches as the stepping elements, providing a completely functional and visually acceptable path for a material cost of $2 to $6 per stone from garden centres or home improvement stores. I have used budget concrete slabs on several DIY stepping stone projects and find that their visual appearance in a lawn or planted setting improves significantly after one full outdoor season when weathering, algae, and biological growth soften the raw grey concrete surface to a more natural-looking tone that suits most informal garden settings without any additional treatment.
Painting Concrete Stepping Stones for a Better Look
Concrete stepping stones painted with exterior masonry paint in natural stone-effect tones including buff, sandstone, and grey provide a significantly improved visual appearance over plain grey concrete at a material cost of $12 to $20 per liter of paint covering 6 to 8 stones per liter at full coverage. I painted twelve concrete stepping stones in a warm buff exterior masonry paint for a residential project, and the painted stones photographed virtually identically to natural sandstone in the finished garden. The paint requires a single coat of exterior primer on bare concrete before the color coat, which takes 30 minutes of preparation per 12 stones before the decorative color layer is applied.
Concrete Stepping Stone Patterns for a Walkway
A single straight row, a slightly offset alternating row, and a curved single row are three concrete stepping stone patterns suited to a low-budget stepping stone walkway. A single straight row places each stepping stone on the path center axis at regular stride intervals and produces the simplest, most direct route across a lawn or gravel area. A slightly offset alternating row places consecutive stones 3 to 4 inches alternately left and right of the center axis, producing a slightly more natural walking line than a perfectly straight center row. A curved single row follows a gently sweeping curved route rather than a straight line, which produces a more naturally organic stepping stone walkway appearance even with budget concrete slab materials.
Slate Stepping Stone Ideas for a Modern Garden
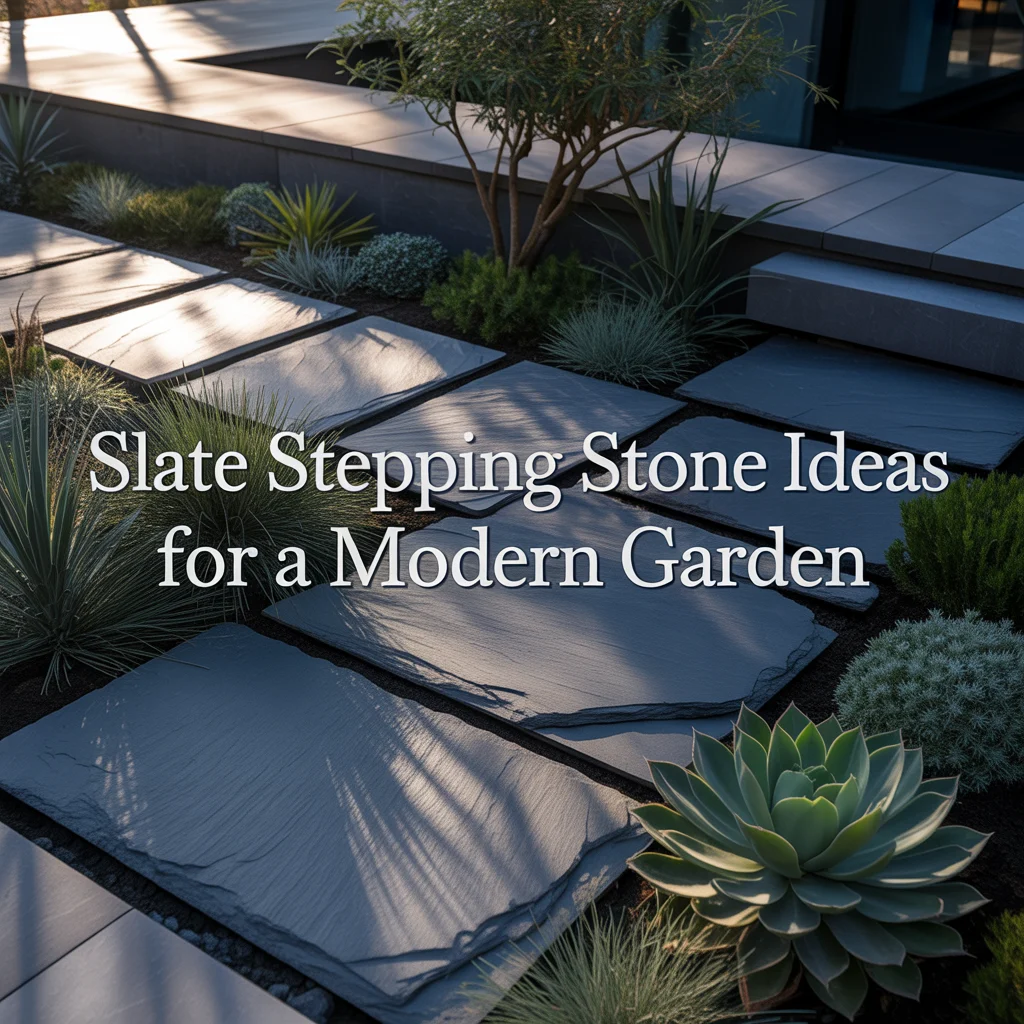
Slate stepping stones use the dark blue-grey, riven surface of natural Welsh or Brazilian slate as the stepping element material, creating a stepping stone path with a cool, refined appearance suited to contemporary and minimalist garden designs where the dark stone creates a strong visual contrast with pale gravel, green grass, or modern planting schemes. I specified 450mm by 450mm Welsh riven slate stepping stones for a contemporary garden project, setting them in a perfectly straight double row across a white gravel surface, and the combination of the dark blue-grey slate against the white gravel produced a stepping stone walkway of genuine visual quality at a material cost of $14 per stone.
Slate Stepping Stone Sizes and Shapes
300mm by 300mm, 450mm by 450mm, and irregular random shapes are three size and shape options suited to slate stepping stones. The 300mm by 300mm size suits a narrow garden path of 2.5 to 3 feet and a single center row placement where a compact stone size is proportionally correct for the path width. The 450mm by 450mm size provides a more generous stepping surface suited to a path of 3.5 to 4 feet and produces a bolder visual presence that suits the contemporary garden design contexts where slate stepping stones are most commonly used. Irregular random slate shapes produce the most naturalistic stepping stone arrangement and suit a woodland or informal garden design where the organic variation of the irregular pieces coordinates with the surrounding naturalistic planting.
Setting Slate Stepping Stones in Gravel
Slate stepping stones in a gravel surface are set by excavating a shallow pocket of stone depth plus 20mm at each stone position, spreading a 20mm sharp sand bed, placing the slate stone with its face sitting 10 to 15mm above the final gravel surface level, and infilling the surrounding gravel to the intended surface level around the set stone. The 10 to 15mm height of the slate face above the gravel level is correct for a stepping stone in gravel because the gravel settles around the stone base over one season, bringing the gravel surface level to within 5mm of the stone face. I always set slate stepping stones in gravel before the gravel is spread, working from a fixed starting stone and measuring each subsequent stone position from the preceding one.
DIY Stepping Stone Ideas Using Hypertufa
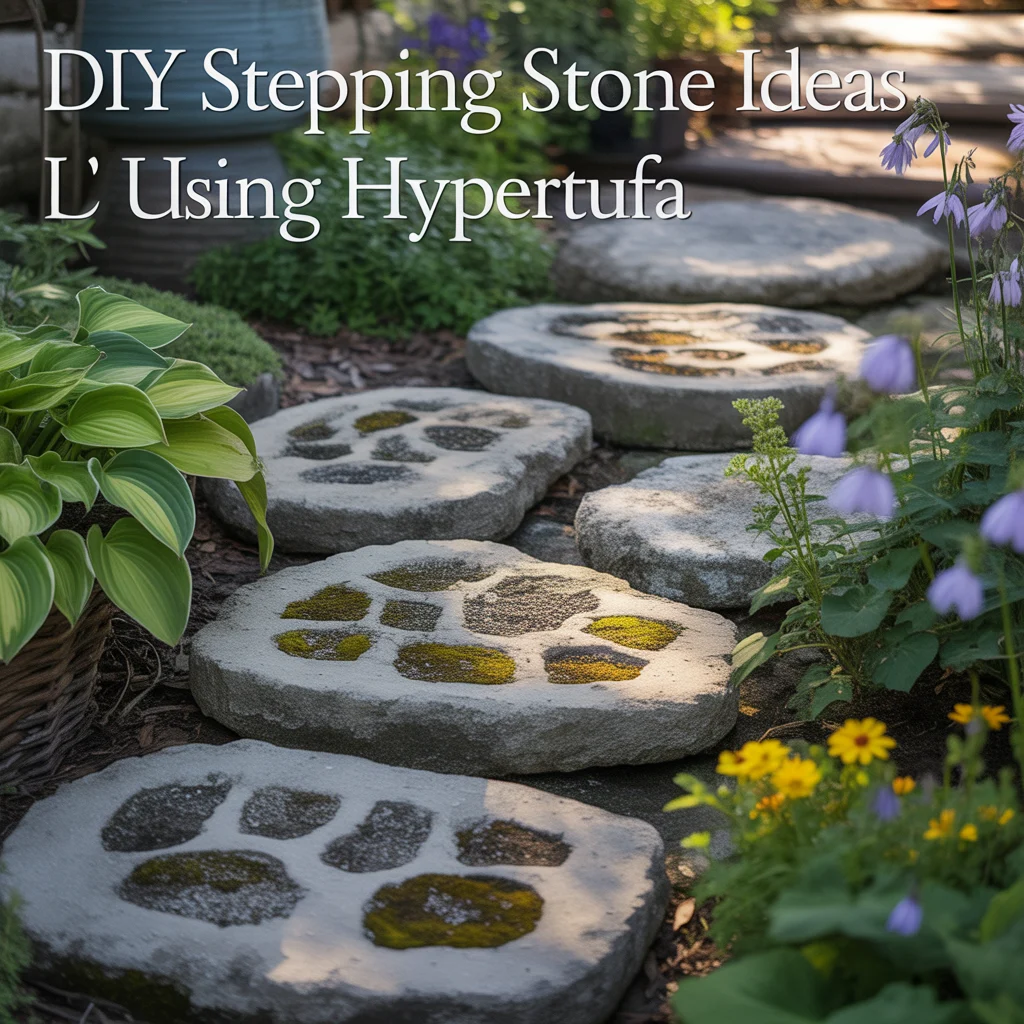
Hypertufa stepping stones are DIY-made paving elements produced from a mixture of Portland cement, peat moss or coir, and perlite that produces a lightweight, porous stone-effect surface with a naturally aged, rough texture resembling ancient stone at a material cost of $1 to $3 per stone. I made my first batch of hypertufa stepping stones using plastic mixing bowls as molds, producing eight circular stepping pads of 18 inches diameter in a single afternoon session, and the finished stones had a naturally aged, rough texture that looked more like reclaimed stone than manufactured concrete from the day they were placed in the garden.
Hypertufa Stepping Stone Recipe
A hypertufa stepping stone recipe uses 1 part Portland cement, 1.5 parts peat moss or coir fiber, and 1.5 parts perlite by volume, mixed with water to a stiff, mouldable consistency that holds its shape when pressed into a mold without slumping. I mix all dry ingredients thoroughly before adding water in small amounts, testing the consistency by squeezing a handful of the mix which should hold its shape and release only a few drops of water when compressed. Too wet a mix produces a weak, crumbly stone, and too dry a mix produces a stone with surface cracks as it cures. The mix is pressed firmly into the mold in layers, allowing 24 to 48 hours of covered curing before unmolding.
Hypertufa Stepping Stone Molds and Shapes
Plastic mixing bowls, cardboard boxes, and wooden formwork frames are three mold types suited to DIY hypertufa stepping stones. Plastic mixing bowls of 14 to 18-inch diameter produce rounded, slightly domed circular stepping stones that suit an informal garden path in grass or between planted borders. Cardboard boxes lined with plastic sheet produce square or rectangular stepping stones of any dimension and suit a more formal stepping stone walkway where a geometric shape is the design intention. Wooden formwork frames built from 3-by-2-inch timber produce any custom shape and thickness and suit a DIY stepping stone project where a specific size or profile is needed for a particular garden layout that standard mold shapes cannot accommodate.
Stepping Stone Ideas for Kids
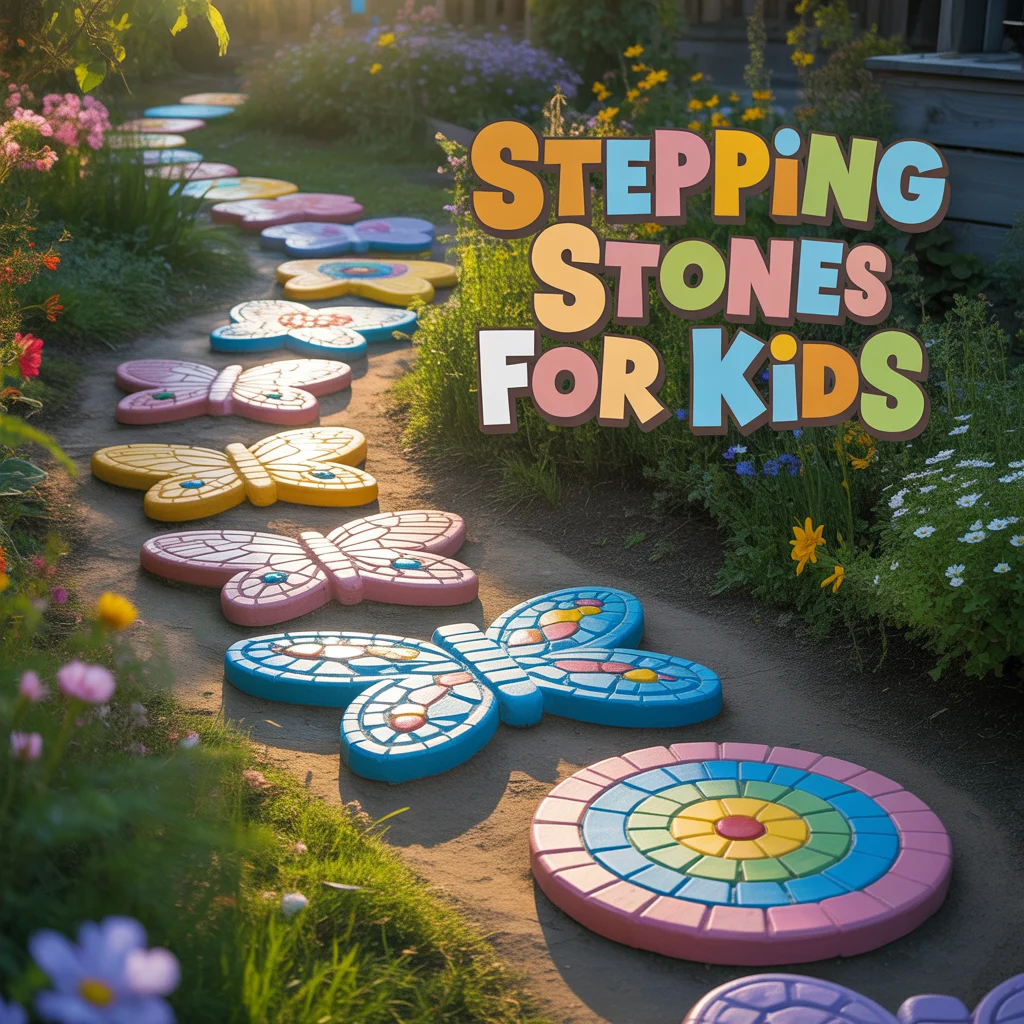
Stepping stone ideas for kids use painted, decorated, or cast concrete stepping pads with numbers, letters, animal prints, or bright colors as the stepping elements, creating a garden path that engages children in counting, spelling, or nature discovery activities while providing a defined, firm walking route across the garden. I created a numbered stepping stone path for my niece using ten painted concrete pads in the numbers 1 to 10, set in a slightly irregular curved route across her family’s back lawn, and she spent forty minutes on the first day alone jumping between the numbers, counting backward, and inventing games that had nothing to do with walking from one side of the garden to the other. For a more naturalistic stepping stone surface suited to older children and family gardens, planting ideas between the stones are covered in these garden paths with creeping thyme between stepping stones.
Painting Stepping Stones for Kids
Non-toxic exterior paint, weather-resistant outdoor chalk markers, and exterior acrylic craft paint sealed with two coats of exterior varnish are three painting approaches suited to stepping stone ideas for kids. Non-toxic exterior paint in bright primary colors provides the most durable and weatherproof finish for kids’ stepping stones, lasting 3 to 5 years before repainting is needed and costing $8 to $15 per 250ml pot covering 4 to 6 stones. Weather-resistant outdoor chalk markers provide a less permanent decorating option that suits a seasonal stepping stone path for kids where the design is intended to be refreshed each year with new numbers, letters, or images. Exterior acrylic craft paint with varnish sealing costs $4 to $8 per color and suits a detailed painted design.
Educational Stepping Stone Path Designs for Kids
Number sequence paths, alphabet paths, and animal footprint paths are three educational stepping stone ideas for kids. A number sequence path places stepping stones painted or cast with numbers 1 to 10 in order, providing a counting and number recognition path that children engage with naturally through jumping, stepping, and reciting the sequence aloud during garden play. An alphabet path uses 26 stepping stones with individual letter markings in a sequence that extends through the garden as a letter recognition and phonics outdoor learning feature. An animal footprint path casts or paints different animal track patterns on each stone, encouraging nature identification, track comparison, and wildlife knowledge development in children aged 4 to 10 using the garden path.
Stepping Stone Ideas for a Walkway to the Front Door
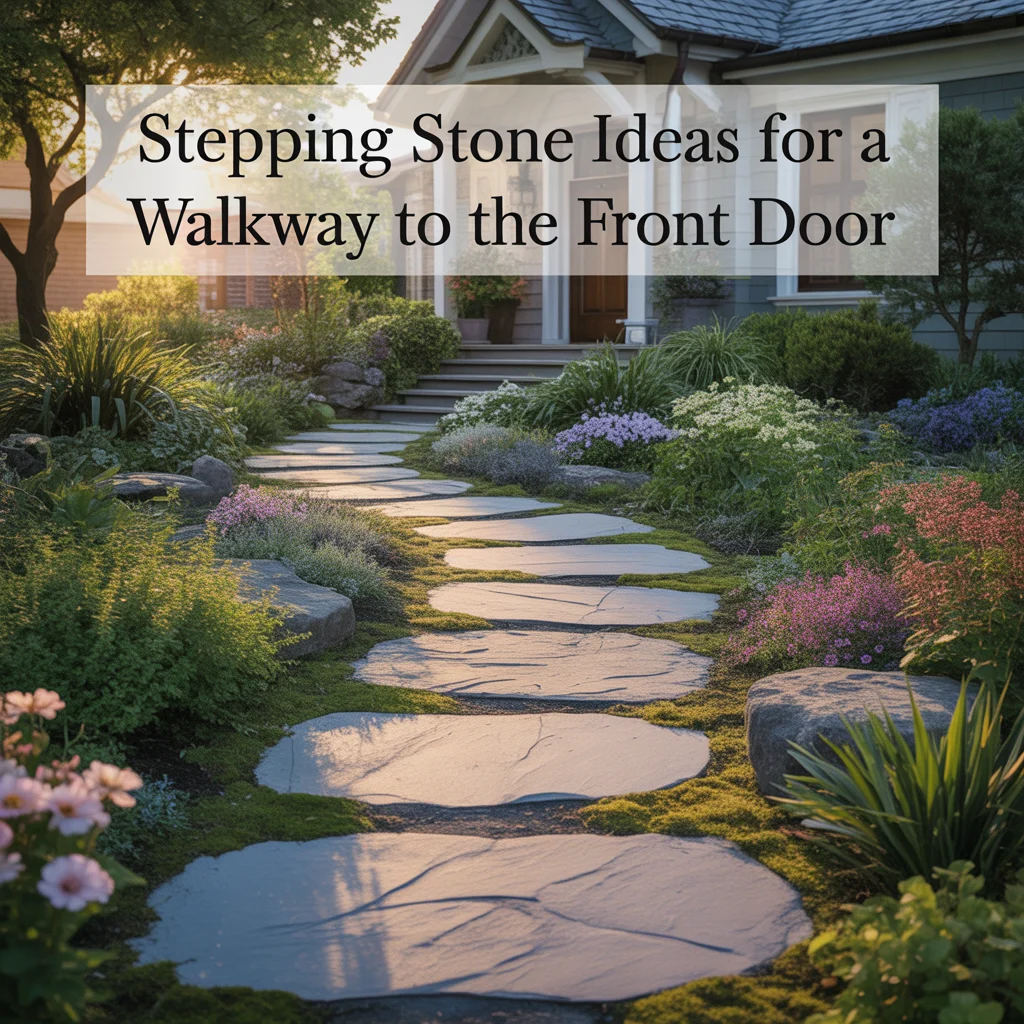
Stepping stone ideas for a walkway to the front door use larger, more formally placed stone pieces on a defined straight or gently curved route from the garden gate or driveway edge to the property entrance, creating a front garden path that is functional for daily use while maintaining the flexible, garden-integrated character of a stepping stone design rather than a fully continuous paved path. I redesigned a front garden stepping stone walkway at a terraced property using 600mm by 600mm buff sandstone pads on a straight route from the gate to the front step, and the wider stone format and straighter layout produced a front door stepping stone walkway that suited the formal street-facing character of the property without losing the natural stone quality of the material.
Front Door Stepping Stone Spacing and Width
Stepping stones for a walkway to the front door are spaced at 10 to 14-inch gaps between stone faces rather than the 14 to 18-inch stride spacing used for informal garden stepping stone paths, because a front door approach path receives daily use in all weather conditions where a shorter gap between stones reduces the chance of slipping on wet grass or gravel between the stepping elements. I use 12-inch gaps between 24-by-24-inch stepping pads on all front door stepping stone walkways, which provides a confident stride length that is comfortable for most adults in normal footwear including dress shoes, which are more commonly worn on a front door approach path than on informal garden stepping stone routes.
Stone Finishes for a Front Door Stepping Stone Walkway
Riven natural stone, sawn stone with a textured finish, and exposed aggregate concrete are three surface finishes suited to a stepping stone walkway to a front door. Riven natural stone in sandstone, limestone, or slate provides natural slip resistance of R11 to R12 that suits a front door stepping stone path without any additional surface treatment or anti-slip coating requirement. Sawn stone with a light textured finish provides slip resistance of R10 and suits a contemporary front door stepping stone walkway where a flat, refined stone surface is the design intention. Exposed aggregate concrete stepping stones provide a naturally textured non-slip surface at $6 to $12 per stone and suit a budget front door stepping stone walkway.
Low Maintenance Stepping Stone Ideas
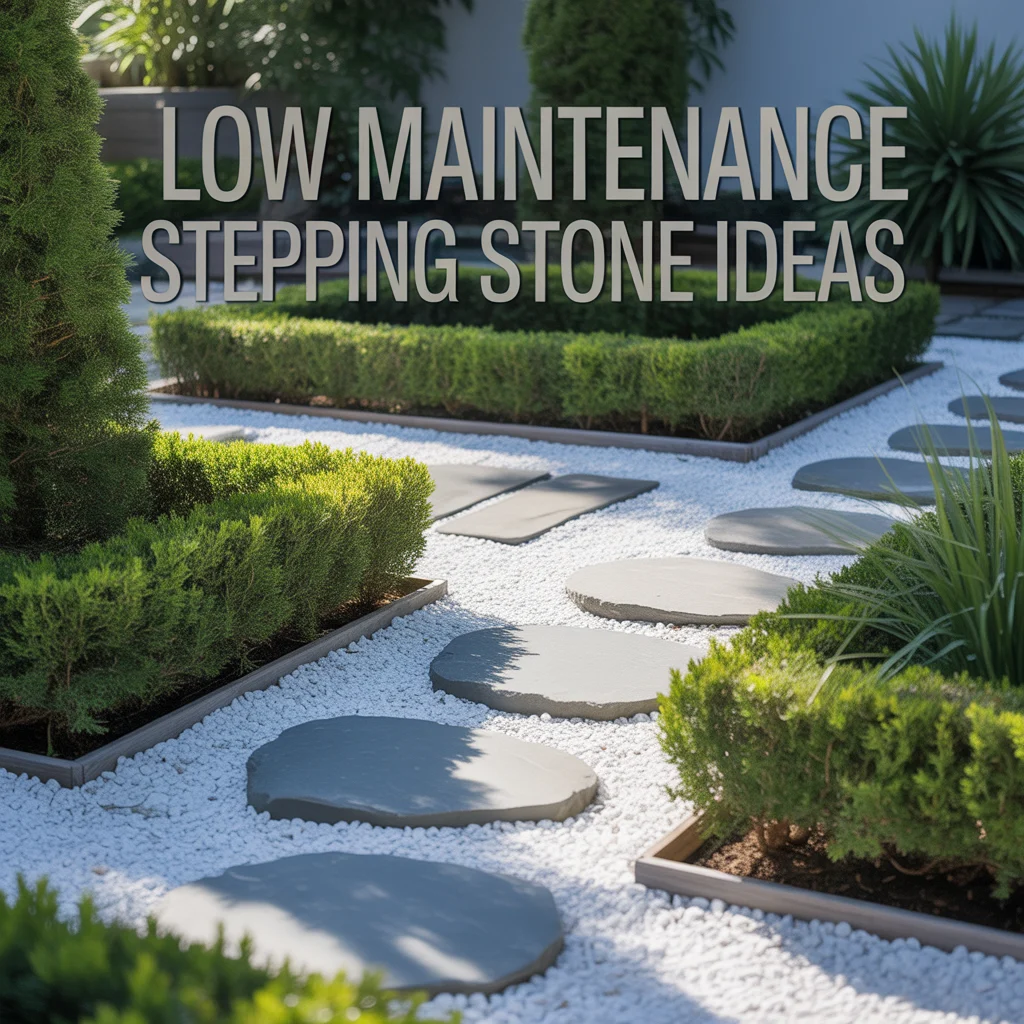
Low maintenance stepping stone ideas use materials and installation methods that require the minimum possible ongoing attention after initial placement, with no annual sealing, no regular joint weeding, and no re-leveling for a minimum of 5 years under normal garden conditions. I designed a low maintenance stepping stone path for a rental property using 24-by-24-inch porcelain paving stones set in a lawn surface with a weed-suppressing membrane beneath each stone and a 3-inch clear edge gap around each stone filled with compressed kiln-dried sand to prevent grass and weed growth at the stone edges. The path has required zero maintenance in two years beyond mowing over the flush-set stones with the lawn mower.
Materials for Low Maintenance Stepping Stones
Porcelain paving stones, dense limestone, and recycled plastic stepping stones are three materials suited to low maintenance stepping stone ideas. Porcelain paving stones at 600mm by 600mm are the most stain-resistant, frost-proof, and maintenance-free stepping stone material available, requiring no sealing, no treating, and no specialist cleaning beyond an annual hose-down at a material cost of $12 to $22 per stone. Dense limestone at 50mm thickness in a honed or sawn finish is the most naturally maintenance-free stone option, requiring only an annual brush-clean to remove lichen growth that develops on the stone surface in shaded positions. Recycled plastic stepping stones are completely frost-proof, fade-resistant, and maintenance-free at $8 to $18 per stone.
Weed Prevention Around Low Maintenance Stepping Stones
A weed-suppressing membrane layer, a sand-filled edge gap, and a ground cover plant border are three weed prevention approaches suited to a low maintenance stepping stone path. A heavy-duty 130-gram woven polypropylene membrane placed beneath each stepping stone and extending 6 inches beyond each stone edge prevents weed establishment in the soil immediately surrounding the stones for 8 to 10 years. A 2-inch-wide gap filled with compressed kiln-dried sand around each stone edge prevents grass encroachment onto the stone face and eliminates the manual edging task that grass-backed stepping stone paths require twice per season. A low ground cover planting of Thymus serpyllum or Acaena between and around the stepping stones provides a living weed barrier after two growing seasons.
Circular Stepping Stone Ideas in a Garden
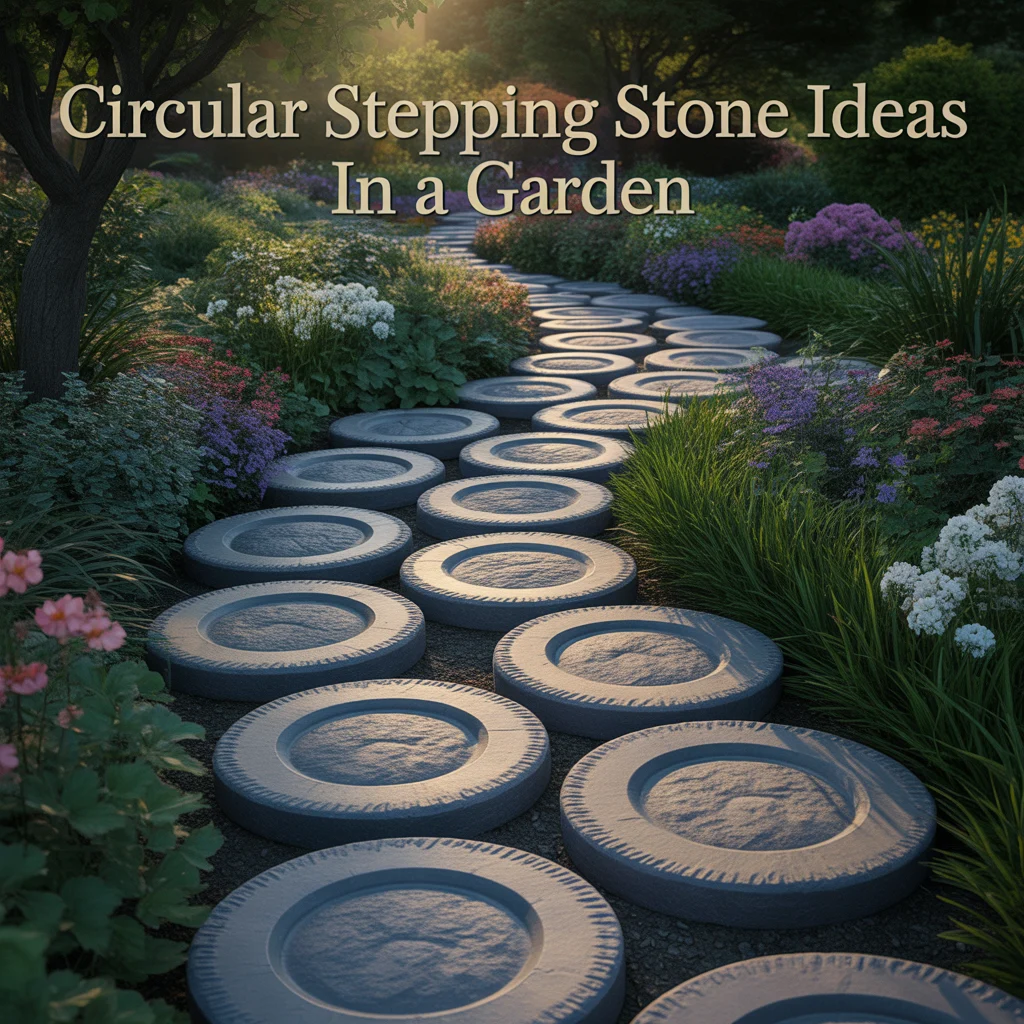
Circular stepping stone ideas use round stone pieces rather than square or rectangular formats to create a path with a softer, more organic visual character suited to informal, cottage, and naturalistic garden designs where the curved profile of each individual stone produces a path that looks naturally placed rather than constructed. I sourced twelve 18-inch-diameter circular limestone stepping pads for a cottage garden project and set them in a winding route through an established herbaceous border, and the circular stone format suited the informal character of the planting more naturally than any square or rectangular stone would have done in the same position and planting context.
Making Circular DIY Stepping Stones
Circular DIY stepping stones are made using circular molds of 14 to 20-inch diameter including plastic plant saucers, circular cake tins, and homemade plywood ring molds, filled with a standard 3:1 sharp sand and cement concrete mix poured to 40mm depth and vibrated with a pencil or rod to remove air bubbles. I use 18-inch-diameter plastic plant saucers as the most accessible and consistently sized mold for circular DIY stepping stones, producing stones of 40mm thickness at a material cost of $1.50 to $2.50 per stone in cement and sand. The concrete cures fully within 48 to 72 hours at temperatures above 10 degrees Celsius, after which the stone is removed from the mold and allowed to continue curing for 7 days before installation.
Decorating Circular Stepping Stones
Pressed leaf impressions, mosaic tile inlays, and pebble patterns are three decorative techniques suited to circular stepping stones. Pressed leaf impressions are made by pressing a large flat leaf into the wet concrete surface immediately after pouring, pressing to 5mm depth, and removing the leaf after 20 minutes to reveal the leaf vein and outline pattern cast in the concrete surface. Mosaic tile inlays use pre-cut ceramic or glass tiles pressed into the wet concrete surface in a geometric or floral pattern before the concrete cures. Pebble patterns use smooth river pebbles pressed into the wet concrete at two-thirds their depth before curing, producing a raised pebble surface decoration that adds texture and natural material character to the circular DIY stepping stone.
Timber Round Stepping Stone Ideas
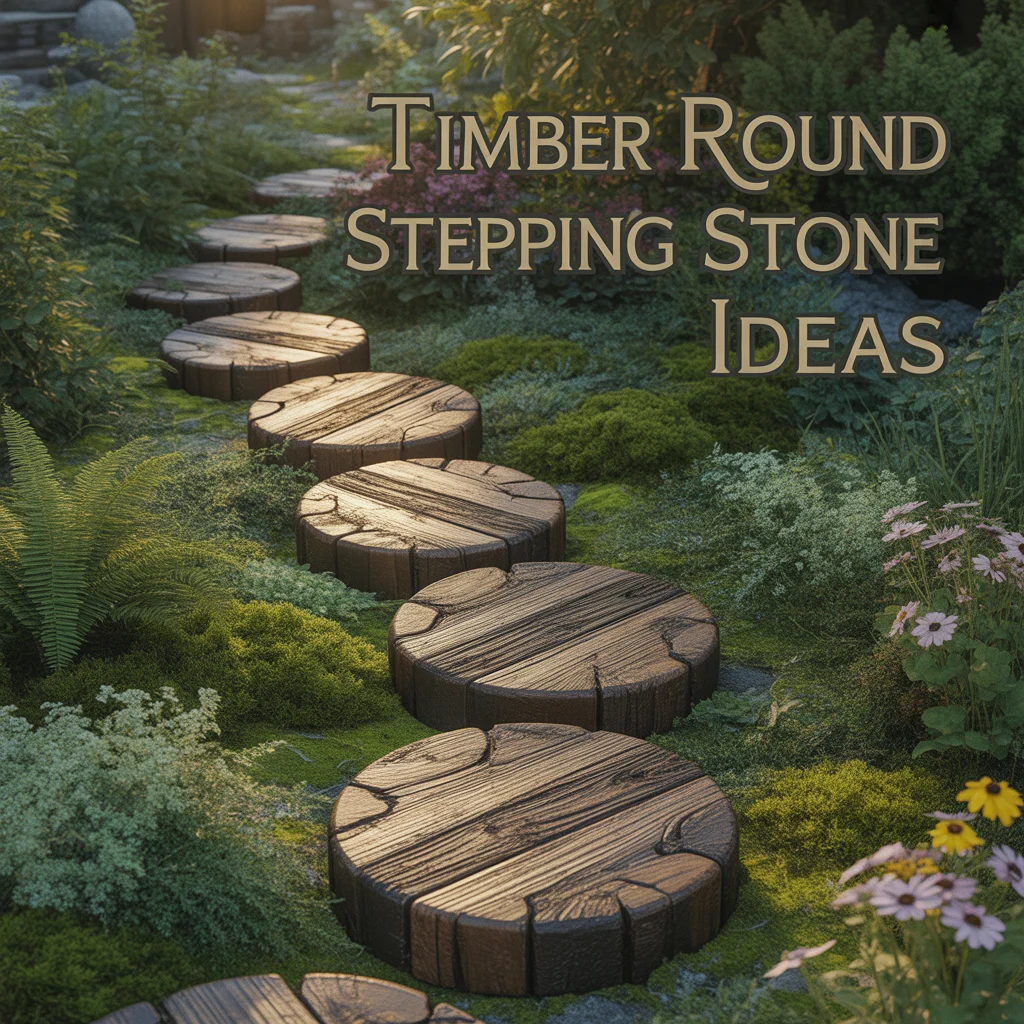
Timber round stepping stone ideas use cross-section slices of tree trunks or branches as the stepping elements, creating a natural, woodland-character path suited to informal gardens, woodland areas, and naturalistic planted spaces where the circular wood grain surface of each timber round coordinates with the organic character of the surrounding landscape. I cut twelve timber rounds from a felled oak tree in my garden using a chainsaw, producing rounds of 14 to 20-inch diameter and 60 to 80mm thickness, and set them in a bark chip path through my woodland garden section at no material cost, creating the most naturally integrated stepping stone path I have installed in any garden. Ideas for using curved stepping stone routes around existing trees are covered in these garden paths around a tree using curved stepping stones.
Timber Species for Garden Stepping Stone Rounds
Oak, sweet chestnut, and larch are three timber species suited to stepping stone rounds for a garden path. Oak produces the most durable stepping stone round with a natural outdoor lifespan of 15 to 25 years in a non-ground-contact setting and 8 to 15 years when set in soil or bark, making it the longest-lasting timber species for a natural stepping stone path. Sweet chestnut produces a durable stepping stone round with a lifespan of 10 to 18 years and suits a stepping stone path in a woodland or cottage garden where the natural grain and color of chestnut coordinates with the surrounding tree species. Larch produces a stepping stone round with a lifespan of 8 to 15 years and a distinctive warm reddish-brown color that suits a naturalistic stepping stone path.
Preserving Timber Stepping Stone Rounds
Timber stepping stone rounds require two coats of exterior timber preservative applied to all surfaces including the end grain faces on the top and bottom of each round before installation to extend the outdoor lifespan from 3 to 5 years untreated to 10 to 15 years with preservative treatment. The end grain faces on the top and bottom of each timber round absorb moisture most rapidly because the wood fiber ends are exposed, so I give extra attention to these surfaces during preservative application, applying an additional brush coat to each end grain face 30 minutes after the first full coat has been absorbed. I use a copper-based exterior timber preservative rated for ground contact on all stepping stone rounds installed in direct soil contact or bark chip surfaces.
Mosaic Stepping Stone Ideas
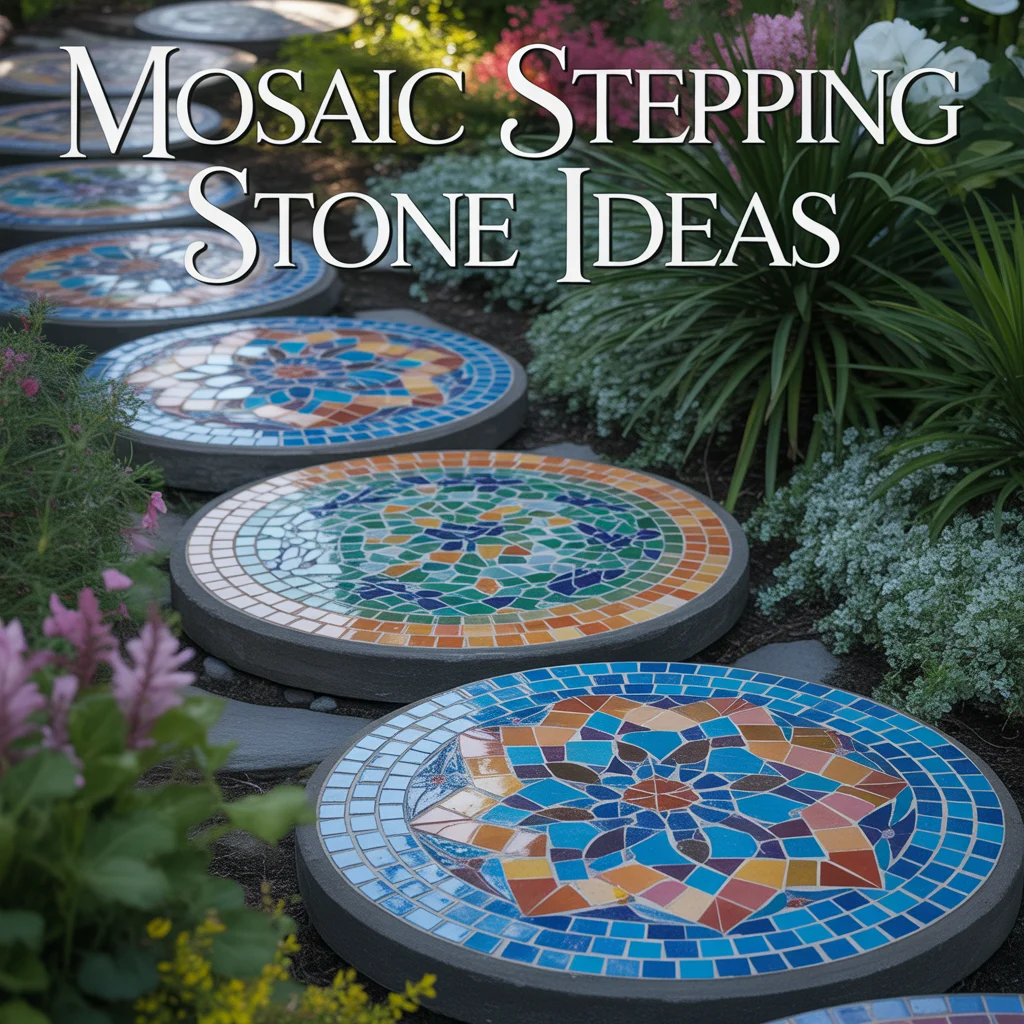
Mosaic stepping stones use small pieces of ceramic tile, glass, stone, or pebble set in a decorative pattern on the surface of a concrete base stone to create a path of individual art pieces that are also functional walking surfaces. I made a set of eight mosaic stepping stones for a courtyard garden project using broken ceramic tile pieces in blue, green, and terracotta tones set in exterior tile adhesive on 18-by-18-inch concrete base stones, and the finished mosaic stones produced a stepping stone path that received more comments from visitors than any other element in that garden, including the planted borders and the water feature.
Materials for DIY Mosaic Stepping Stones
Broken ceramic tiles, glass mosaic tiles, and river pebbles are three materials suited to DIY mosaic stepping stone ideas. Broken ceramic tiles sourced from tile off-cuts, damaged floor tiles, or deliberately broken old tiles provide a zero-cost or very low-cost mosaic material with a wide range of colors and glaze finishes suited to any mosaic pattern design. Glass mosaic tiles at 20mm by 20mm in standard colors cost $4 to $8 per 100 tiles and produce the most reflective, jewel-like mosaic surface of the three options. River pebbles at 10 to 30mm provide a natural, organic mosaic material suited to a naturalistic pattern design on a stepping stone for a cottage or garden with naturalistic planting.
Sealing DIY Mosaic Stepping Stones
DIY mosaic stepping stones require sealing with two coats of exterior clear sealant applied over the fully cured grout and tile surface 24 hours after grouting is complete, which protects the grout from frost damage, prevents water absorption into the tile adhesive layer, and extends the outdoor lifespan of the mosaic surface from 3 to 5 years unsealed to 8 to 12 years with correct sealing. I use a penetrating exterior stone and tile sealer applied with a small brush on all mosaic stepping stone surfaces, working the sealer into the grout joints as well as the tile faces to ensure complete penetration of the most water-vulnerable parts of the mosaic surface structure.
Stepping Stone Ideas Through a Wildflower Meadow
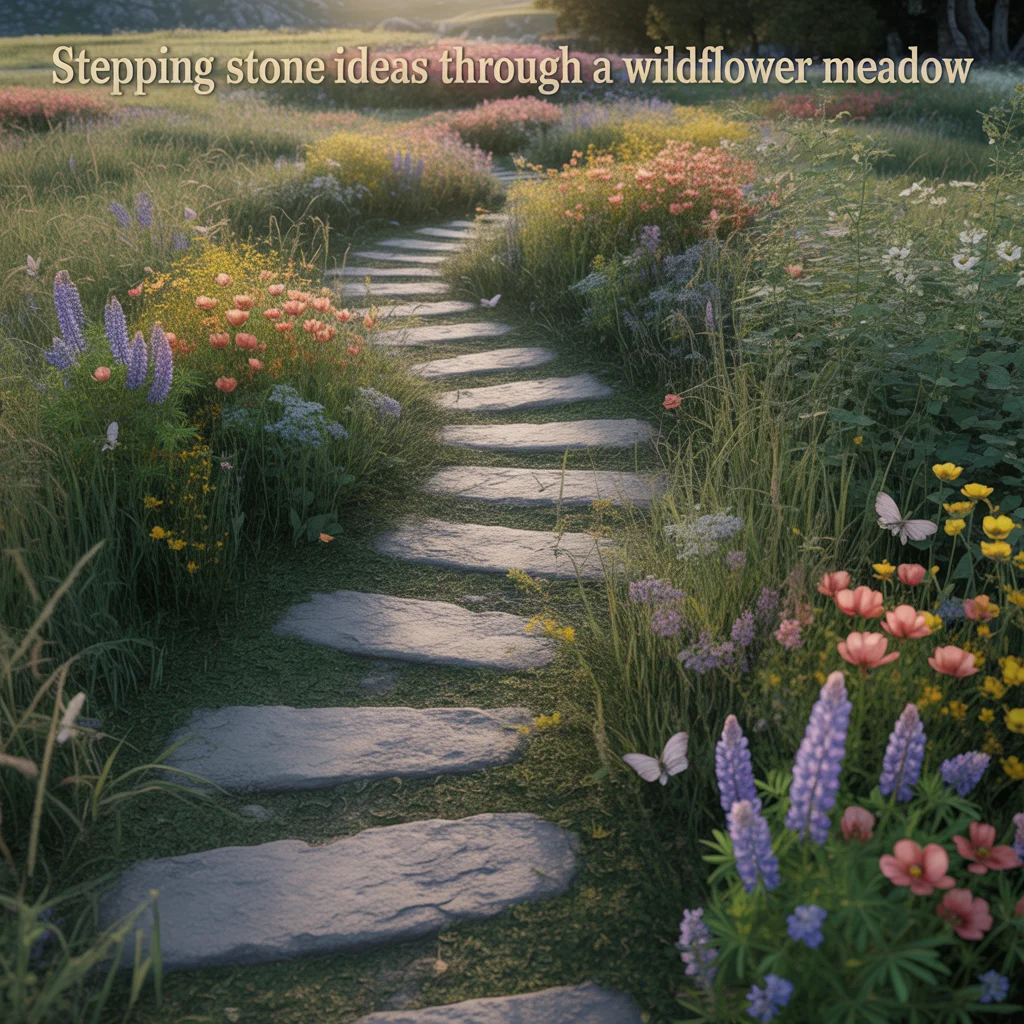
Stepping stone ideas through a wildflower meadow use individual flat stones as a defined walking route through a naturalistic wildflower planting area, providing a firm path surface through the tall meadow growth while allowing the wildflowers to grow right up to and between the stone pieces on both sides of the defined path route. I mowed a 2-foot-wide strip through my back garden wildflower area and set ten sandstone stepping pads at 16-inch intervals in the mown strip, and the path through the wildflower growth produced the most photographed area of my garden each summer when the ox-eye daisies and field scabious flowers surrounded every stepping stone on both sides at close range.
Stone Types for a Wildflower Meadow Path
Irregular random sandstone, reclaimed York stone, and large slate pieces are three stone types suited to stepping stone ideas through a wildflower meadow. Irregular random sandstone pieces of 14 to 20 inches produce the most naturalistic stepping stone path through a wildflower meadow because the organic, irregular shapes of the individual stones coordinate with the wild, informal character of the surrounding meadow planting. Reclaimed Yorkstone provides an aged, weathered surface that suits a meadow setting where the stone appears as though it has been in the ground as long as the wildflower species surrounding it. Large irregular slate pieces provide a dark, contrasting surface against which the wildflower stems and flowers read most clearly in a meadow stepping stone path.
Maintaining Stepping Stones in a Wildflower Meadow
Stepping stones in a wildflower meadow require one maintenance visit per year in October after the annual meadow cut, in which the stone surfaces are cleared of cut vegetation, any stones that have settled unevenly are re-leveled by lifting and adjusting the sand bed beneath, and any encroaching meadow grass root growth at the stone edges is trimmed back with a half-moon edger to maintain a clear stone surface for the following season. I complete the annual stepping stone meadow maintenance in approximately 30 minutes for a 10-stone path, which represents the full annual maintenance requirement for this style of stepping stone path when correctly installed on a sharp sand bed over a compact sub-base.
Geometric Stepping Stone Pattern Ideas
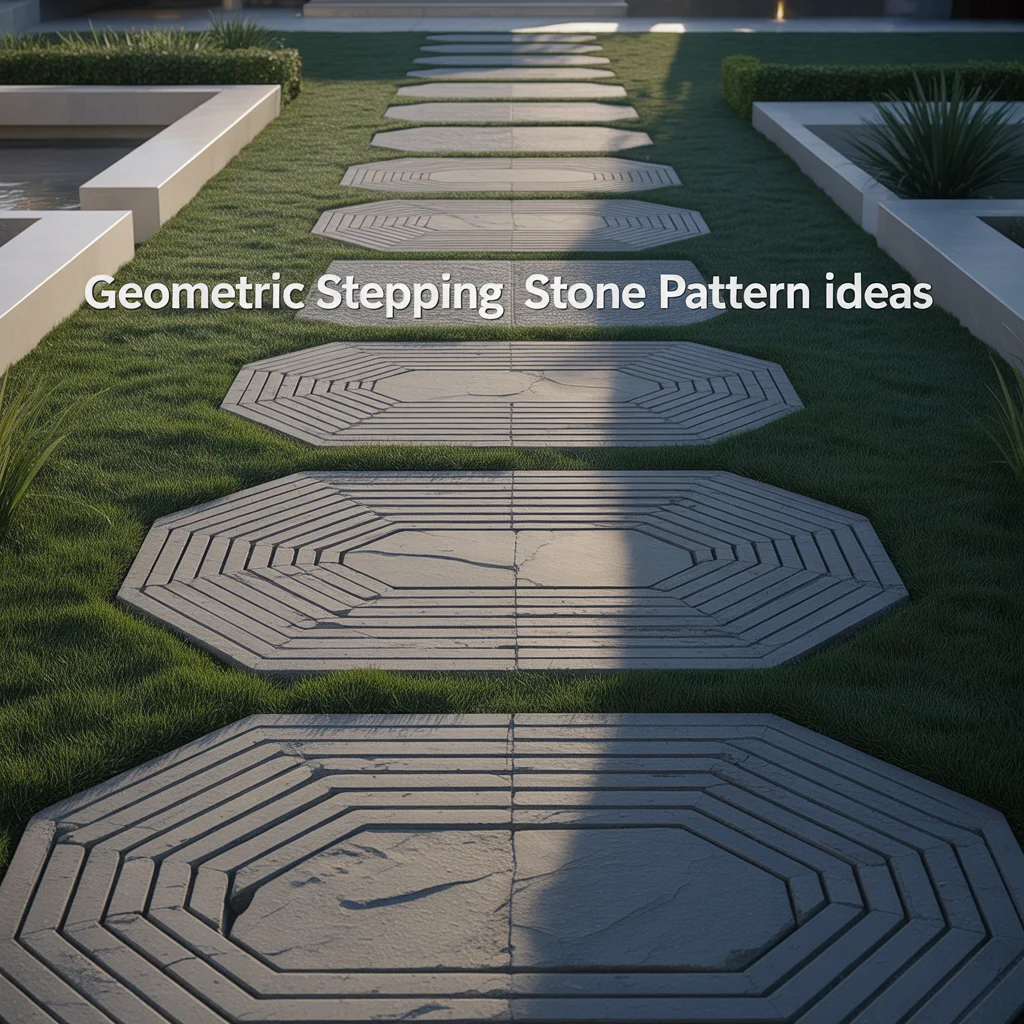
Geometric stepping stone pattern ideas use precise, regularly spaced stepping stones in square, rectangular, diamond, or grid arrangements to create a stepping stone path with a formal, structured visual character suited to contemporary gardens, formal outdoor spaces, and designed garden areas where a geometric pattern communicates deliberate design intent rather than casual stone placement. I designed a diamond grid stepping stone pattern for a contemporary courtyard garden using 450mm by 450mm grey limestone pads set at 45 degrees to the courtyard axes and spaced at equal intervals across a white marble chip surface, and the geometric precision of the diamond stepping stone pattern produced a highly designed courtyard surface for a material cost significantly below a fully paved alternative.
Diamond Pattern Stepping Stones
A diamond stepping stone pattern sets square or rectangular stones at 45 degrees to the primary garden axis, producing a diagonal grid that reads differently from the standard straight grid of axis-aligned stepping stones. I mark the diamond grid on the ground surface using chalk lines before setting any stones, establishing the 45-degree angle from a fixed reference point at the garden edge and measuring equal spacing between each marked stone position. The diamond pattern requires more precise positioning than a straight grid because slight spacing errors between stones are more visible in a 45-degree diagonal arrangement than in a standard axis-aligned stepping stone layout, where small inconsistencies are less apparent to the eye.
Grid Pattern Stepping Stone Ideas
A 2-by-n double row grid, a 3-by-n triple row grid, and an offset checkerboard grid are three geometric stepping stone patterns suited to a formal garden path. A 2-by-n double row grid places two parallel rows of equal-spaced stepping stones side by side at 12-inch row separation, creating a wide stepping stone walkway of 5 to 6 feet that suits a formal garden approach path or a wide terrace-to-garden transition route. A 3-by-n triple row grid uses three parallel rows at the same separation, producing a very wide stepping stone surface suited to a large formal garden or commercial outdoor space. An offset checkerboard grid places stepping stones in a regular grid with alternate stones removed, creating a pattern of stones and gaps in equal proportion.
Stepping Stone Ideas in a Gravel Garden
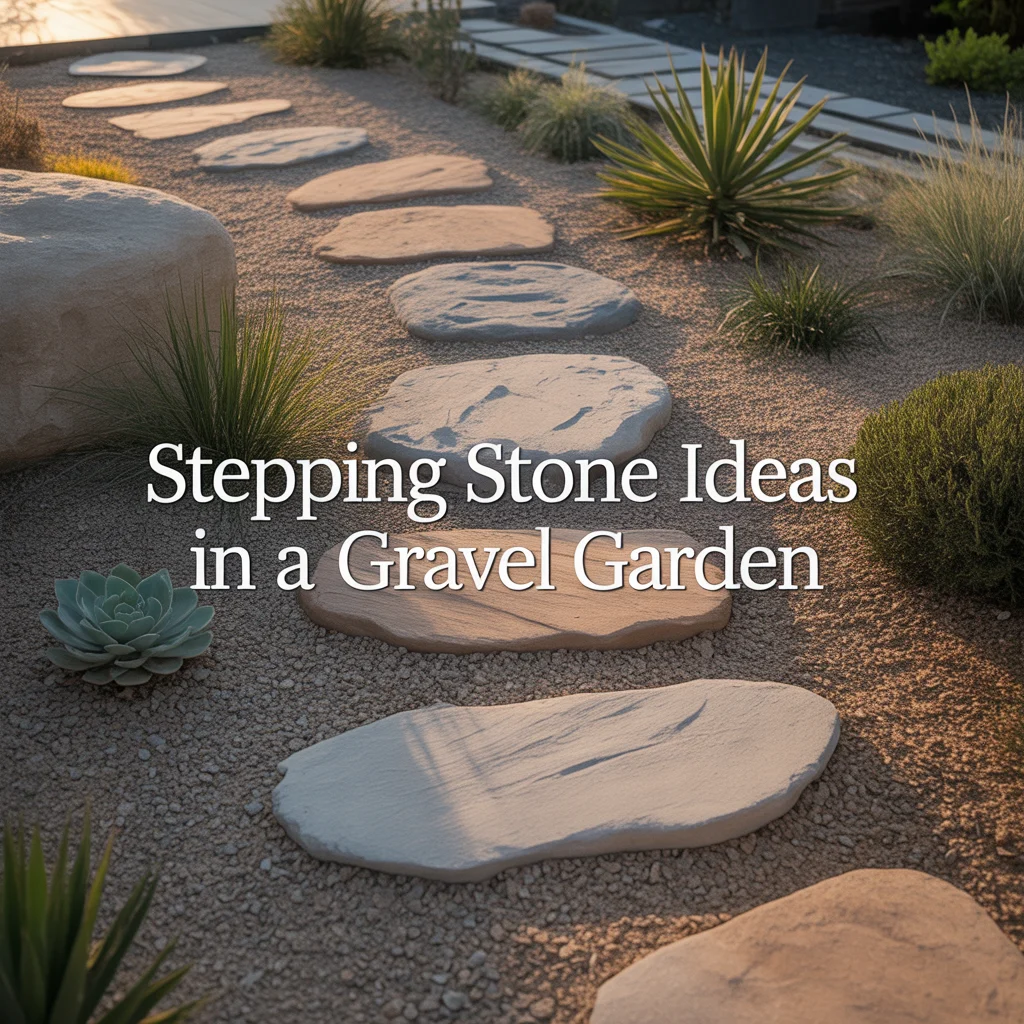
Stepping stone ideas in a gravel garden set individual flat stones into a loose gravel surface as the primary path elements, creating a stepping stone path where the gravel surrounds each stone and fills the gaps between stones as the base surface material. I have set stepping stones in gravel on multiple projects and find this combination produces one of the most visually refined stepping stone path results in garden design because the contrast between the flat, solid stone surface and the loose, light-reflecting gravel surrounding it clearly communicates the path route while looking completely natural in a wide range of garden styles from Japanese to contemporary minimalist.
Setting Stepping Stones in Gravel
Stepping stones in a gravel garden are set by excavating a pocket at each stone position to the stone thickness plus 20mm for a sand bed, placing the stone on the compacted sand and checking the level so the stone face sits 10 to 15mm above the intended final gravel surface, then spreading gravel around and up to the stone base. The 10 to 15mm protrusion of the stone face above the gravel surface is the correct height for a stepping stone in gravel because the gravel settles around the stone over one season and wind-blown organic material partially buries the stone base, producing a naturally integrated stone and gravel path surface. I always set the stepping stones before spreading the surrounding gravel to maintain accurate level control during stone placement.
Gravel Colors That Suit Different Stepping Stone Materials
White marble chippings, golden gravel, and grey flint are three gravel colors suited to different stepping stone materials in a gravel garden. White marble chippings at 10 to 20mm create the strongest visual contrast against dark grey slate or black basalt stepping stones, producing the most visually bold stepping stone path in a gravel garden. Golden gravel at 14 to 20mm coordinates naturally with sandstone and limestone stepping stones, producing a warm, harmonious combination where the stone and the gravel appear to belong to the same natural material palette. Grey flint at the same chip size provides a neutral mid-tone background suited to any stepping stone material and coordinates with the cool grey tones of contemporary garden design materials.
Reclaimed Material Stepping Stone Ideas
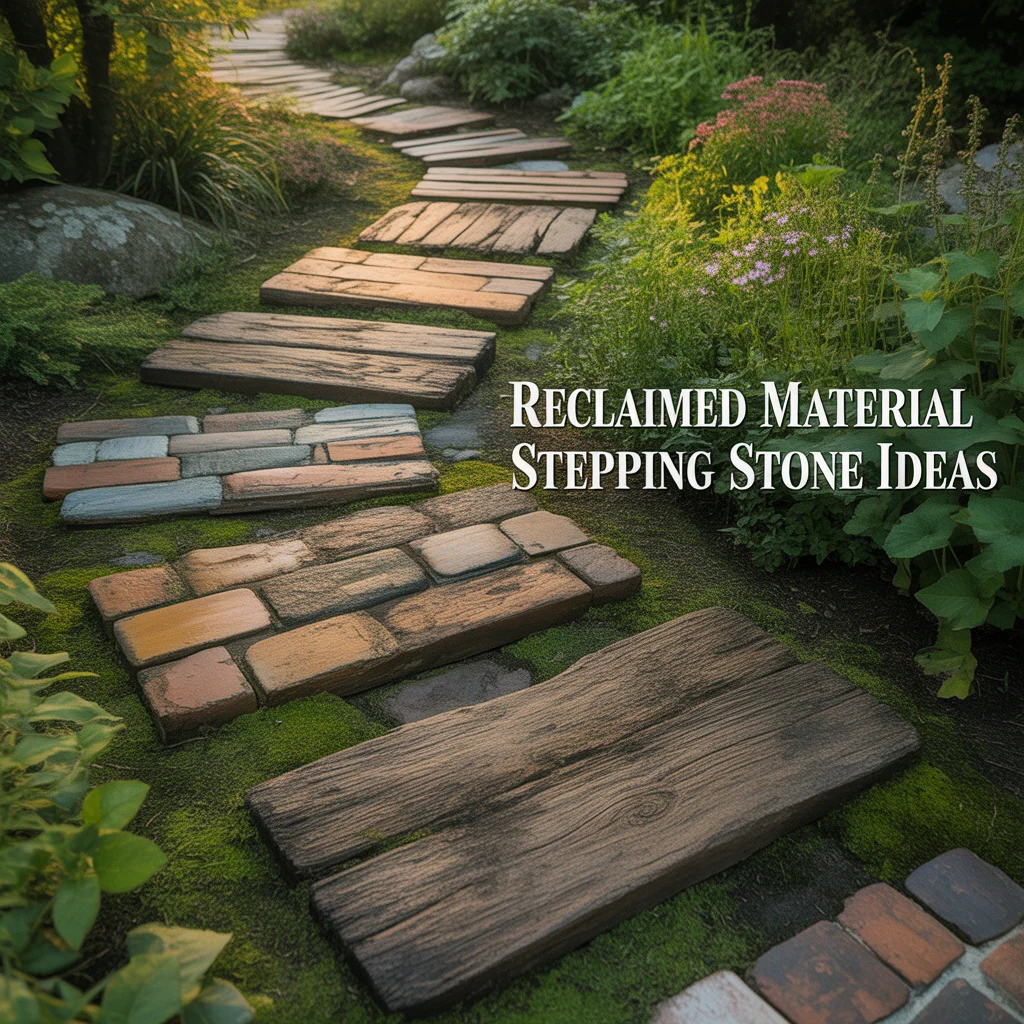
Reclaimed material stepping stone ideas use salvaged materials from building sites, demolition clearances, or garden clearances as the stepping stone elements, producing a path at zero or very low material cost from materials that would otherwise go to waste. I have made stepping stone paths from reclaimed brick sets arranged flat, broken concrete pieces from a demolished driveway, old roof tiles laid flat, and irregular sandstone pieces from a garden clearance, and in every case the reclaimed material produced a stepping stone path with more character and visual interest than a path of identical new manufactured stepping stones would have achieved.
Reclaimed Materials Suited to Stepping Stone Paths
Reclaimed brick sets, broken concrete flag pieces, and reclaimed roof tiles are three salvaged materials suited to stepping stone ideas on a budget. Reclaimed brick sets of 65mm by 215mm laid flat produce individual stepping stone pads of approximately 18 by 18 inches when four sets are arranged in a square group, providing a period-appropriate stepping stone for a Victorian or cottage garden path at a cost of $0 to $0.50 per brick from online marketplaces or building salvage. Broken concrete flag pieces of 200mm to 500mm across provide irregular stepping stone elements at zero cost from domestic demolition clearances, suiting a stepping stone path through an informal planting area. Reclaimed roof tiles laid flat produce thin, decorative stepping elements suited to a feature garden path.
Arranging Reclaimed Materials as Stepping Stones
Reclaimed materials used as stepping stone ideas are arranged in a path layout by selecting pieces with the flattest available top face as the walking surface, setting each piece on a 20mm sharp sand bed at a consistent level, and choosing adjacent pieces of similar thickness so the stepping stone path does not create significant height variation between consecutive steps. I sort all reclaimed stepping stone materials by thickness into groups of equal depth before beginning the path layout, which prevents the uneven step heights that occur when materials of very different thicknesses are mixed without adjusting the sand bed depth beneath each individual piece.
Stepping Stone Ideas for a Shaded Garden

Stepping stone ideas for a shaded garden use materials that age attractively in low-light, moist conditions and address the increased slip risk that shaded stepping stone surfaces present when algae and moss accumulate on the stone face during the autumn and winter months. I installed stepping stones in a deeply shaded north-facing garden section using 20mm-thick riven Welsh slate pads, and found that the natural riven surface of the slate maintained adequate traction in wet shaded conditions that made my earlier smooth concrete stepping stones in the same position genuinely hazardous after rainfall from October to March.
Anti-Slip Treatments for Shaded Stepping Stones
Riven surface finish, anti-slip exterior sealant, and non-slip aggregate coating are three slip prevention approaches suited to stepping stone ideas in a shaded garden. A riven surface finish on natural stone stepping stones provides natural slip resistance rated at R11 to R12 that requires no additional treatment to perform safely in wet shaded conditions. Anti-slip exterior sealant containing fine mineral particles costs $12 to $25 per liter and is applied in two coats to smooth or sawn stone stepping stones in shaded positions, raising the wet slip resistance from R9 to R10 to a safer R11 to R12 rating. A non-slip aggregate coating uses fine silicon carbide particles broadcast onto a wet exterior resin coat on each stepping stone surface, providing a permanently textured, highly slip-resistant surface rated at R12 or above.
Stone Materials for a Shaded Stepping Stone Path
Riven slate, riven sandstone, and textured concrete are three materials suited to a shaded stepping stone path. Riven slate provides the best natural slip resistance for a shaded stepping stone path due to its naturally split, rough surface and its dark color that makes algae growth less visually obvious than on pale stone species. Riven sandstone provides a warm-toned natural surface with good inherent slip resistance and ages to an attractive lichen-covered patina in a shaded position that many garden designers consider more visually appealing than the appearance of new stone. Textured concrete stepping stones at $4 to $10 each provide the most affordable non-slip surface for a shaded garden stepping stone path.
Related
best ground cover plants between backyard stepping stones
how to use stepping stones in a long narrow garden path
backyard pathway ideas using stepping stones for large yards
Frequently Asked Questions
What is the cheapest stepping stone idea for a garden?
DIY hypertufa or concrete stepping stones are the cheapest stepping stone idea, costing $1.50 to $3.00 per stone in materials when made at home using Portland cement, sand, and perlite or sharp sand poured into plastic plant saucers or cardboard box molds. Reclaimed concrete slab pieces and salvaged brick sets arranged flat provide zero-cost stepping stone materials when sourced from domestic demolition clearances, online free listings, or neighborhood skip contents. Budget concrete paving slabs from garden centres cost $2 to $5 each and provide a completely functional and weatherproof stepping stone for a lawn or gravel garden path when set flush in the ground surface.
How do I stop stepping stones from sinking in a lawn?
Stepping stones sink in a lawn when installed without a firm compacted sand or sub-base layer beneath the stone, and the solution is to excavate each stone position to stone thickness plus 50mm, compact the exposed soil firmly using a hand tamper, spread 30mm of compacted sharp sand over the compacted soil, place the stone, and check level before tamping the stone into the sand. I always add a 30mm sand bed beneath every lawn stepping stone on all projects because soil-only bedding allows stones to sink unevenly within the first growing season as the surrounding soil settles and compresses under the stone weight and foot traffic load combined.
What size stepping stones work best for a garden path?
Stepping stones of 18 by 18 inches to 24 by 24 inches work best for a standard domestic garden path because this size range provides a confident foot placement surface for most adults while remaining proportionally balanced in a typical home garden setting. Stones below 14 by 14 inches feel too small for a confident footfall and require stepping precision that most garden users find uncomfortable on a regularly used path. Stones above 30 by 30 inches start to read as paving slabs rather than stepping stones and suit a different design intention. I use 20-by-20-inch stepping stones as the default specification on all standard domestic garden paths where no specific design constraint requires a different size.
How far apart should stepping stones be spaced?
Stepping stones are spaced at 14 to 18-inch intervals measured from the center of one stone to the center of the next for a standard adult walking pace on an informal garden path. The exact spacing is determined by the intended path user’s natural stride length, which is measured by asking the person to walk naturally across grass and measuring the distance between heel-strike positions. For children aged 4 to 10, the correct center spacing is 10 to 14 inches, which matches the shorter stride of a child without requiring an exaggerated step or an awkward stretch between stepping stone positions on the path.
Can stepping stones be used for a front door walkway?
Stepping stones work effectively as a front door walkway when the stones are 24 by 24 inches or larger, spaced at 10 to 14-inch gaps rather than the wider gaps used for informal garden paths, and set in a straight or gently curved route with a consistent surface level across all stones. The reduced gap between stones on a front door stepping stone walkway provides confident, secure footing in all footwear types including formal shoes, which are worn on a front door approach path more frequently than on informal garden stepping stone routes. I specify 600mm by 600mm stones at 12-inch gaps for all front door stepping stone walkways to provide the most comfortable and confident daily approach path.