
16 Narrow Brick Garden Paths That Make a Tight Space Look Completely Intentional
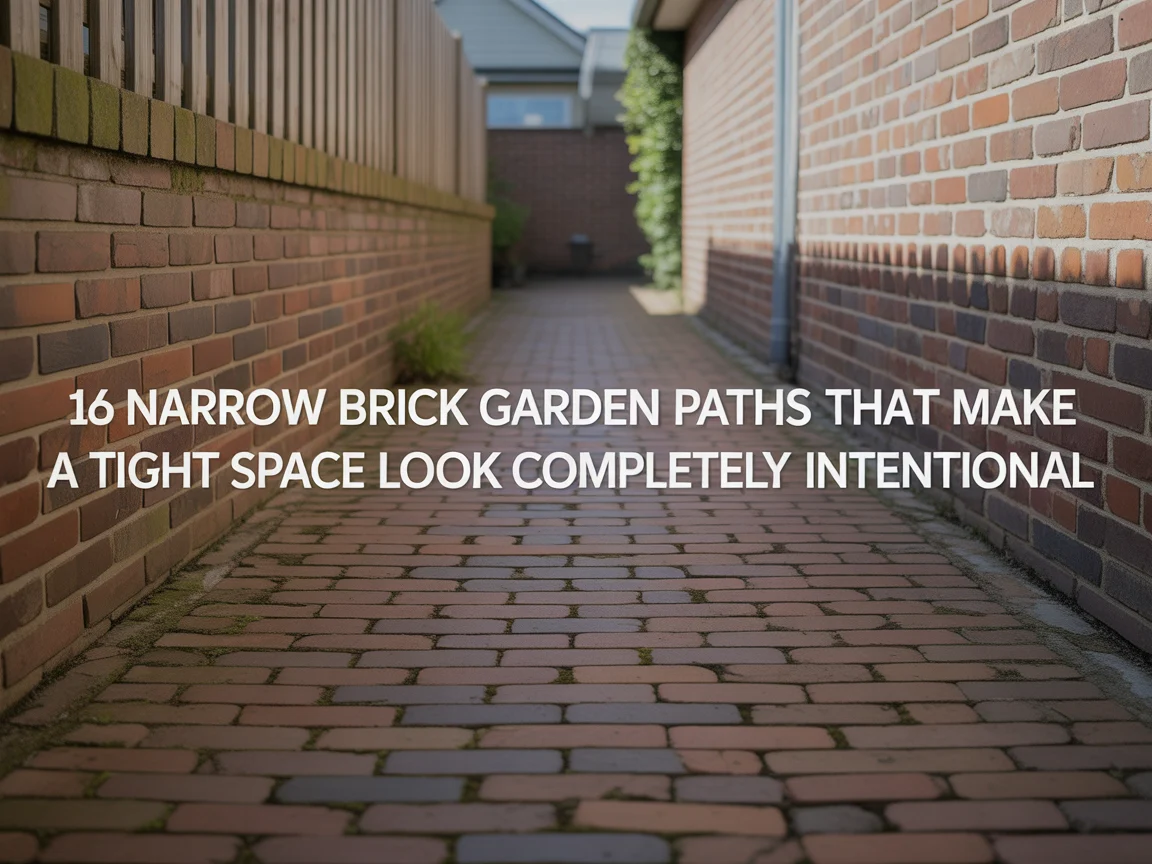
I laid my first narrow brick garden path along the side of my house seven years ago and made every possible mistake in the process. I used the wrong sand depth, skipped the weed membrane, and chose a laying pattern that made the 3-foot-wide passage look even narrower than it actually was. Three years later I lifted the whole thing and started again, this time with a proper sub-base, a herringbone pattern at 45 degrees, and reclaimed clay bricks that gave the path a warmth the new bricks never had. The difference was so significant that my neighbor asked if I had widened the passage.
Narrow brick garden paths are walkways of 2 to 4 feet in width constructed from fired clay or concrete brick units laid in a planned pattern on a prepared sub-base, specifically designed to create a durable, attractive, and functional path in spaces where width is limited. The brick material gives the path a classic, timeless appearance that suits period properties, cottage gardens, and contemporary designs equally well. The defined edge of a brick walkway also makes it an ideal base for border planting or structural edging on both sides, and anyone looking to extend the design beyond the path surface itself will find a comprehensive range of planting and edging combinations in these garden paths with borders alongside brick walkways, which cover everything from lavender and box hedge borders to brick soldier course edging, steel strip borders, and mixed perennial planting schemes suited to paths of different widths and styles.
Since that second installation, I have laid, studied, and advised on many narrow brick garden path projects across different styles and budgets. I have seen simple brick pathway ideas work in passages as tight as 24 inches wide, and I have also studied complex brick path designs that used pattern and border details to make a narrow strip look like a designed feature rather than a service route.
In this article, I am sharing 16 narrow brick garden paths that I have either laid myself or studied closely enough to recommend with full confidence.
Herringbone Narrow Brick Garden Path
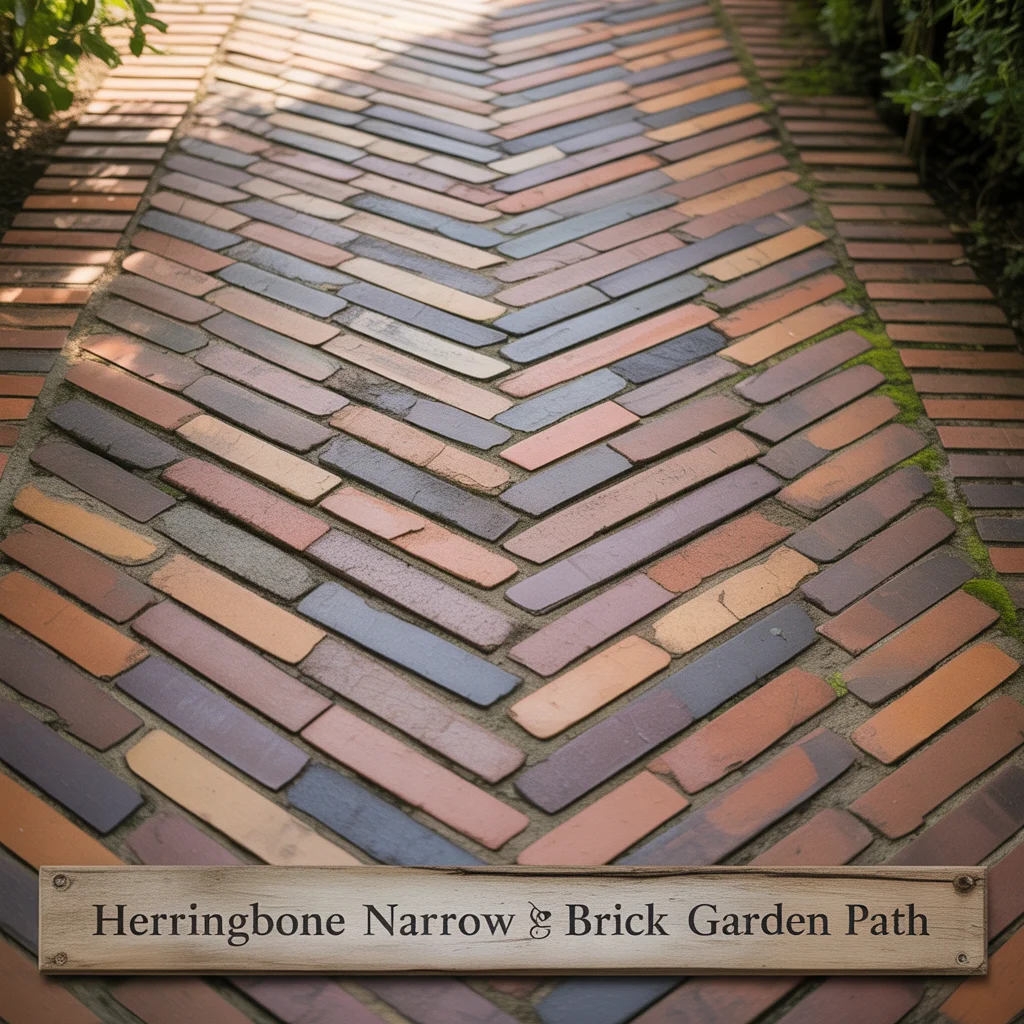
A herringbone narrow brick garden path is the single most effective brick path design for a narrow space because the 45-degree diagonal pattern of the bricks draws the eye outward toward the path edges rather than running parallel lines straight along the length, which makes the path appear wider than its physical measurement. I re-laid my own side passage path in herringbone after lifting the stretcher bond first attempt, and the perceived width increase was immediately noticeable from the entrance point of the passage without any change to the actual dimensions. Every brick path design guide I have studied since identifies herringbone as the optimal pattern for narrow brick garden paths for exactly this reason.
How to Lay a Herringbone Narrow Brick Path
A herringbone narrow brick garden path is laid by setting bricks at 45 degrees to the path’s long axis, with each brick placed at a right angle to its immediate neighbor. The first brick is set at the path center at 45 degrees, and subsequent bricks are placed against it at alternating right angles until the full row is complete. Edge cutting is required along both long sides of the path where the diagonal pattern meets the straight edge, using an angle grinder with a diamond disc or a brick splitter. I cut all edge bricks on my herringbone path project using a 9-inch angle grinder, which produced clean, accurate cuts in approximately 3 minutes per brick.
Sub-Base Preparation for a Narrow Herringbone Brick Path
A herringbone narrow brick garden path requires a sub-base of 4 inches of compacted Type 1 MOT hardcore over the cleared and leveled soil, followed by a 2-inch layer of sharp sand screeded to a flat, even surface before the first brick is placed. The hardcore sub-base is the most important structural element because it distributes the load of the brick surface and prevents the path from developing dips and humps as the underlying soil settles over time. I compact the hardcore using a plate compactor hired for $45 per day, making two passes in perpendicular directions before screeding the sand layer, which produces the most consistent compaction result across the full path width.
Stretcher Bond Narrow Brick Path
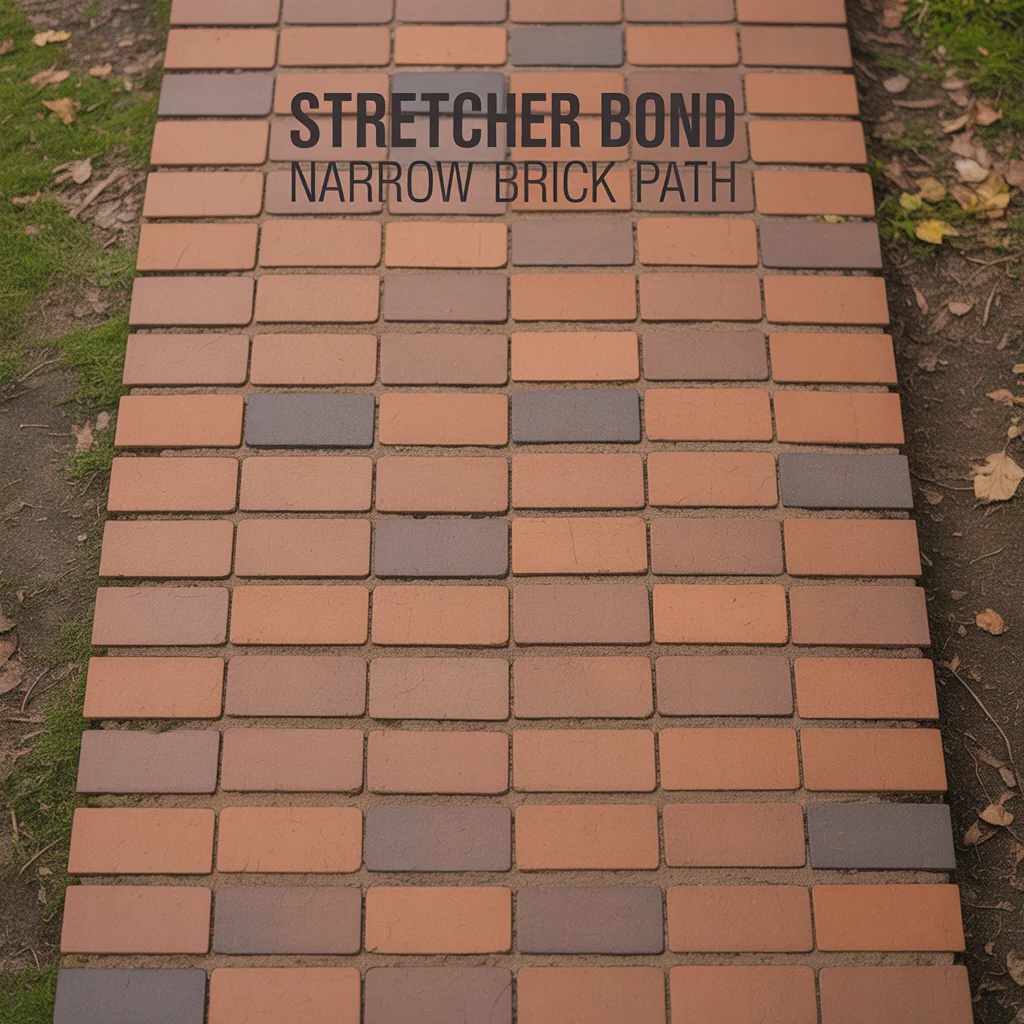
A stretcher bond narrow brick garden path uses the simplest and most widely used brick laying pattern, in which each brick is placed with its long axis running along the path direction and each course offset by half a brick length from the course beside it, producing a clean, regular surface that suits both traditional and contemporary narrow garden spaces. I laid a stretcher bond path in my front garden border as a simple brick pathway idea for a 28-inch-wide strip between a lawn edge and a planted border, and the regular, familiar pattern of the stretcher bond suited the informal cottage planting on both sides better than the more complex herringbone or basketweave patterns would have done in that setting.
Stretcher Bond Brick Laying Sequence
A stretcher bond narrow brick garden path is laid by placing the first full brick at one end of the path with its long axis running along the path direction, then placing subsequent bricks end to end along the full width of the path before moving to the next course. The second course starts with a half brick cut to offset the joints by 4.5 inches from the first course, and subsequent courses alternate between full and half brick starts. I use a string line stretched between two pins at the correct course height as a guide for each row, which keeps the surface level and the joint alignment consistent throughout the full path length without repeated checking with a spirit level.
Mortar vs Sand Jointing for a Stretcher Bond Brick Path
Kiln-dried sand jointing, wet mortar jointing, and resin jointing compound are three jointing options for a stretcher bond narrow brick garden path. Kiln-dried sand brushed into the joints costs $8 to $12 per 25kg bag and suits a path on a firm, stable sub-base where slight movement between bricks is acceptable. Wet mortar jointing using a 4:1 sand-to-cement mix produces a harder, more weather-resistant joint that suits a narrow brick path in a high-traffic location. Resin jointing compound costs $25 to $40 per bag but produces a completely weed-resistant joint lasting 15 to 20 years, making it the best jointing option for a low maintenance narrow brick garden path where annual re-sanding or repointing is not preferred. For anyone working with a sloped or uneven site where brick is the intended surface material, the joint choice becomes even more important because gradient and ground movement affect joint performance directly, and the full range of surface options and installation approaches for challenging terrain is covered in these garden paths for uneven ground using brick, which include stepped brick designs, textured brick pavers on gradients, and accessible ramp solutions suited to sloped garden sites.
Reclaimed Brick Narrow Garden Path
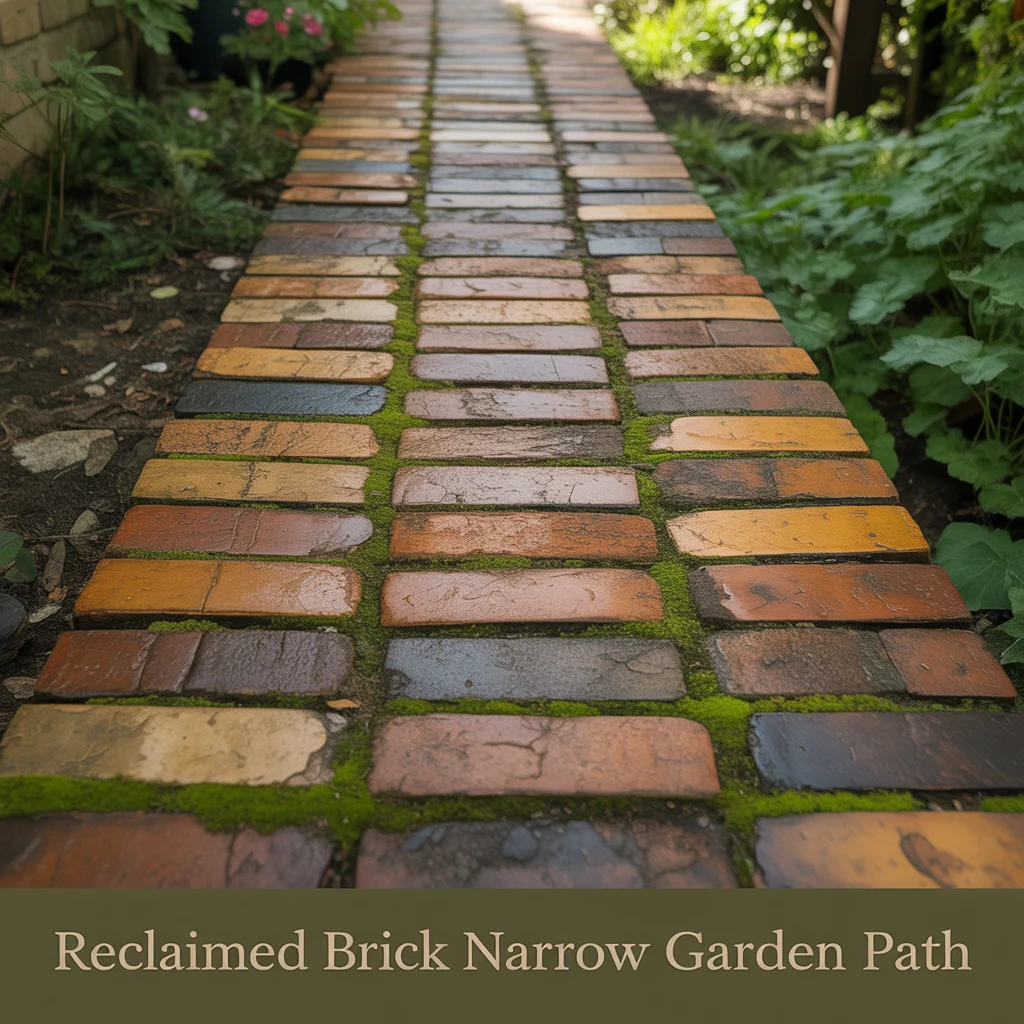
A reclaimed brick narrow garden path uses second-hand clay bricks salvaged from demolished buildings, which carry an aged, weathered appearance that new bricks take 10 to 15 years to develop naturally. I sourced 400 reclaimed London stock bricks from a local reclamation yard at $0.80 each for a 24-foot narrow path project, and the warm yellow-orange tone and irregular surface texture of the reclaimed material produced a path that looked as though it had been in the garden for decades from the day it was completed. Reclaimed brick path designs consistently photograph better than new brick paths of the same pattern because the colour variation between individual bricks adds a visual depth that uniform new bricks lack.
Sourcing Reclaimed Bricks for a Narrow Garden Path
Reclamation yards, online marketplaces, and demolition contractors are three sources for reclaimed bricks suited to a narrow brick garden path. Reclamation yards provide the most reliable source of graded, cleaned reclaimed bricks with a consistent size and condition standard, costing $0.60 to $2.00 per brick depending on the species, age, and regional demand. Online marketplaces including eBay and local selling platforms list reclaimed bricks from private sellers at $0.20 to $0.80 per brick, though the condition and size consistency is less guaranteed than reclamation yard stock. Demolition contractors occasionally offer reclaimed bricks free or at very low cost from site clearances, though availability is unpredictable and collection is typically required within a tight timeframe.
Cleaning and Preparing Reclaimed Bricks for a Path
Reclaimed bricks for a narrow garden path require cleaning to remove old mortar from the face and bed surfaces before laying. Mortar is removed using a brick bolster and club hammer to knock off the bulk of the material, followed by a wire brush to clean the residual mortar from the brick surface. I clean reclaimed bricks in batches of 20 to 30 per session and find each brick takes 2 to 4 minutes to clean adequately, which means a full batch of 400 bricks for a 24-foot path requires approximately 16 to 25 hours of cleaning work spread across several days before the path laying can begin. Bricks with deep mortar staining benefit from a 30-minute soak in a diluted brick acid solution before wire brushing.
Basketweave Narrow Brick Garden Path
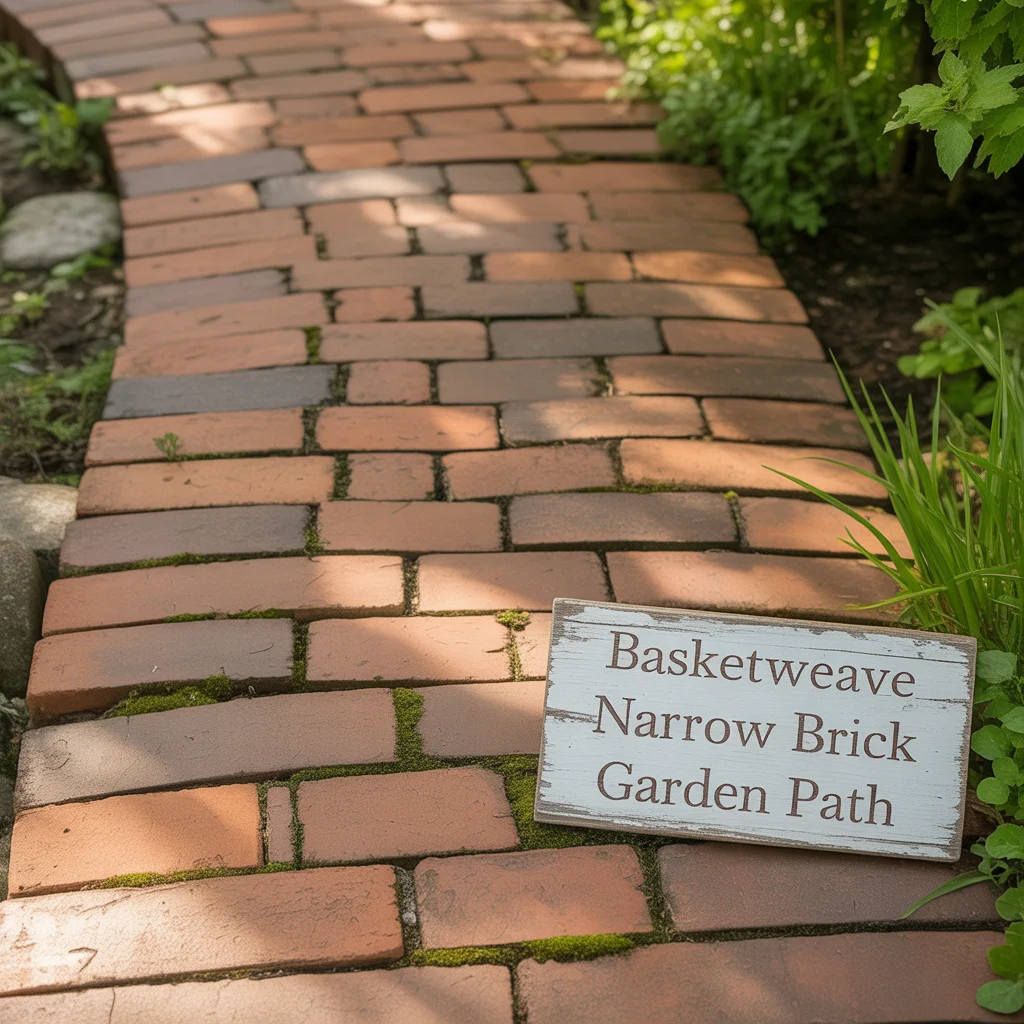
A basketweave narrow brick garden path uses pairs of bricks laid alternately horizontal and vertical in adjacent squares, producing a weave-like surface pattern that suits formal and cottage garden narrow paths where a more decorative surface texture is wanted than stretcher bond provides. I laid a basketweave section as a test panel at a garden project and found the pattern required more precise spacing than herringbone or stretcher bond because any irregularity in the square spacing between basketweave units is immediately visible in the finished surface. The basketweave pattern works best on a narrow brick path of exactly two or four brick widths wide, because odd-width paths require partial basketweave units at the edges that disturb the visual rhythm of the pattern.
How to Lay a Basketweave Brick Pattern
A basketweave narrow brick garden path is laid by placing two bricks side by side with their long axis running across the path width, then placing the next two bricks with their long axis running along the path length, and alternating this sequence along the full path length. Each basketweave unit measures two brick lengths by two brick widths, which is approximately 9 by 9 inches for a standard brick of 9 by 4.5 inches. I mark the basketweave unit positions on the sand bed with a chalk line before placing any bricks, which prevents the cumulative spacing errors that develop when the basketweave sequence is laid without pre-marked unit boundaries along the path length.
Brick Sizes Best Suited to a Basketweave Narrow Path
Standard UK clay bricks at 215mm by 102.5mm, imperial bricks at 228mm by 108mm, and modular bricks at 194mm by 92mm are three brick sizes suited to a basketweave narrow brick garden path. Standard UK clay bricks at 215mm by 102.5mm produce basketweave units of approximately 215mm by 215mm, which suits a path width of 430mm for a two-unit-wide path or 645mm for a three-unit-wide path. Imperial bricks produce a slightly larger basketweave unit that suits a wider narrow path of 456mm or 684mm. Modular bricks produce the smallest basketweave unit and suit the narrowest brick path designs of 2 feet or less where the smaller unit scale is proportionally correct for the confined path width.
Narrow Brick Path on Soil Without Concrete
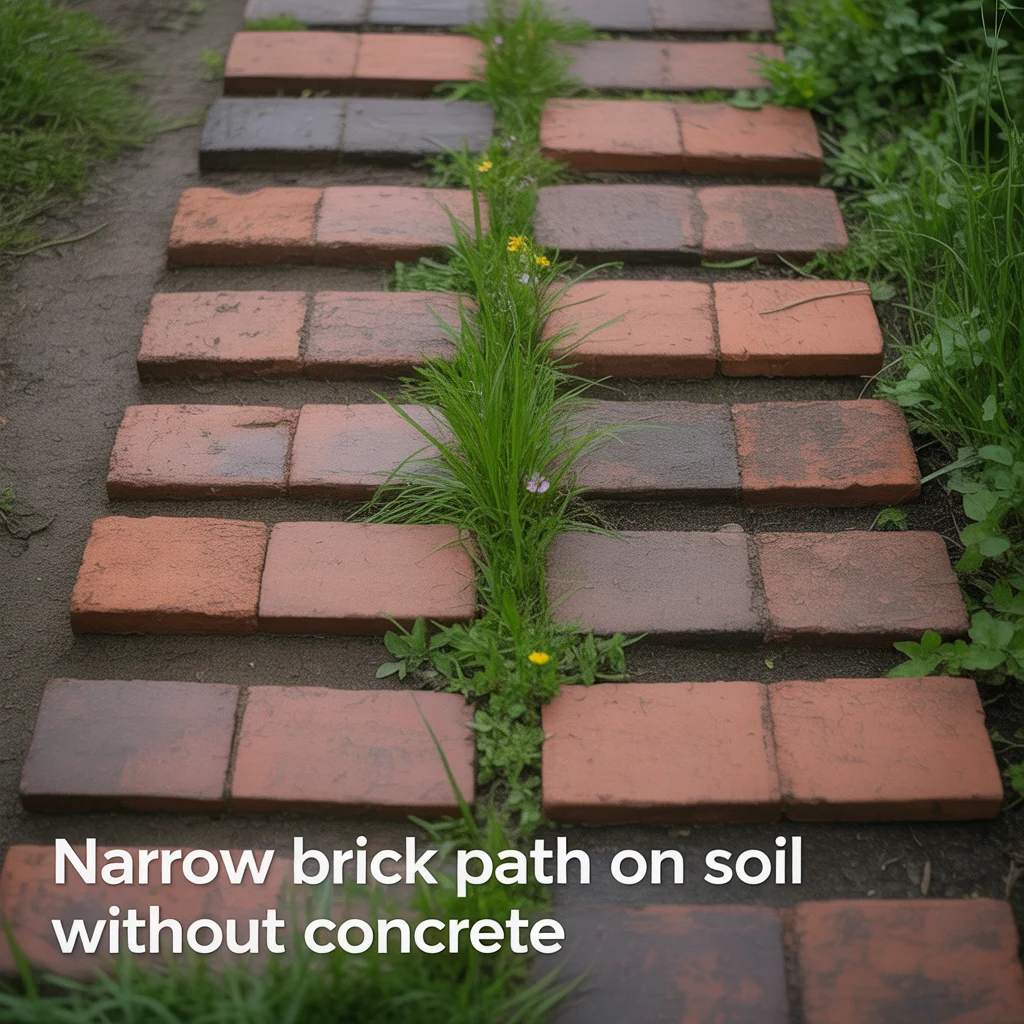
A narrow brick garden path laid directly on soil without a concrete sub-base is the most accessible simple brick pathway idea for a home garden DIY project because it requires no concrete mixing, no specialist equipment beyond a spade and a rake, and produces a path that can be lifted and relaid easily if the layout needs changing in future. I laid a narrow brick path on soil for a temporary kitchen garden route using second-hand bricks pressed directly into a 3-inch layer of compacted sharp sand over leveled soil, and the path remained stable and serviceable for three growing seasons without any settlement issues. Laying a brick path on soil works reliably in stable, well-drained garden conditions where heavy clay soil or waterlogged ground is not present.
How to Lay a Brick Path on Soil Step by Step
Laying a brick path on soil requires five steps completed in sequence. First, mark the path width and excavate to 4 inches depth, removing all turf and root material. Second, compact the base soil firmly with a hand tamper or the back of a spade. Third, lay a heavy-duty weed membrane over the compacted soil surface, turning the edges up against the path sides. Fourth, spread and screed 3 inches of sharp sand over the membrane to a flat, even surface. Fifth, lay the bricks in the chosen pattern, pressing each brick firmly into the sand to produce a level surface, and sweep kiln-dried sand into the joints to complete the path. I complete all five steps in a single day for a path of up to 20 feet in length.
Weed Control for a Brick Path Laid on Soil
A weed-suppressing membrane under a brick path laid on soil prevents weed growth through the path joints for 5 to 10 years when a heavy-duty woven polypropylene membrane rated at 100 grams per square meter or above is used. Lighter non-woven membranes rated below 70 grams per square meter allow root penetration within 2 to 3 years in a fertile garden soil, which defeats the purpose of laying the membrane. I use 130-gram woven polypropylene membrane on all brick paths laid on soil and find zero weed penetration through the membrane after five years on two completed projects, with all weed growth restricted to the path joints above the membrane surface where wind-blown seed germinates in the jointing sand.
Victorian-Style Narrow Brick Garden Path
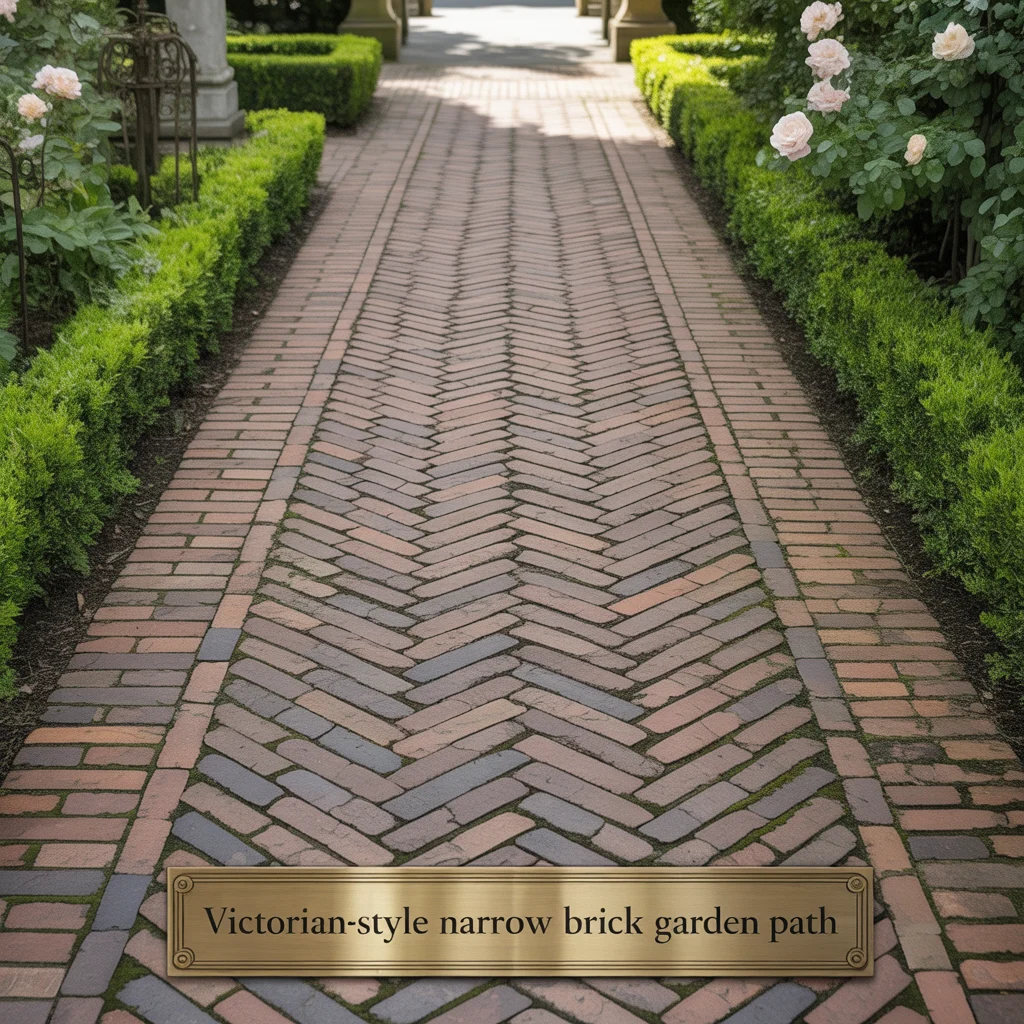
A Victorian-style narrow brick garden path uses a combination of red clay bricks in a herringbone or stretcher bond pattern with a contrasting black engineering brick border along both path edges, replicating the decorative path style common in Victorian terrace gardens across the United Kingdom. I designed this path for a period property where the owner wanted a front garden path consistent with the architectural character of their 1880s terrace, and the combination of the red clay field bricks and the black engineering brick border produced a path that looked genuinely period-correct from the street. Victorian-style brick path designs pictures consistently show this border-and-field combination as the most historically accurate option for a period property narrow path.
Engineering Brick Border Details for a Victorian-Style Path
Engineering brick borders on a Victorian-style narrow brick garden path use Class B blue-black engineering bricks at 215mm by 102.5mm set on edge along both long sides of the path, with the narrower 65mm face of the brick forming the vertical edge face and the 102.5mm dimension providing the border width visible on the path surface. Setting the engineering bricks on edge rather than flat produces a taller, more defined border profile that suits the formal character of a Victorian terrace garden path. I set the engineering brick borders first on both sides of the path before filling the central field area with the red clay herringbone infill, which establishes the correct path width and edge alignment before the more complex pattern laying begins.
Red Clay Brick Species for a Victorian Narrow Path
London stock bricks, Staffordshire blue bricks, and Flemish bond red bricks are three clay brick species suited to a Victorian-style narrow brick garden path. London stock bricks in yellow-orange tones are the most historically accurate choice for a Victorian path in a London or southeast England terrace property because they were the dominant brick type produced in the London area during the Victorian period. Staffordshire blue bricks produce a dark blue-grey surface that suits a Victorian path border or a full-surface Victorian path in the West Midlands style. Flemish bond red bricks in deep red tones suit a Victorian path in a northern England terrace where red clay bricks were the dominant local building material during the 1850 to 1900 construction period.
Simple Brick Pathway With Grass Joints
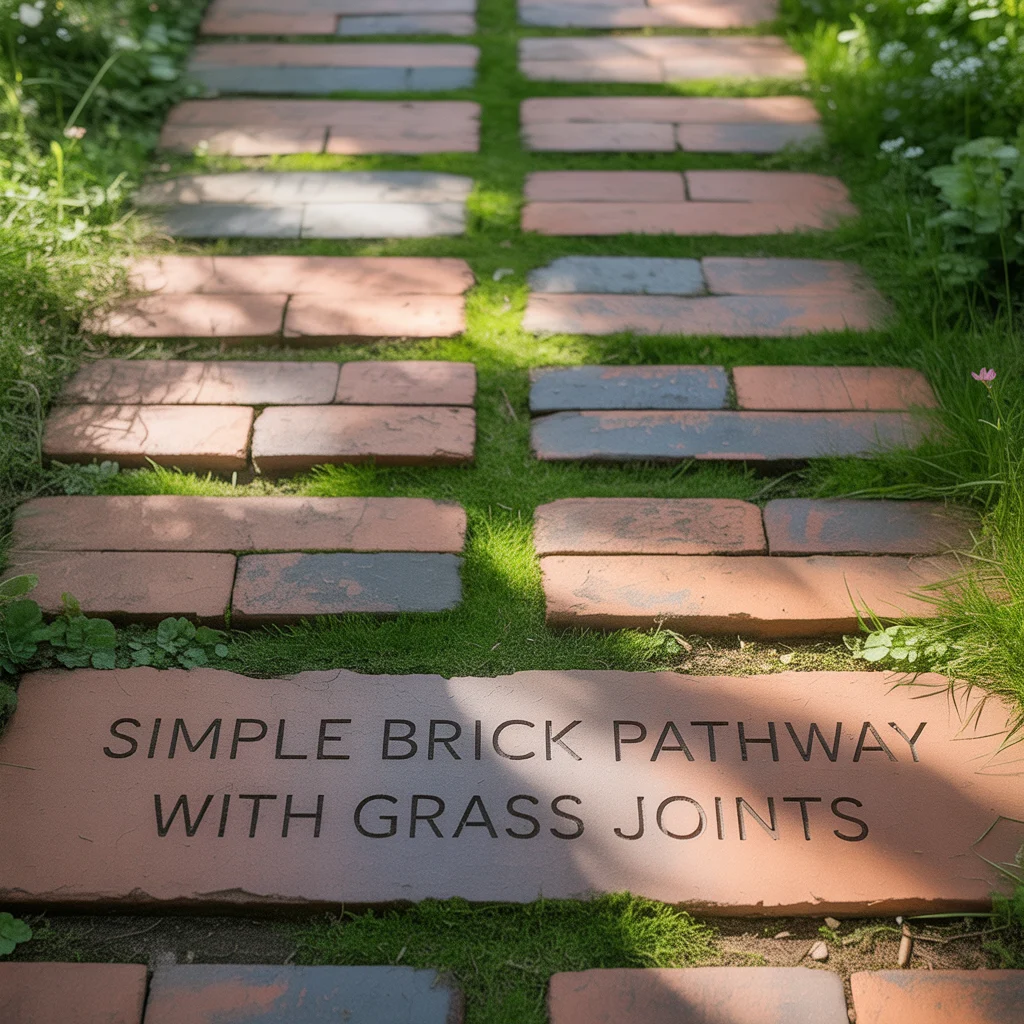
A simple brick pathway with grass joints uses standard clay or concrete bricks spaced 2 to 3 inches apart rather than tight-jointed, with grass or low ground cover plants growing in the wide spaces between the bricks to create a path surface that combines the solidity of brick with the softness of a planted surface. I created this design in my back garden using second-hand bricks spaced at 2.5-inch intervals in a loose grid pattern on a well-drained sandy soil, with creeping thyme planted in the wide joints. The combination of the warm brick surface and the green thyme joints produced a simple brick pathway idea that looked more designed and considered than a close-jointed brick path of the same material.
Brick Spacing for a Grass Joint Narrow Path
Bricks on a grass joint narrow garden path are spaced at 2 to 3 inches between each brick face to provide enough soil gap for grass or ground cover roots to establish a viable root system in the joint space. Gaps below 1.5 inches provide insufficient soil depth for most ground cover plants to establish reliably, producing thin, patchy growth that fails to cover the joint surface within one growing season. I use 2.5-inch gaps on all grass-jointed brick path projects because this width allows creeping thyme and mind-your-own-business to fill the joints fully within 8 to 10 weeks of planting in spring, producing a covered joint surface before the main summer growing season is underway.
Ground Cover Plants for a Brick Path With Planted Joints
Creeping thyme, mind-your-own-business, and Sedum acre are three ground cover plants suited to the wide joints of a simple brick pathway with planted joints. Creeping thyme stays below 2 inches in height, tolerates occasional foot traffic, produces pink flowers in June, and releases a herbal fragrance when lightly trodden, which adds an olfactory quality to the brick path experience. Mind-your-own-business, Soleirolia soleirolii, forms a very fine-textured bright green mat and fills joints within 6 weeks of planting in a moist, shaded position. Sedum acre produces bright yellow flowers in June and tolerates full sun and dry conditions better than any other path joint ground cover, suiting a south-facing narrow brick garden path.
Narrow Brick Path With Soldier Course Border
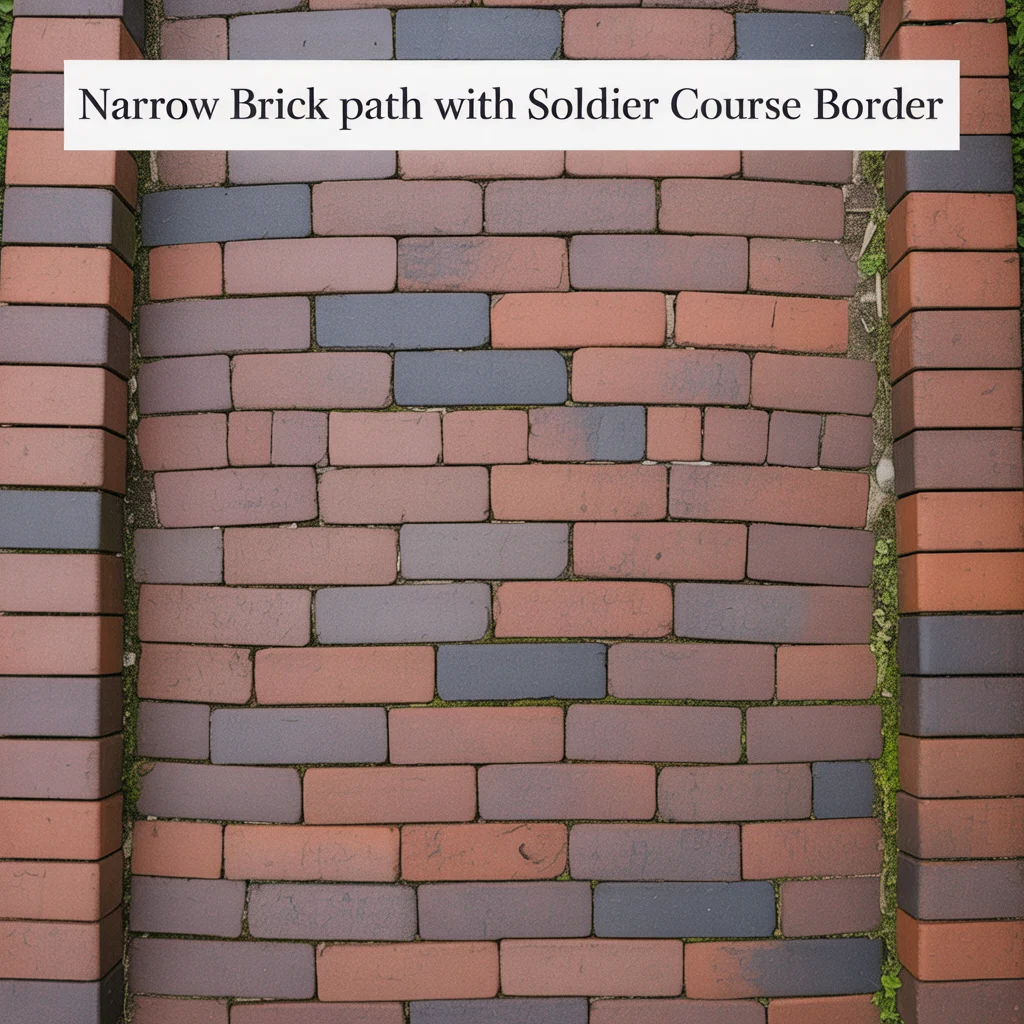
A narrow brick path with a soldier course border uses bricks set upright with their long axis vertical and their narrow 65mm face exposed on the path surface as a border along one or both sides of the main path laying pattern, creating a formal, defined edge detail that suits both herringbone and stretcher bond field patterns on a narrow brick garden path. I added a soldier course border on one side of a 30-inch-wide herringbone brick path at a cottage garden project, and the upright brick border gave the path edge a clean, defined line against the adjacent lawn that reduced the edging maintenance time significantly because the vertical brick face resisted lawn grass creep better than a flat brick surface.
Setting Soldier Course Bricks on a Narrow Path
Soldier course bricks on a narrow brick garden path are set in a continuous line along the path edge with each brick placed vertically on its 215mm by 65mm bed face, the narrow 102.5mm width of the brick running across the path and the 65mm face forming the visible vertical surface at the path edge. Each soldier brick is bedded in a 1-inch layer of 4:1 dry-mix mortar compacted firmly beneath the brick base to hold the vertical position during the jointing and setting period. I place soldier course bricks first before any field bricks are laid, using a string line at the correct height to keep the top face of the soldier course level across the full path length before the herringbone or stretcher bond infill begins.
Brick Colors for a Soldier Course Border on a Narrow Path
Matching clay bricks, contrasting engineering bricks, and reclaimed bricks are three color options for a soldier course border on a narrow brick garden path. A matching clay brick soldier course uses the same brick species as the field pattern, producing a unified color surface where the pattern change between soldier and field provides the visual border detail without any color contrast. A contrasting engineering brick soldier course in dark blue or black creates the most defined visual border, suiting a formal or Victorian-style narrow brick path where the strong edge definition reinforces the structured character of the path. A reclaimed brick soldier course uses weathered bricks of slightly different color from the field bricks, creating a subtle tonal border that suits an informal or cottage garden narrow path. Anyone working with a confined long strip space will find the broader context of border choice, paving direction, and planting strategy covered in these long narrow garden path design tips, which include diagonal paving layouts, optical illusion planting techniques, and repeating rhythm planting schemes that make a tight space feel deliberately designed rather than simply restricted.
Diagonal Narrow Brick Path for a Wider Appearance
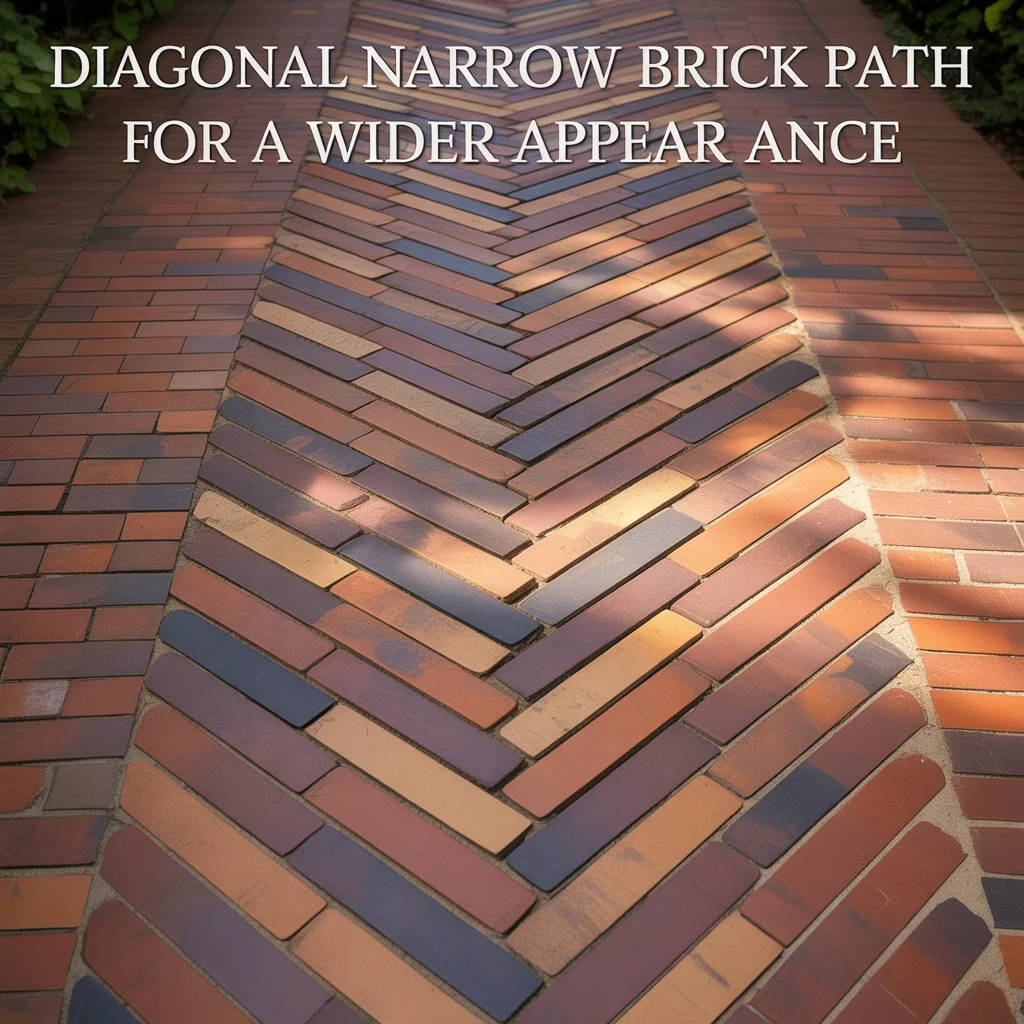
A diagonal narrow brick garden path uses the same visual principle as diagonal paving to make the path appear wider than its physical measurement by laying the bricks at 45 degrees to the path’s long axis across the full path width without the alternating right-angle pattern of herringbone. I tested a full 45-degree diagonal brick layout on a 30-inch-wide path alongside a standard 90-degree stretcher bond section of the same width, and the diagonal section consistently appeared wider than the stretcher bond section in photographs taken from the path entrance, despite the physical width being identical across both sections. This effect suits any narrow brick garden path where maximum perceived width is the primary design goal.
Brick Cutting for a Diagonal Narrow Path Layout
A full 45-degree diagonal narrow brick garden path requires a higher proportion of cut bricks at the path edges than a herringbone or stretcher bond layout because every brick at the path edge requires a 45-degree miter cut to produce a clean straight edge at the path perimeter. The number of edge cuts on a 45-degree diagonal path is approximately 30 to 40% higher than on a herringbone path of the same length and width, which increases the total cutting time and brick waste factor by a similar proportion. I calculate a 15% additional brick quantity on all diagonal brick path projects to account for the increased edge cut waste, compared to a 10% addition on herringbone and a 5% addition on stretcher bond paths of equivalent size.
Brick Cutting Tools for a Narrow Path Project
An angle grinder with a diamond disc, a brick splitter, and a hired disc cutter are three cutting tools suited to brick cutting on a narrow brick garden path project. An angle grinder with a 115mm diamond disc costs $45 to $90 and cuts standard clay bricks in approximately 3 minutes per cut, suiting a small project of up to 200 cut bricks before the disc wears to the replacement point. A brick splitter, also called a guillotine cutter, costs $80 to $200 to buy or $25 per day to hire and produces fast, clean straight cuts without dust or noise, suiting a path project in a residential area where the noise and dust of an angle grinder are undesirable. A hired disc cutter produces the fastest and most accurate cuts for large quantities above 200 bricks.
Narrow Brick Garden Path With Planted Border
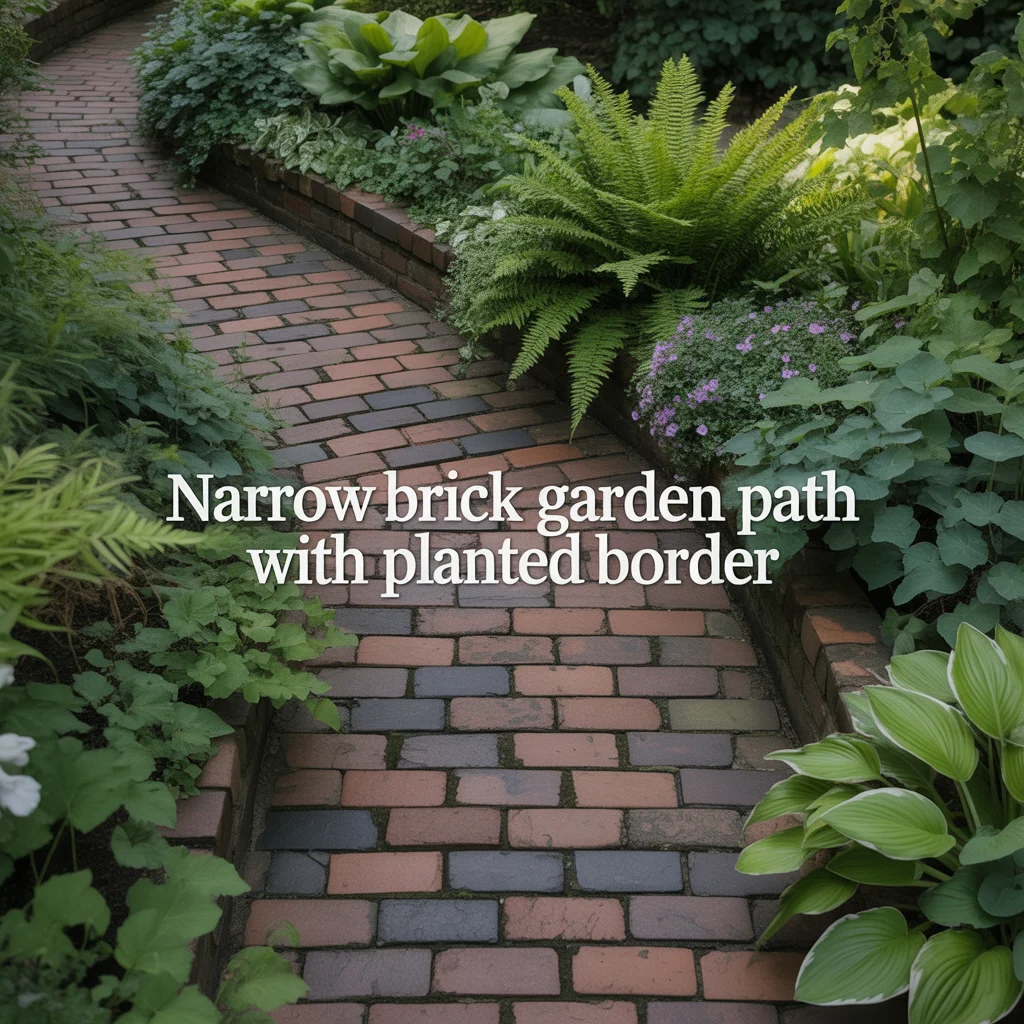
A narrow brick garden path with a planted border uses low-growing perennial or annual plants positioned along one or both sides of the brick path at the transition between the brick edge and the adjacent lawn, wall, or border, creating a path design where the brick surface is softened and framed by plant growth that changes through the seasons. I planted Alchemilla mollis, Nepeta x faassenii, and Geranium rozanne along both sides of a 28-inch herringbone brick path at a cottage garden project, and the overhanging plant growth from both borders reduced the visible width of the brick surface by approximately 4 inches on each side while making the overall path setting look significantly more designed and intentional than the bare brick edges had before.
Low-Growing Plants for a Narrow Brick Path Border
Alchemilla mollis, Nepeta x faassenii, and Erigeron karvinskianus are three low-growing plants suited to the border of a narrow brick garden path. Alchemilla mollis produces soft, pleated grey-green leaves with a water-repellent surface and small yellow-green flowers from June to August, growing to 18 inches in height and 24 inches in spread. It suits a partial shade position alongside a narrow brick path in a cottage or formal garden. Nepeta x faassenii produces lavender-blue flowers from May to September at 18 inches height and 24 inches spread, repeating if cut back after the first flush. Erigeron karvinskianus produces small white and pink daisy flowers from May to November at 12 inches height and self-seeds freely into the brick joints along the path edge.
Edging Options Between a Brick Path and a Planted Border
Steel lawn edging, terracotta rope-top edging, and Victorian-style rope tiles are three edging options that define the transition between a narrow brick garden path and an adjacent planted border. Steel lawn edging at 100mm depth creates a sharp, precise edge between the brick path surface and the border soil at a cost of $3 to $5 per linear foot, suiting a contemporary or modern brick path design. Terracotta rope-top edging tiles cost $2 to $4 per linear foot and suit a Victorian or cottage style narrow brick garden path where the period character of the edging matches the brick material and garden style. Victorian-style rope tiles in red clay suit a period property path where the edging detail reinforces the historical character of the brick path design.
Narrow Brick Path Between Raised Beds
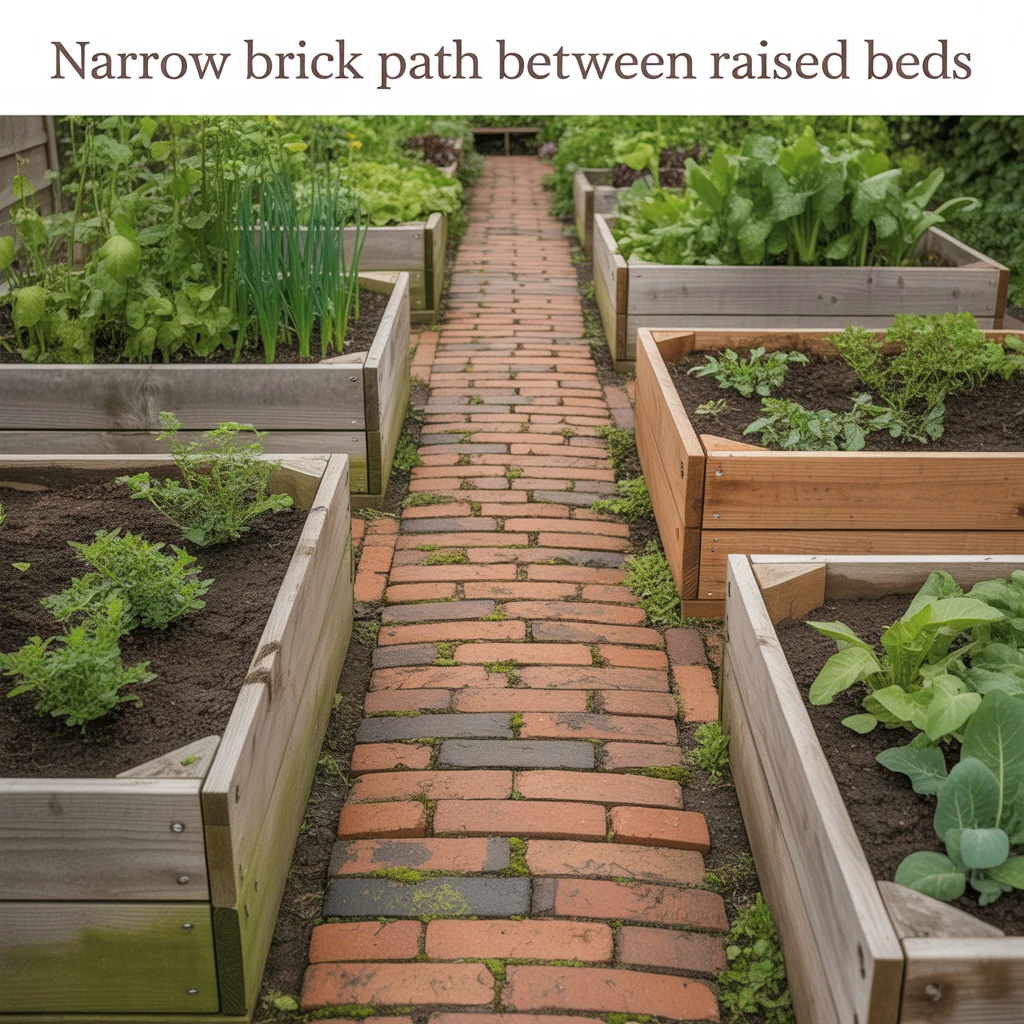
A narrow brick garden path between raised beds uses a 24 to 30-inch-wide brick path running between two parallel raised beds in a kitchen or productive garden, creating a firm, all-weather walking surface that connects the full length of the growing space and defines the path clearly against the raised bed timbers or brick sides. I laid a 26-inch herringbone brick path between two oak-sleeper-sided raised beds in my kitchen garden and the combination of the warm red brick surface and the dark oak sleeper sides produced the most considered-looking path in any section of my garden, despite being one of the simplest projects I have completed in terms of layout and sub-base preparation.
Brick Path Width Between Raised Beds
A narrow brick garden path between raised beds measures most effectively at 24 to 30 inches in width, which provides comfortable walking space and the ability to crouch or kneel at the bed edge for planting and harvesting without stepping off the brick surface. A path narrower than 20 inches between raised beds feels restrictive when carrying a trug or watering can along the path. A path wider than 36 inches between raised beds reduces the productive growing area of the beds on both sides and makes reaching the center of a standard 4-foot-wide bed more difficult from the path edge. I use 26 inches as the standard path width between raised beds on all kitchen garden brick path projects and find this width accommodates all normal garden tasks comfortably.
Brick Path Drainage Between Raised Beds
A narrow brick path between raised beds requires positive drainage away from the bed edges to prevent water pooling against the raised bed structure and accelerating timber decay. A cross-fall of 1 in 60 across the path width, directing water toward a central drainage channel or toward a permeable gravel strip at one side of the path, prevents standing water after heavy rain. I build a 1 in 60 cross-fall into the sand bed on all brick paths between raised beds by screeding the sand 5mm higher on the bed side than on the drain side across a 30-inch path width, which produces a consistent fall that sheds water quickly without being perceptible as a slope during normal walking on the path surface.
Reclaimed Brick Path in Cottage Garden Style
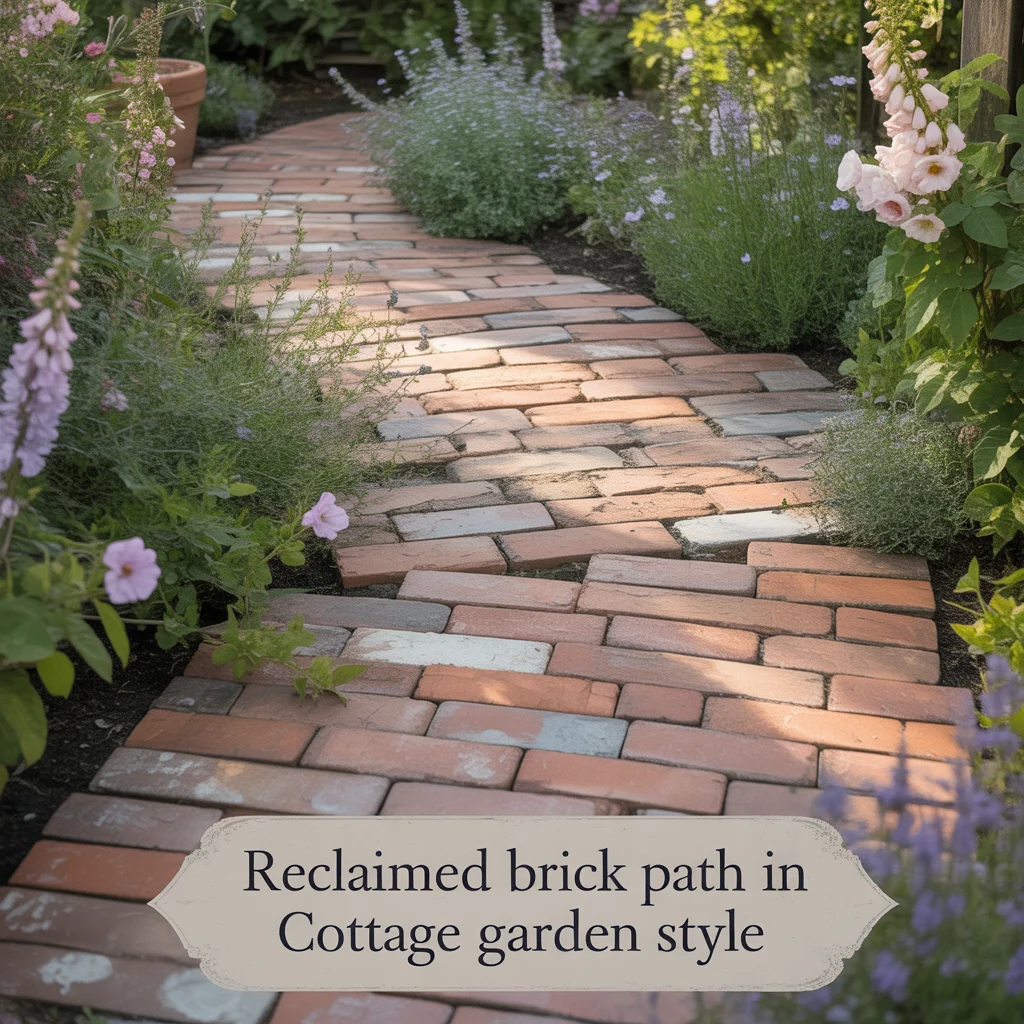
A reclaimed brick path in cottage garden style uses weathered, uneven reclaimed clay bricks in a loose stretcher bond or random pattern to create a path with an aged, informal character that suits the relaxed planting style of a cottage garden where precise geometric patterns would look too formal. I laid a reclaimed brick path through the center of a cottage border planting using 220 London stock bricks sourced from a local reclamation yard at $0.75 each, laying them in a loose stretcher bond with slightly irregular joint widths of 10 to 15mm to enhance the informal, hand-laid appearance. The path looked as though it had been in the garden for 40 years from the day the planting grew around it at the end of the first growing season.
Choosing Reclaimed Bricks for a Cottage Garden Path
Wire-cut clay bricks, hand-made clay bricks, and sand-faced clay bricks are three reclaimed brick types suited to a cottage garden style narrow path. Wire-cut clay bricks have a slightly rough, textured surface produced by the wire cutting process during manufacture and suit an informal cottage path where surface regularity is not the design goal. Hand-made clay bricks have the most irregular surface texture and colour variation of any brick type, produced by the hand-pressing process that creates slight dimples, bumps, and colour variation in each individual brick. Sand-faced clay bricks have a smooth face coated with fine sand during firing and suit a cottage path where a slightly more refined brick surface is wanted without the precision of a new pressed brick.
Jointing Width for a Reclaimed Brick Cottage Path
Reclaimed brick paths in cottage garden style use wider joints of 10 to 15mm compared to the standard 10mm joint of a formal brick path, which suits the slight size variation between individual reclaimed bricks and enhances the informal, hand-laid appearance of the path surface. Wider joints of 12 to 15mm also allow self-seeding plants including Erigeron karvinskianus and Campanula portenschlagiana to establish in the joints naturally over two to three seasons, which adds the planted joint detail that characterises the best cottage garden reclaimed brick path designs. I leave the joints of my cottage garden reclaimed brick paths filled only with kiln-dried sand initially, allowing self-seeding plants to colonize the joints naturally rather than deliberately planting them.
Narrow Brick Path With Central Contrasting Strip
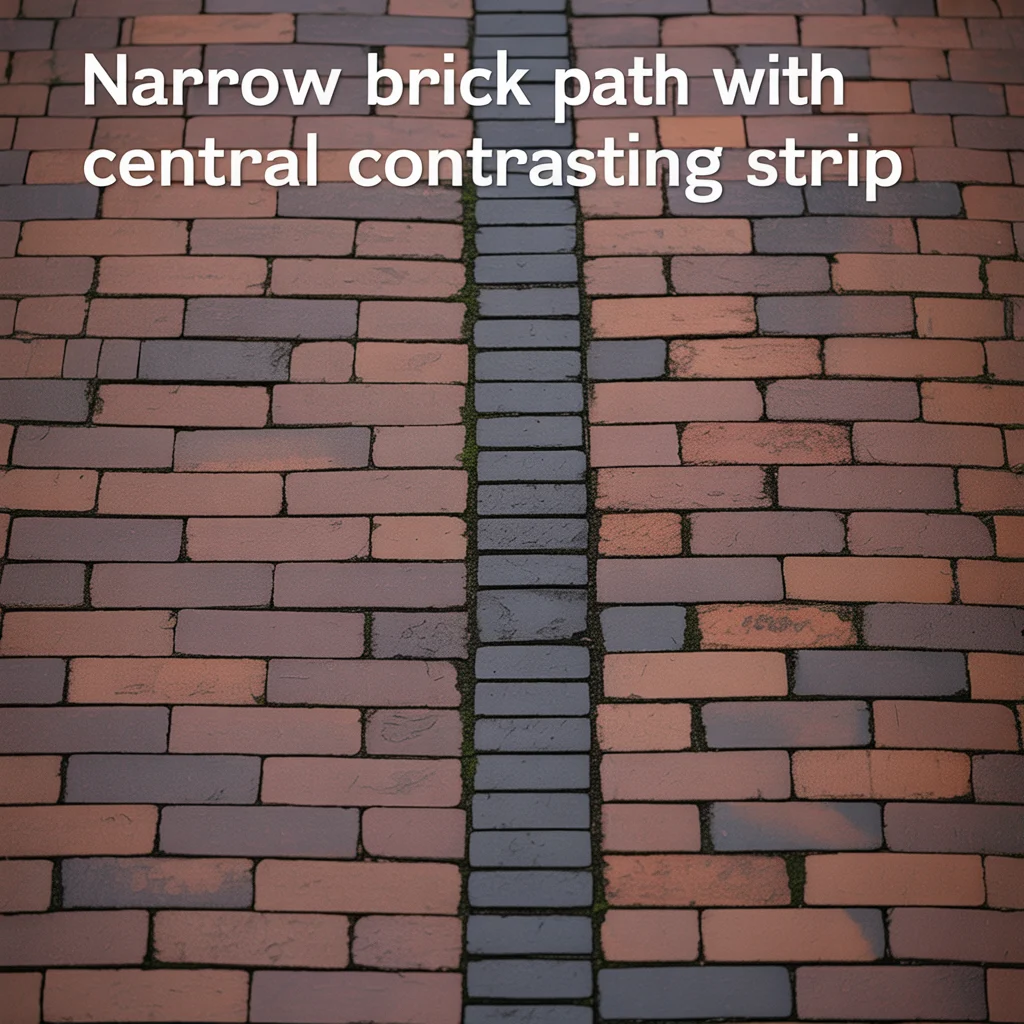
A narrow brick garden path with a central contrasting strip uses a different brick color, size, or orientation in a single central row running along the full length of the path to create a visual center line that both decorates the surface and makes the path appear longer and more intentional from the entrance point. I used this detail on a 28-inch-wide red clay herringbone path, inserting a single central row of blue-black engineering bricks running straight along the path axis at 90 degrees to the 45-degree herringbone field bricks on both sides. The straight central strip against the diagonal field pattern created a path surface that looked significantly more designed than a single-material herringbone would have produced.
Contrasting Brick Options for a Central Strip Detail
Blue engineering bricks, yellow stock bricks, and white calcium silicate bricks are three contrasting brick options suited to a central strip detail on a narrow brick garden path. Blue engineering bricks in Class B blue-black produce the strongest color contrast against a red clay field brick and suit a Victorian, formal, or contemporary narrow brick path design where a bold visual center line is the intended effect. Yellow stock bricks against a red field brick produce a warm, period-appropriate color contrast suited to a cottage or traditional garden narrow path where the yellow and red brick combination is historically consistent with Georgian and Victorian domestic garden design. White calcium silicate bricks produce the brightest contrast against a red field brick and suit a modern garden narrow path design.
Maintaining a Consistent Central Strip on a Narrow Path
A central contrasting strip on a narrow brick garden path maintains its alignment across the full path length when the central row is laid first before any field bricks are placed, using a string line stretched between two pins at each end of the path to mark the exact center of the path surface. I lay the central strip row completely before starting the herringbone or stretcher bond field bricks on either side, which ensures the strip runs in a perfectly straight line regardless of any slight variations in the path edge alignment. Laying the field bricks first and inserting the central strip row afterward produces a less straight result because the accumulated small irregularities of the field bricks push the central strip off its true center line.
Narrow Brick Path With Step Details
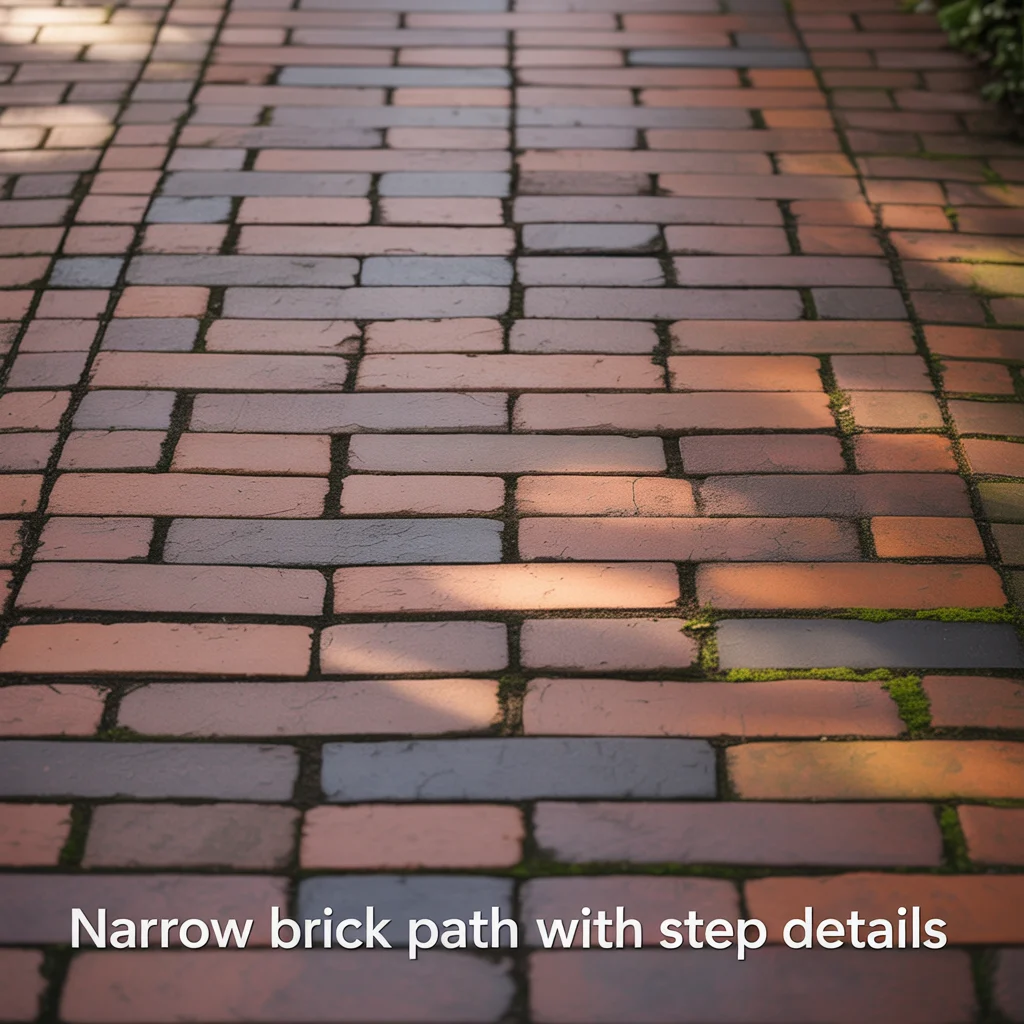
A narrow brick garden path with step details uses brick risers and brick treads to manage a level change along the path route, creating a path that maintains the consistent brick material and character across both the flat sections and the stepped sections rather than switching to a different material for the steps. I designed a brick path with two integrated brick steps at a garden project where the path dropped 8 inches over its 25-foot length, using the same reclaimed red clay bricks for the step risers and treads as for the flat path sections, and the unified brick material across the full path made the step details read as a natural part of the path design rather than an interruption of it.
Brick Step Dimensions for a Narrow Garden Path
Brick steps on a narrow brick garden path measure most effectively at 150mm riser height and 300mm tread depth, which produces a step geometry classified as a comfortable outdoor step by British Standard BS 8300:2018 for accessible outdoor environments. A riser of 150mm requires one course of standard 65mm bricks plus a 10mm mortar joint on the riser face, which gives a nominal riser height of 75mm per brick course, requiring two brick courses per 150mm riser. The tread depth of 300mm suits a path width of 24 to 36 inches and provides enough surface area for a confident, secure footfall on a single tread without requiring an extended stride length to clear the full tread depth.
Constructing Brick Step Risers on a Narrow Path
Brick step risers on a narrow brick garden path are constructed using a concrete foundation block of 100mm depth poured at the base of each riser position and allowed to cure for 24 hours before the brick courses are laid on top. The riser bricks are bedded in 4:1 sand-to-cement mortar with full bed and perpend joints, using a spirit level to check the riser face is plumb and the top bed is level before the mortar sets. I construct both riser courses before laying the tread bricks on top, which allows me to check the combined riser height against the intended step geometry before the tread course is committed to mortar, preventing the most common brick step error of an unequal riser height between consecutive steps on the same path.
Narrow Brick Garden Path Drawing Into a Design

A narrow brick garden path that incorporates a drawn or planned design detail uses specific brick path designs, including curved sections, circular features, or herringbone-to-basketweave pattern transitions, to create a path that looks as though it was drawn before it was laid, with a clear geometric or artistic intention visible in the finished surface. I draw every narrow brick garden path design to scale on graph paper before laying a single brick, which allows the pattern transitions, border details, and curved sections to be planned accurately and the brick cutting quantities to be calculated before purchasing materials. This planning stage consistently produces better-finished paths than projects started without a drawn plan.
Drawing a Narrow Brick Path to Scale
A narrow brick path drawing uses a scale of 1:20, in which 1cm on the drawing represents 20cm on the ground, which suits a standard A4 or A3 drawing sheet for paths up to 6 meters in length. Each standard UK brick at 215mm by 102.5mm scales to 10.75mm by 5.125mm on a 1:20 drawing, which is large enough to represent individual brick positions accurately while keeping the overall path drawing to a manageable size. I draw the path outline first, then add the pattern grid, then mark the border brick positions, and finally calculate the number of full bricks and cut bricks visible in the drawing to produce an accurate materials order that includes a 10% waste factor for all cut positions.
Free Tools for Drawing a Brick Path Design
Graph paper, SketchUp Free, and RoomSketcher are three tools suited to drawing a brick path design before installation. Graph paper at 5mm squares provides the simplest drawing method, with each square representing 100mm at a 1:20 scale, allowing accurate hand-drawn brick path drawings without any software. SketchUp Free is a browser-based 3D modelling tool that allows a narrow brick garden path to be drawn and visualised in three dimensions, showing how the path will look from the entrance point and from above. RoomSketcher is a floor plan tool that suits a 2D overhead brick path design drawing and produces a colour-rendered plan that communicates the brick pattern and border detail clearly to a bricklayer or contractor who will be completing the installation.
Low Maintenance Narrow Brick Garden Path
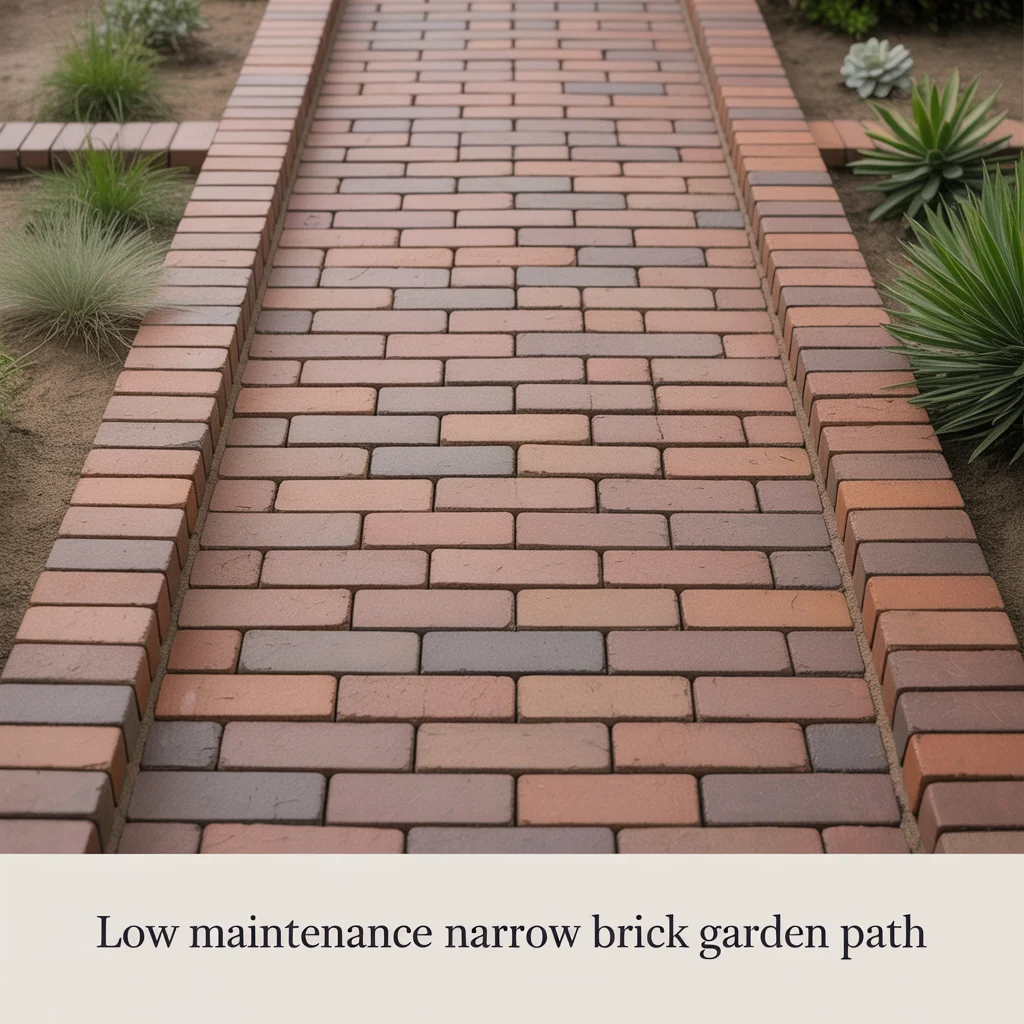
A low maintenance narrow brick garden path uses a combination of the correct sub-base preparation, a permanent jointing compound, and a quality brick sealer to produce a path surface that requires no annual re-jointing, no weed removal, and no sealing for a minimum of 10 years after installation. I completed a low maintenance narrow brick path installation at a rental property seven years ago using a 4-inch hardcore sub-base, resin jointing compound in all joints, and a penetrating brick sealer applied in two coats after jointing, and the path has required no maintenance beyond an annual brush-down in the four years since the tenant took occupancy, which has been the defining advantage of this specification in a property management context.
Resin Jointing Compound for a Low Maintenance Brick Path
Resin jointing compound for a narrow brick garden path uses a two-component polyurethane or epoxy resin system mixed immediately before use and packed into the brick joints using a pointing tool or a rubber float, curing to a hard, flexible, permanently weed-resistant joint within 24 to 48 hours. The compound costs $25 to $40 per bag, with each bag covering approximately 6 to 8 square meters of standard brick path jointing at 10mm joint width. I use a pointing tool to pack the compound firmly into each joint, working in sections of 2 square meters to prevent the compound from curing before the joint is fully packed and tooled. The cured joint requires no maintenance and resists weed growth, freeze-thaw cracking, and ant disturbance better than any sand or mortar joint alternative.
Brick Sealer for a Low Maintenance Narrow Path
A penetrating brick sealer, a colour-enhancing brick sealer, and a natural look matt sealer are three sealer types suited to a low maintenance narrow brick garden path. A penetrating brick sealer soaks into the brick surface without forming a film coating, reducing water absorption by 90% without changing the visual appearance of the brick and costing $18 to $35 per liter, with one liter covering 8 to 12 square meters. A colour-enhancing sealer deepens the natural colour of the brick surface and suits a reclaimed brick path where the sealer enriches the existing colour variation of the aged bricks. A natural look matt sealer provides the same water-repellent protection as a penetrating sealer but leaves a very slight sheen on the brick surface that suits a formal or period-style narrow brick garden path.
Related
best ground cover plants between narrow brick path joints
how to add flowers along a classic brick garden path
flagstone vs brick path ideas for small backyards
Frequently Asked Questions
How wide should a narrow brick garden path be?
A narrow brick garden path measures most effectively at 24 to 36 inches in width, which accommodates a single adult walking comfortably while keeping the path proportionally correct for the limited-width spaces where narrow brick paths are most commonly installed. A width of 24 inches suits a side passage or border path used as an occasional access route. A width of 30 inches suits a regularly used path between garden sections. A width of 36 inches suits a narrow brick path used as the primary route between the front and rear garden where a 24 or 30-inch width would feel restrictive during daily use. I use 28 to 30 inches as the standard specification for most domestic narrow brick garden path projects.
What is the best brick laying pattern for a narrow garden path?
Herringbone at 45 degrees is the best brick laying pattern for a narrow garden path because the diagonal brick orientation makes the path appear wider than its physical measurement by directing the eye outward toward the path edges rather than along the path length. Research and practical observation consistently confirm that a 45-degree herringbone pattern increases the perceived width of a narrow path by 20 to 30% compared to a stretcher bond pattern of identical physical dimensions. Basketweave suits a formal narrow path where a more decorative surface is wanted. Stretcher bond suits an informal narrow path where the simplest possible brick path design is preferred for both practical and aesthetic reasons.
How do I lay a brick path on soil without concrete?
A brick path on soil is laid by excavating 4 inches of soil, compacting the base, laying a weed-suppressing membrane, screeding 3 inches of sharp sand, and pressing the bricks into the sand bed in the chosen pattern before filling the joints with kiln-dried sand. The compacted sharp sand bed provides sufficient stability for a narrow brick garden path in a domestic garden setting where heavy vehicle loads are not a factor. A concrete sub-base is required only for a brick path subject to vehicle overrun or for a brick path on clay soil with high shrink-swell movement that would cause sand-bedded bricks to crack or shift. I have laid multiple narrow brick paths on soil using this method with no structural problems after five or more years of regular use.
How many bricks do I need for a narrow garden path?
A narrow brick garden path requires approximately 38 standard UK bricks per square meter of path surface at 10mm joints, which means a path of 30 inches width and 20 feet length of approximately 5.6 square meters requires 213 bricks before adding a waste factor. A waste factor of 10% suits a stretcher bond path with minimal cutting, requiring a total order of 235 bricks. A waste factor of 15% suits a herringbone path with diagonal edge cuts, requiring a total order of 245 bricks. A waste factor of 20% suits a full diagonal or complex pattern path with a high proportion of cut bricks at the edges, requiring a total order of 256 bricks for the same 5.6-square-meter path area.
What is the best jointing material for a low maintenance narrow brick path?Resin jointing compound is the best jointing material for a low maintenance narrow brick garden path because it cures to a hard, permanently weed-resistant joint that requires no re-jointing, no weed removal, and no maintenance for 15 to 20 years after installation. Kiln-dried sand is the cheapest jointing material at $8 to $12 per bag but requires annual top-up as it washes out of the joints and allows weed growth from the second season onward. Wet mortar jointing produces a harder joint than sand and lasts 8 to 12 years before repointing is needed, but cracks in freeze-thaw conditions if the mortar mix is too strong relative to the brick hardness. I specify resin jointing on all narrow brick paths where long-term low maintenance is the primary client requirement.