
Garden Paths For Uneven Ground That Turn a Tricky Slope Into a Genuine Feature
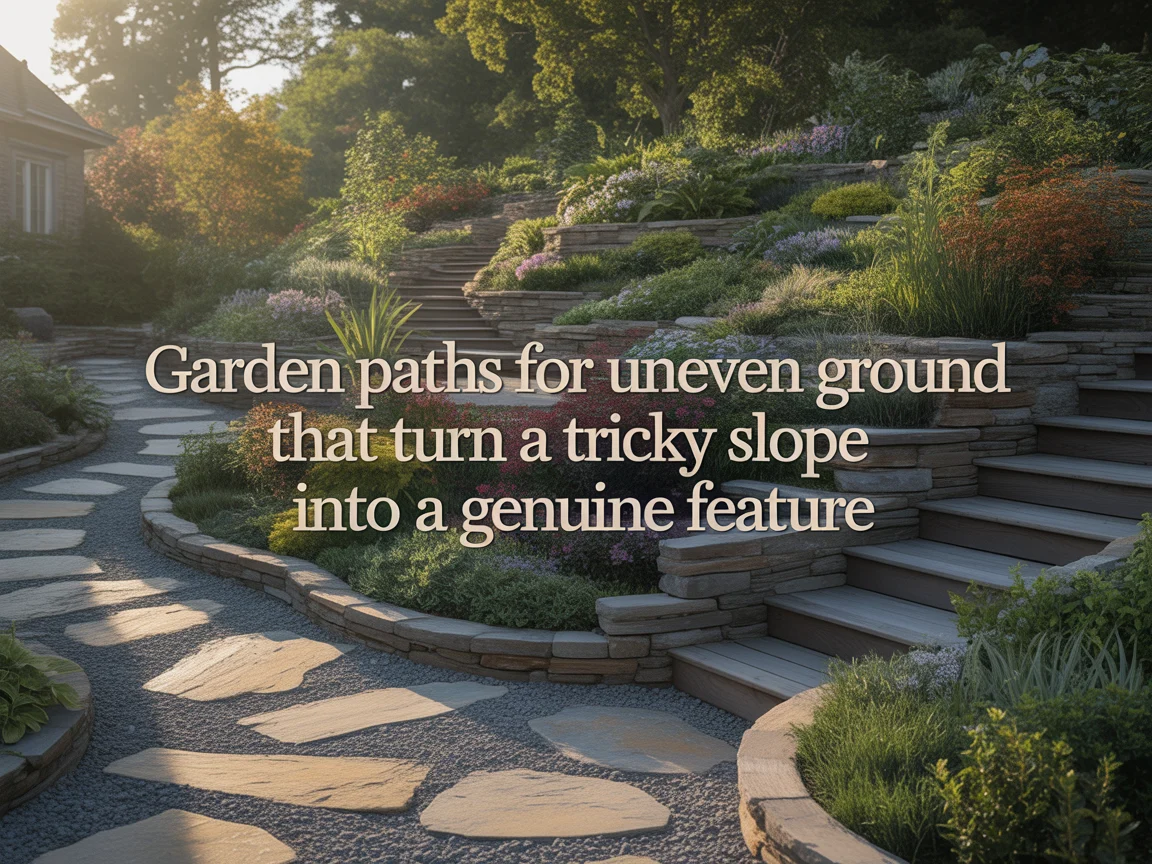
I spent three years ignoring the sloped section at the bottom of my garden because I genuinely had no idea what to do with it. The ground dropped about 18 inches over 20 feet, the grass was impossible to mow evenly, and every time it rained the whole area turned into a muddy slide that my children found entertaining and I found exhausting. Then I laid a simple railway sleeper stepped path down the slope, added gravel between each sleeper, and planted both sides with ornamental grasses. The problem garden became the best-looking section of the whole property within a single weekend.
Garden paths for uneven ground use flexible, adaptable materials and installation techniques including railway sleeper steps, gravel with flexible edging, stepping stone trails, bark chip surfaces, and terraced path designs to create safe, attractive, and functional walkways across sloped, hilly, or irregularly surfaced garden terrain. The path solves the practical problem of navigating uneven ground safely while simultaneously giving the irregular terrain a designed, organized appearance that flat ground garden paths cannot match for visual interest.
Since that sleeper path weekend, I have designed and installed garden paths for uneven ground across many different gradient levels, soil types, and garden sizes. I have seen cheap garden paths for uneven ground costing under $50 produce results equal to expensive professional installations, and I have also seen upward sloping garden ideas executed with considerable skill and genuine visual impact.
In this article, I am sharing the best garden paths for uneven ground ideas that I have either created or studied closely enough to recommend with complete confidence.
Railway Sleeper Stepped Path on a Slope
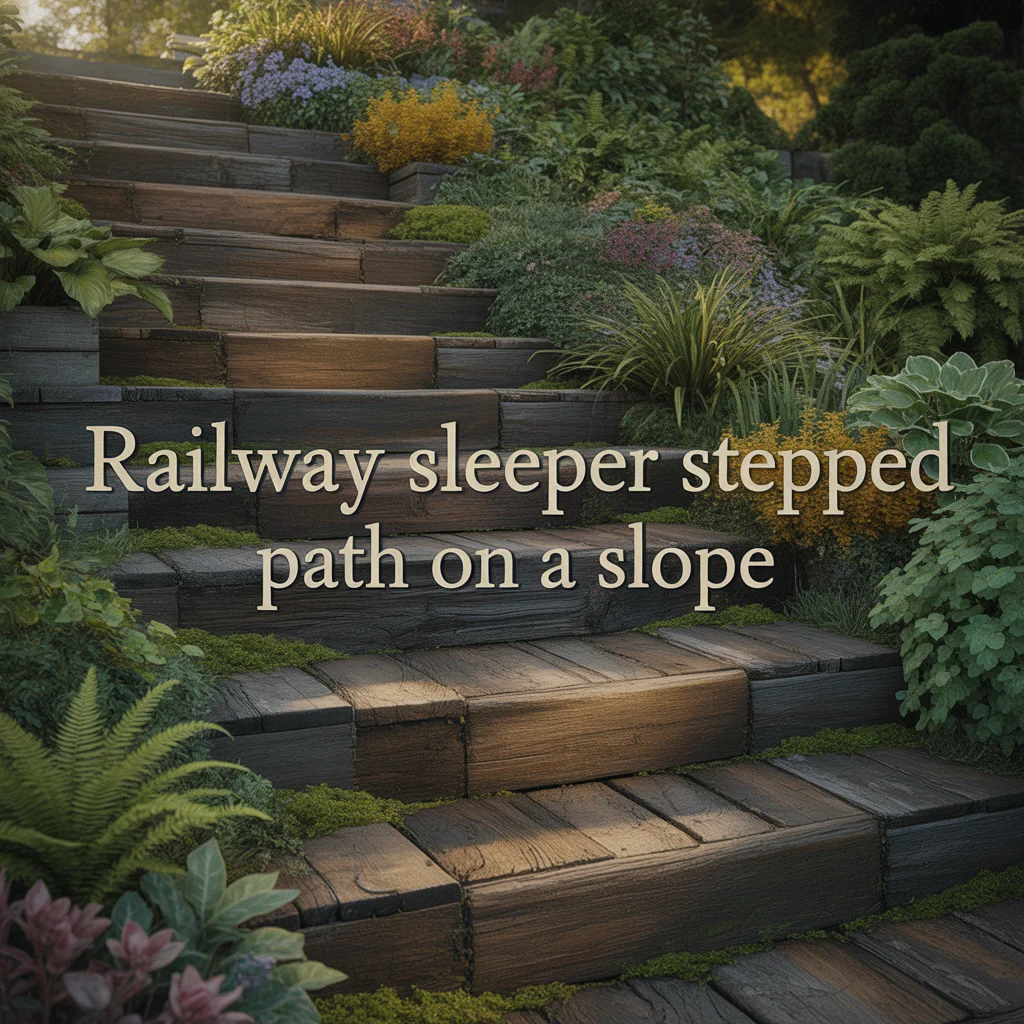
A railway sleeper stepped path on a slope uses horizontal timber sleepers as step risers with gravel, bark, or compacted stone fills between each riser to create a terraced path that manages a gradient across an uneven garden surface. I used this design on a narrow 3.5-foot-wide sloped passage that dropped 18 inches over its 24-foot length, using six oak sleeper risers spaced 4 feet apart with pea gravel fills between each step, and the path converted an unusable muddy slope into a clearly defined walkway that drained well after rain and required no ongoing maintenance beyond an annual rake of the gravel surface between the sleepers.
How to Calculate Railway Sleeper Step Spacing on a Slope
Railway sleeper step spacing on a sloped garden path is calculated by dividing the total vertical drop by the number of steps required. A comfortable outdoor step riser height is 4 to 6 inches. For an 18-inch total drop, four steps at 4.5 inches per riser produce comfortable, easily walked steps on a garden path for uneven ground. I used six steps at 3 inches each on my 18-inch drop path and found the shallower riser more comfortable for regular use, particularly when carrying garden equipment along the uneven ground path. Each horizontal tread between risers measured 4 feet in length, giving enough flat walking distance between each step change.
Sleeper Materials for a Sloped Garden Path
New oak sleepers, reclaimed railway sleepers, and pressure-treated softwood sleepers are three timber options suited to a stepped path for uneven ground. New oak sleepers at 200mm by 100mm cross-section cost $18 to $28 each and provide 20 to 30 years of outdoor service in a horizontal step position with no surface treatment required. Reclaimed railway sleepers cost $12 to $22 each and provide an aged, characterful surface that suits a naturalistic sloped garden path where the weathered timber appearance coordinates with the surrounding planting. Pressure-treated softwood sleepers cost $8 to $15 each and provide 15 to 20 years of service at the most affordable price point for a cheap garden path for uneven ground.
Gravel Path With Flexible Edging on Uneven Ground
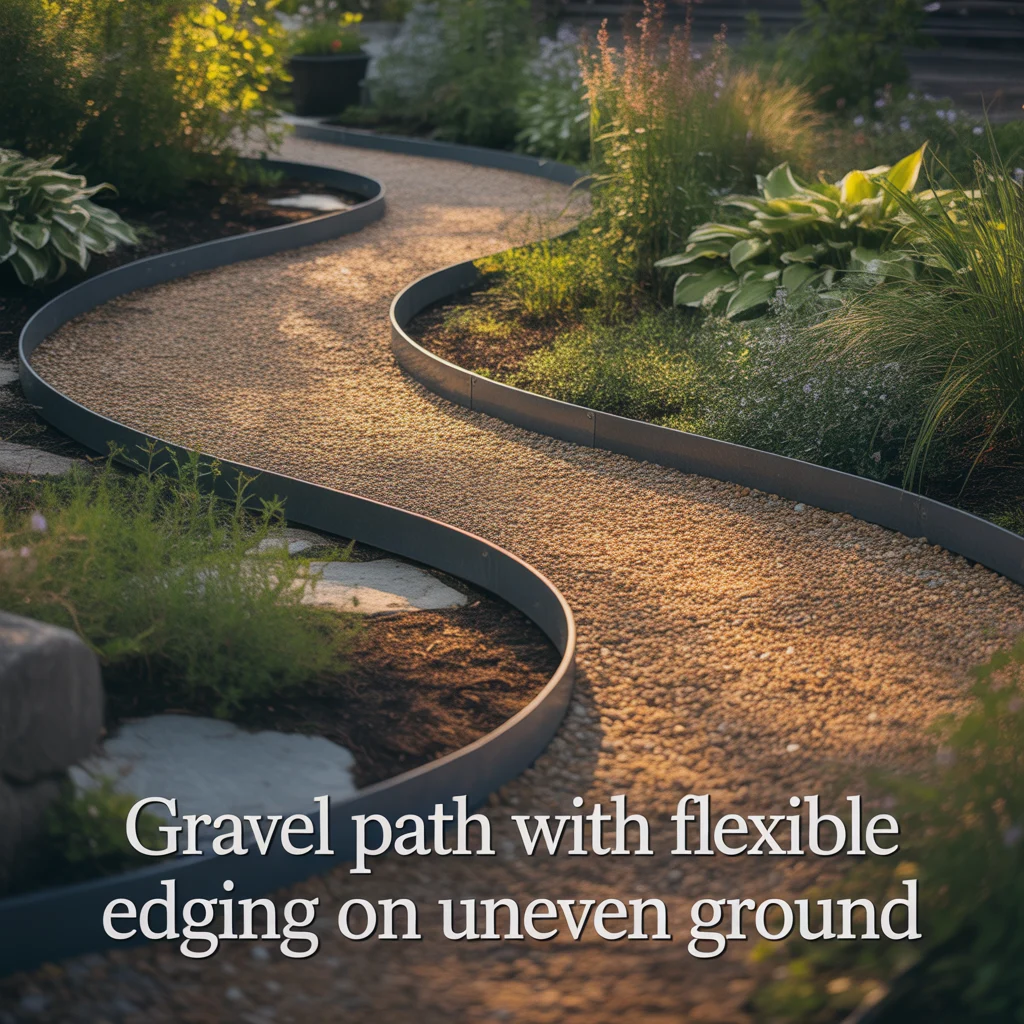
A gravel path with flexible edging on uneven ground uses flexible steel or polypropylene edging strips that follow the natural undulations of the uneven garden terrain, containing gravel within a defined path width on ground that rises, falls, and changes direction without the rigid constraints of fixed paving or concrete path construction. I laid this design on a 30-foot path across a gently undulating garden surface that changed level by 8 inches across its length, using flexible steel edging and 14mm golden gravel at 3-inch depth on a weed membrane, and the flexible edging followed every contour of the uneven ground surface perfectly without any cutting or bending adjustment during installation.
Flexible Edging Types for a Gravel Path on Uneven Ground
Flexible steel edging, flexible polypropylene edging, and flexible aluminium edging are three edging types suited to a gravel path for uneven ground. Flexible steel edging at 3mm thickness and 100mm depth bends to a minimum curve radius of 12 inches and follows gentle gradients without creasing, costing $3 to $5 per linear foot. Flexible polypropylene edging at 100mm depth bends to a tighter minimum radius of 6 inches and costs $1 to $2 per linear foot, providing the most affordable flexible edging for an uneven ground gravel path with complex contours. Flexible aluminium edging at $4 to $7 per linear foot provides a more rigid final installation while still conforming to the uneven ground contours during installation.
Gravel Depth on Uneven Ground Garden Paths
Gravel on a path for uneven ground requires a minimum depth of 3 inches across the full path width, including the lower side of any cross-fall across the path surface, which means the gravel may be 4 to 5 inches deep on the higher side and 3 inches on the lower side to produce a level walking surface across the uneven ground width. I always check the gravel depth at both edges of the path at 3-foot intervals during installation using a depth gauge rod to confirm the minimum 3-inch depth is maintained throughout the full path length and width across the uneven ground surface.
Stepping Stone Path on Uneven Ground
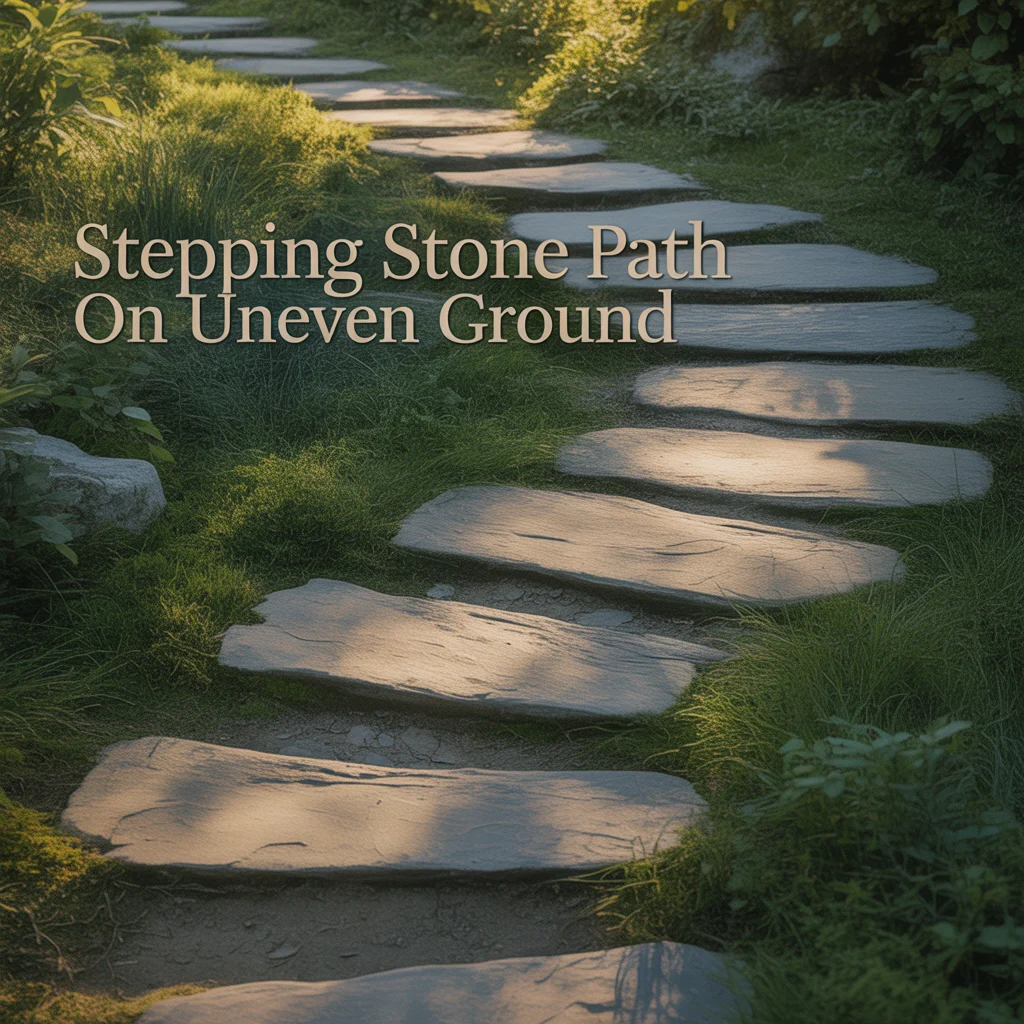
A stepping stone path on uneven ground sets individual flat stones at stride intervals across the irregular garden terrain, allowing each stone to be individually leveled on its sand bed regardless of the surrounding ground level, producing a path where each stepping element is safe and stable despite the uneven ground conditions between them. I set ten 20-by-20-inch sandstone stepping pads across a garden area where the ground undulated by 4 to 6 inches in irregular patterns, spending an additional 5 to 10 minutes per stone compared to a flat-ground installation to achieve consistent level surfaces across the full stepping stone path route.
Leveling Stepping Stones on Uneven Ground
Stepping stones on uneven ground are leveled individually by excavating each stone pocket to the stone thickness plus 20mm for a sharp sand bed, then adjusting the sand bed depth under each stone to compensate for the uneven ground level at that position. On rising ground, less sand is needed beneath the stone. On lower ground positions, more sand is added to raise the stone face to the consistent intended surface level across the path. I check the level of each stepping stone both along the path direction and across its width using a small spirit level before tamping the stone into its final position, which prevents cumulative level errors from developing across the full uneven ground path length.
Stepping Stone Spacing on a Sloped Uneven Ground Path
Stepping stone spacing on a sloped uneven ground path requires adjustment from the standard 16 to 18-inch stride interval used on flat ground because walking uphill shortens the stride and walking downhill lengthens it. On an uphill path, stepping stone centers are spaced at 14 to 16 inches to accommodate the shortened uphill stride. On a downhill path, stepping stone centers are spaced at 16 to 20 inches to accommodate the slightly longer downhill stride. I measure the natural stride length of the intended path user separately for uphill and downhill directions on any sloped uneven ground garden path before confirming stone spacing.
Bark Chip Path on Uneven Ground
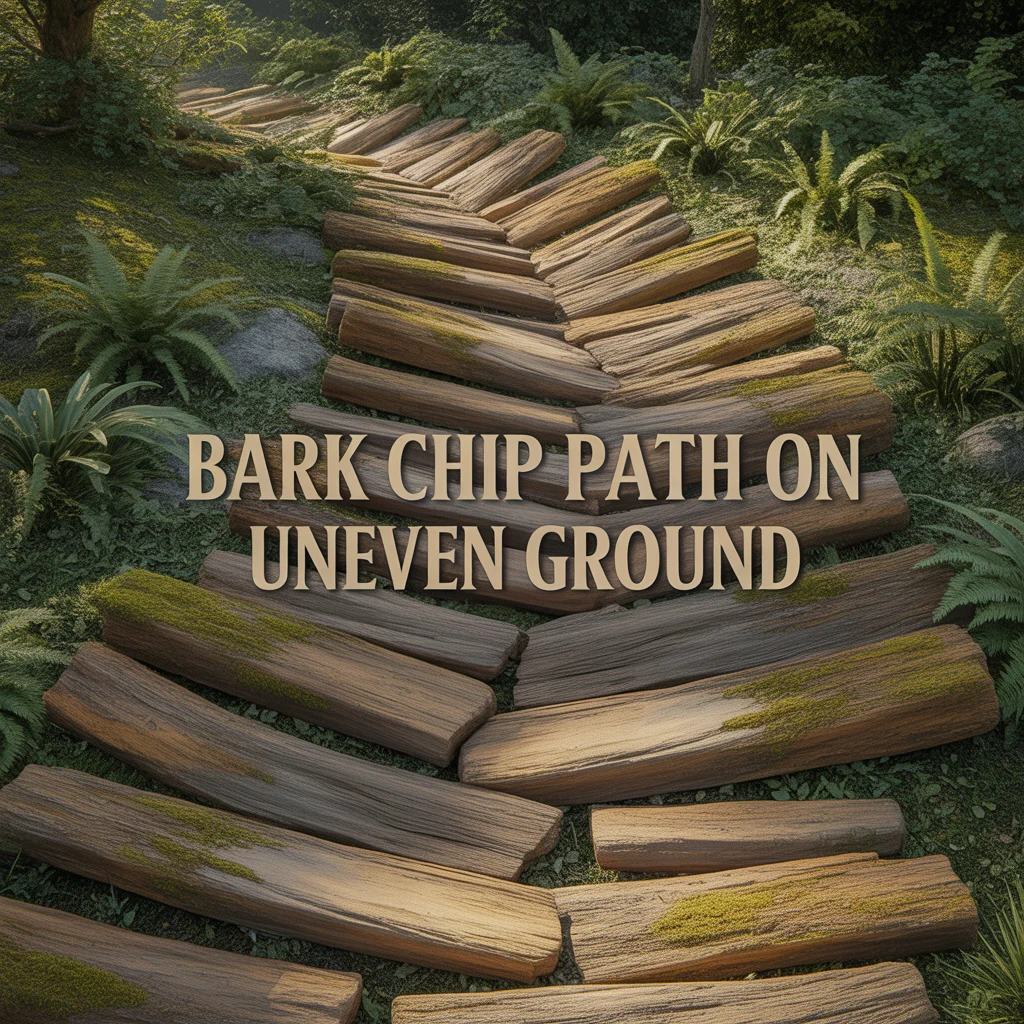
A bark chip path on uneven ground uses the loose, self-leveling character of bark chip material to create a path surface that adapts naturally to uneven ground contours without requiring excavation, leveling, or formal sub-base preparation, making it the most accessible and cheapest garden path for uneven ground available to a homeowner completing the project independently. I laid a bark chip path across a heavily undulating woodland garden area with ground level changes of 10 to 14 inches by simply spreading medium bark chip at 4-inch depth across the contoured surface using a wheelbarrow and rake, and the self-leveling bark filled the low points and covered the high points to produce a walkable surface across the full uneven ground area in under three hours.
Bark Depth Adjustments for Uneven Ground Paths
Bark chip on an uneven ground path requires depth adjustment across the path surface to produce a relatively level walking surface across ground that rises and falls irregularly. On low ground positions, bark depth increases to 5 or 6 inches to fill the hollow and raise the surface to the general path level. On high ground positions, bark depth reduces to 2 to 3 inches where the ground is already at or above the intended path surface level. I always lay a weed-suppressing membrane across the full path area before spreading bark on an uneven ground path, pressing the membrane into the ground contours rather than stretching it flat, which maintains weed suppression across the full uneven surface.
Edging a Bark Chip Path on Uneven Ground
Edging a bark chip path on uneven ground uses flexible log roll, flexible polypropylene edging, or random rock border stones that follow the ground contours rather than requiring a straight, level edging installation. Flexible log roll edging of 3 to 4-inch diameter rounded sections wired together in a continuous roll follows gentle gradient and contour changes and costs $4 to $7 per linear foot, suiting a naturalistic uneven ground bark path in a woodland or informal garden. Random rock border stones of 6 to 12 inches placed end to end along the path edge follow any ground contour and suit a very informal or rustic uneven ground bark path where the rock border coordinates with the natural garden character.
Terraced Path Design for a Sloped Garden
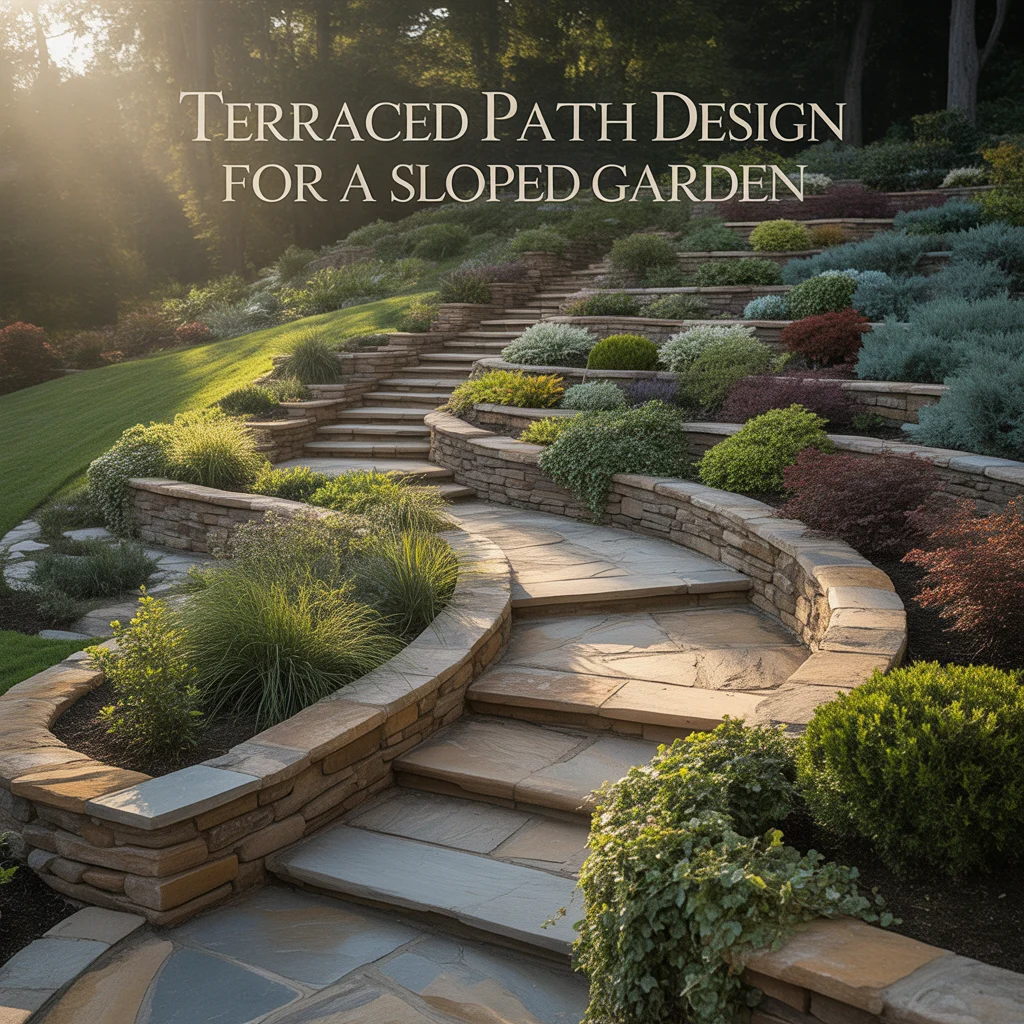
A terraced path design for a sloped garden creates a series of level platforms connected by short step sections across an uneven sloped ground surface, transforming a continuous slope into a sequence of usable flat terraces that are individually accessible by safe, well-defined steps connecting each terrace level. I designed a terraced path for a garden with a 1-in-5 gradient across its 40-foot length, creating four terraces of 8 to 10 feet depth at different levels connected by two-step sections between each terrace, and the terraced path design converted a steep uneven ground area into four distinct garden spaces each suitable for planting, seating, or productive growing.
Terrace Width for a Sloped Garden Path
A terrace on a sloped garden path measures most effectively at a minimum of 6 feet in depth from the rear retaining element to the front edge of the terrace, which provides enough usable flat ground for comfortable standing, garden furniture, or planting beds alongside the connecting path route. Terraces narrower than 4 feet depth do not provide enough usable flat space to justify the construction of a retaining element and simply function as wider step landings rather than genuine usable terrace spaces. I design sloped garden terraces at 8 to 12 feet depth as the standard specification on residential sloped garden path projects, which balances the number of level changes needed against the usable space each terrace provides.
Retaining Elements for a Terraced Sloped Garden Path
Railway sleeper retaining walls, natural stone dry-stone walls, and gabion basket retaining walls are three retaining element types suited to a terraced path design for uneven sloped ground. Railway sleeper retaining walls using single 200mm sleepers on edge provide 200mm of retained height per course and suit a sloped garden path where the timber character of the retaining element coordinates with a naturalistic or informal garden design. Natural stone dry-stone walls provide the most naturalistic retaining element for a terraced uneven ground path in a rural or country garden. Gabion basket retaining walls suit a contemporary uneven ground garden path where the industrial character of the wire mesh and stone fill coordinates with a modern garden design.
Sloped Garden Ideas on a Budget Using Compacted Hoggin
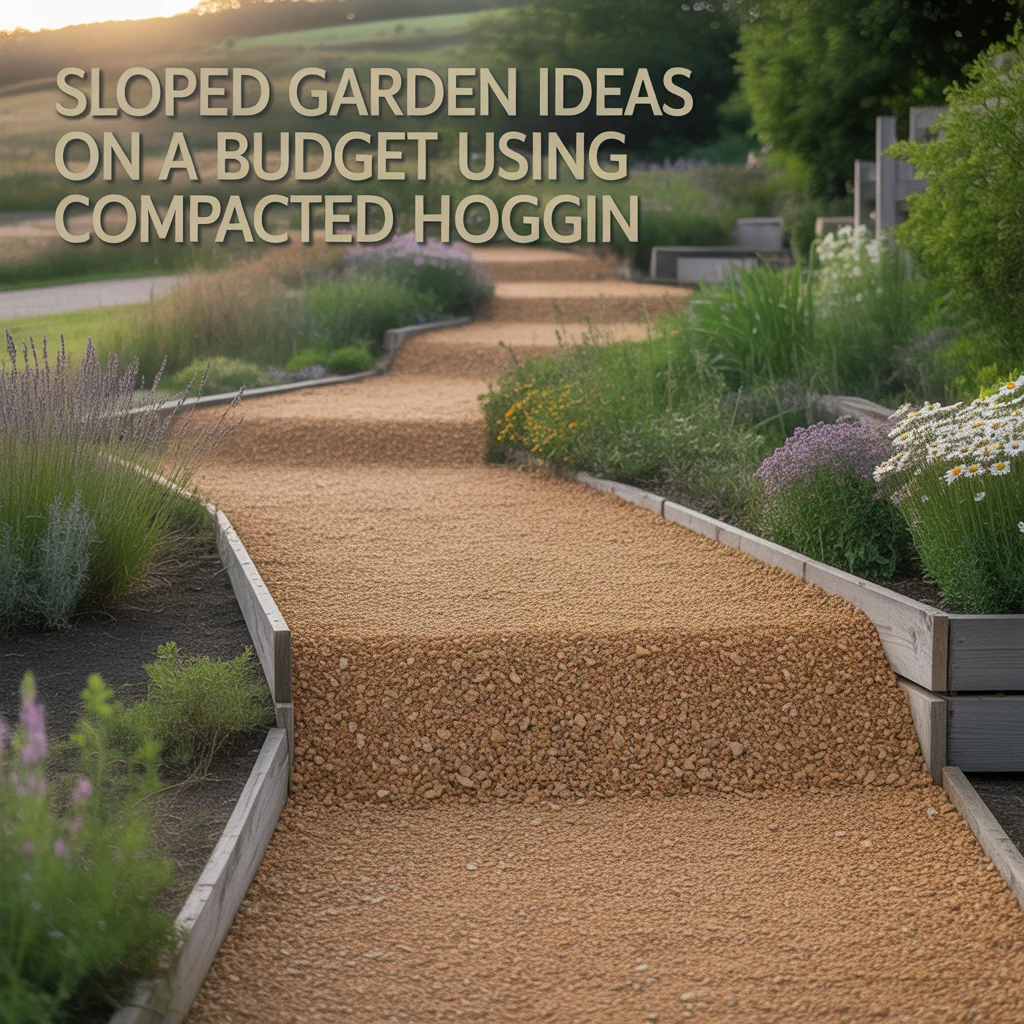
A sloped garden path on a budget using compacted hoggin creates a firm, self-binding gravel surface that sets hard when compacted and suits gentle to moderate gradient changes across uneven garden ground at a material cost of $1.50 to $3.00 per square foot. I used hoggin on a sloped garden path at a budget residential project where the ground dropped 24 inches over 35 feet, compacting the hoggin in two 1.5-inch layers using a hand tamper and creating a firm, all-weather path that suited the uneven ground without the cost of steps, sleepers, or formal paving materials. Hoggin is genuinely one of the most underused cheap garden path ideas for uneven ground.
Installing Hoggin on a Sloped Uneven Ground Path
Hoggin on a sloped uneven ground path is installed by excavating 3 to 4 inches of soil across the path area, installing flexible edging on both sides to contain the hoggin during compaction, spreading the first 1.5-inch layer of hoggin across the full excavated path area, compacting it firmly with a hand tamper or plate compactor hired at $45 per day, spreading the second 1.5-inch layer on top, and compacting again until the surface is firm, level, and does not deflect under foot pressure. A light watering of the hoggin surface after final compaction activates the natural lime binder in the crushed limestone aggregate and speeds the surface curing to a hard, all-weather finish. For uneven sites where a more decorative natural stone finish is preferred over hoggin, alternative materials are covered in these stunning stone garden path solutions for uneven surfaces.
Hoggin vs Gravel for a Sloped Uneven Ground Path
Hoggin and gravel are two loose path surface materials suited to uneven ground garden paths, with practical differences affecting their suitability for different gradient levels. Hoggin compacts to a firm, bound surface that remains stable on gradients up to 1 in 8 without the material rolling or shifting underfoot, making it suitable for a moderately sloped uneven ground path. Gravel at 14mm to 20mm chip size rolls underfoot on gradients above 1 in 12 and requires cross-fall containment by edging on the downhill side to prevent the material from washing away during rain events. I specify hoggin rather than gravel on any uneven ground garden path with a gradient steeper than 1 in 12.
Stepping Stone Path Through Grass on Uneven Ground
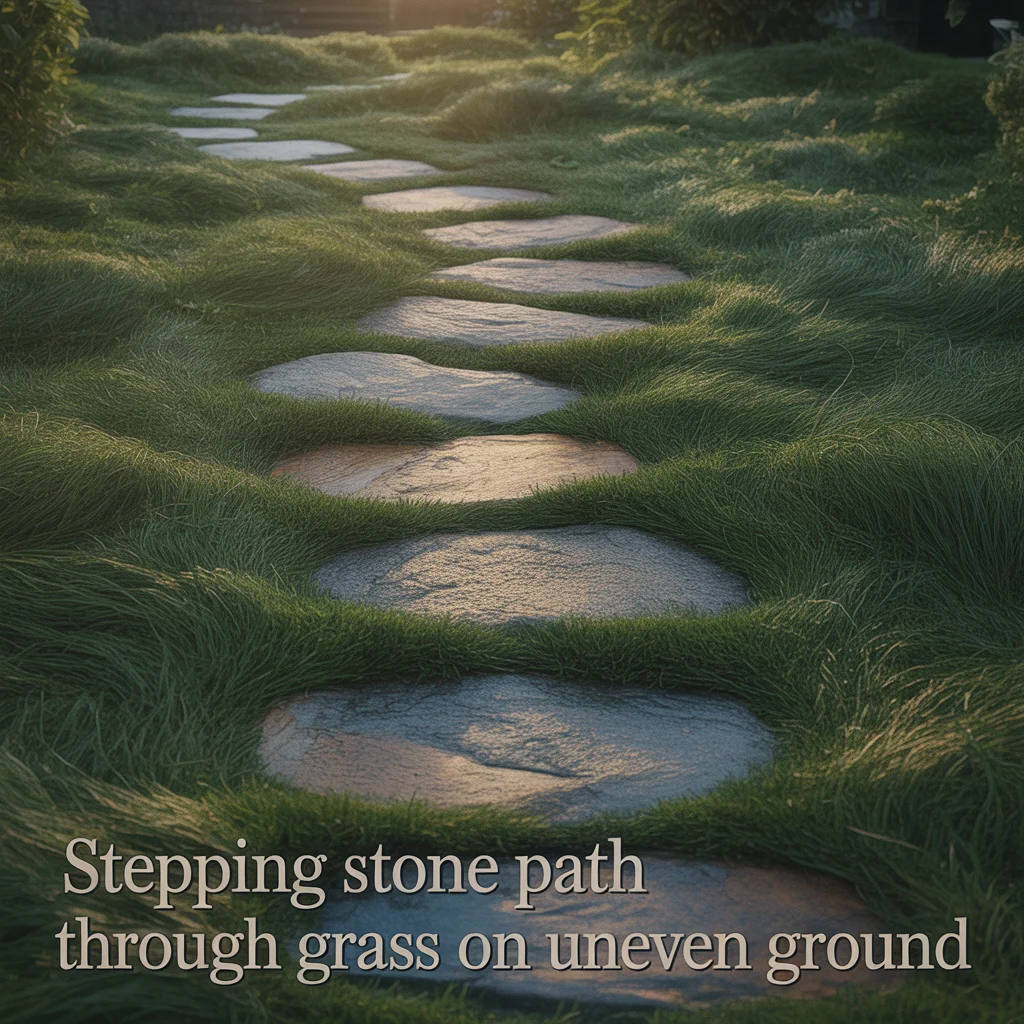
A stepping stone path through grass on uneven ground sets individual flat paving pads flush with the lawn surface across an uneven garden area where the ground level changes gradually rather than sharply, allowing the lawn mower to pass directly over the stones as it follows the undulating lawn surface and eliminating manual edge trimming around the stepping stone path on the uneven ground. I installed this design on a garden lawn with an irregular ground surface that changed by 6 to 8 inches across the lawn area, using 24-by-24-inch concrete pavers set individually to the contour of the uneven ground surface, and each stone required between 10 and 25 minutes of leveling work depending on the local ground level variation at each stone position.
Small Garden Paths for Uneven Ground Using Grass Stepping Stones
Small garden paths for uneven ground using flush grass stepping stones work most effectively in garden areas where the ground undulates gently with level changes of under 8 inches across the path length, because more severe level changes require the stepping stones to be set at height differences that create trip hazards at the stone edges. For gentle uneven ground with 2 to 4 inch level changes, each stepping stone is individually leveled on its sharp sand bed to the general path level and the grass grows back to the stone face within four to six weeks of installation. For uneven ground with 4 to 8 inch changes, adjacent stones may require a 1 to 2-inch height differential which is visible and acceptable.
Edging Stepping Stones in a Grass Uneven Ground Path
Stepping stones set in a grass uneven ground path do not require any additional edging material because the grass itself surrounds each stone face on all sides and the mower passes over the stone surface at the consistent 25mm mowing height. The only edging consideration on an uneven ground grass stepping stone path is ensuring the stone face sits 5mm above the surrounding grass level at installation, accounting for the grass growing back to stone face level within four to six weeks. I re-check the level of each stepping stone six weeks after installation on uneven ground sites and tap any stones that have settled below the turf level back up to the correct 5mm above-turf surface level.
Low Maintenance Garden Paths for Uneven Ground Using Resin Bound Surface
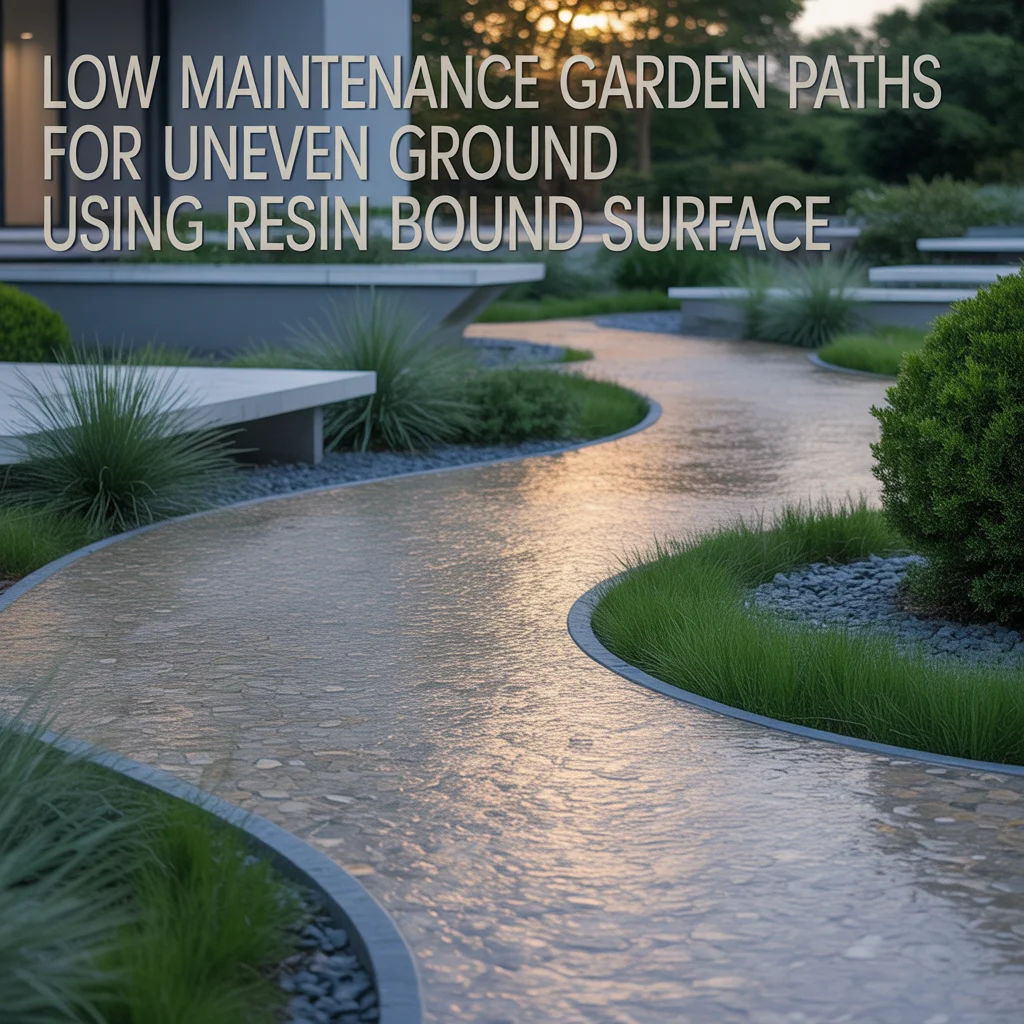
A low maintenance garden path for uneven ground using resin bound surface applies a self-leveling resin aggregate material over a screeded base layer that follows the uneven ground contours, creating a smooth, permeable, all-weather path surface that requires no annual maintenance beyond occasional sweeping. Resin bound paths are professionally installed at $25 to $45 per square foot and suit a homeowner seeking a permanent, low maintenance uneven ground path solution that eliminates the annual bark top-up, gravel redistribution, and step maintenance required by other uneven ground path materials. I have specified resin bound paths for several uneven ground garden path projects where long-term low maintenance was the absolute priority.
Resin Bound Path Installation on Uneven Ground
A resin bound path on uneven ground requires a prepared base layer of 50mm of compacted MOT Type 3 open-graded aggregate over the leveled uneven ground surface, which provides a permeable, stable base that follows the ground contours while providing a consistent depth for the 15mm resin bound wearing course applied on top. The aggregate base layer is the critical component of a resin bound path on uneven ground because an inadequately prepared or poorly compacted base produces a resin surface that cracks, sinks, or deforms within the first two years of use on the uneven ground site. I always require the resin bound installer to compact the aggregate base with a plate compactor in two passes before applying the resin wearing course.
Resin Bound Aggregate Colors for an Uneven Ground Path
Natural buff, dove grey, and golden flint are three resin bound aggregate colors suited to an uneven ground garden path. Natural buff aggregate provides a warm, neutral surface color that suits most garden styles and coordinates with stone, brick, and timber surrounding materials on an uneven ground garden path. Dove grey aggregate produces a cooler, more contemporary surface that suits a modern or minimalist garden path design on uneven ground. Golden flint aggregate produces the warmest and most visually distinctive resin bound surface color and suits a cottage or country garden uneven ground path where the warm golden tone coordinates with natural stone and terracotta garden materials.
Upward Sloping Garden Path Ideas

Upward sloping garden path ideas address the specific design and safety requirements of a path that climbs from a lower level to a higher level across an uneven garden slope, where the primary concerns are preventing the path surface from becoming slippery when wet, managing the visual foreshortening effect that makes an upward sloping path appear shorter and steeper than it actually is, and selecting materials that remain stable on a gradient without shifting downhill under foot pressure or during rain events. I designed three upward sloping garden paths in the same year on sites with gradients of 1 in 8, 1 in 6, and 1 in 4, and found that each gradient level required a completely different design approach.
Path Materials Suited to an Upward Sloping Garden
Railway sleeper steps with compacted gravel treads, natural stone flag steps, and textured brick pavers are three materials suited to an upward sloping garden path. Railway sleeper steps with compacted gravel treads suit a gradient of 1 in 4 or steeper where the path must change level in defined increments rather than ramping continuously up the slope. Natural stone flag steps using sandstone or limestone flags at 40mm thickness suit a gradient of 1 in 6 to 1 in 4 where the step riser height of 100 to 150mm per flag course provides a comfortable ascent on the upward sloping path. Textured brick pavers suit a gradient up to 1 in 8 where the textured surface provides adequate grip on the upward slope without requiring formal step risers. Additional brick path solutions for sloped or uneven sites are covered in these narrow brick garden paths on sloped uneven ground.
Cross-Fall Design on an Upward Sloping Garden Path
An upward sloping garden path requires a cross-fall of 1 in 40 to 1 in 60 across the path width to shed rainwater toward the lower edge of the path surface and prevent water running directly down the slope direction on the sloping path surface. A path that slopes upward along its length without any cross-fall channels rainwater down the center of the path, creating a water course on the walking surface that erodes loose materials, makes the path slippery in wet conditions, and concentrates drainage water at the lowest point of the upward sloping path rather than dispersing it across the surrounding garden.
Sloping Garden Ideas With Steps and Planting

Sloping garden ideas with steps and planting combine a stepped path design with deliberate planting on the retained slopes between each step level to create a sloped garden where the uneven ground is both navigated safely by the steps and decorated by the surrounding planting at each level change. I designed a sloped garden path with steps and planting at a residential project, using railway sleeper risers at 5-foot intervals down a 1-in-5 gradient with ornamental grass planting of Miscanthus sinensis on both sides of each tread and Echinacea purpurea planted on the retained slopes between the step levels, and the combination of the structured steps and the naturalistic planting produced a sloped garden that looked deliberately designed at every level.
Plants for Sloped Garden Paths With Steps
Miscanthus sinensis, Pennisetum alopecuroides, and Geranium macrorrhizum are three plants suited to the slopes and step edges of a sloped garden path for uneven ground. Miscanthus sinensis produces tall arching grass plumes of 4 to 6 feet that suit the retained slope banks between railway sleeper steps on an uneven ground path, providing a naturalistic, low-maintenance planted bank that covers the retained slope surface within two growing seasons. Pennisetum alopecuroides provides a more compact grass alternative at 24 inches height that suits a narrower slope bank between step levels. Geranium macrorrhizum provides a spreading, fragrant ground cover for the slope banks between path steps.
Ground Cover for Retained Slopes on a Sloped Garden Path
Vinca minor, Pachysandra terminalis, and Hedera helix are three ground cover plants suited to retained slope banks on a garden path for uneven ground. Vinca minor spreads at 18 to 24 inches per season and covers retained slope banks between stepped path levels within two growing seasons, suppressing weeds on the uneven ground slope surface without any ongoing maintenance after establishment. Pachysandra terminalis provides a dense, evergreen mat on the slope banks and tolerates the dry, shaded conditions common on retained slopes alongside a stepped uneven ground garden path. Hedera helix, ivy, provides the fastest-establishing slope ground cover for a retained bank alongside a sloped garden path.
Sloping Garden Ideas for a Budget Using Timber Steps and Bark
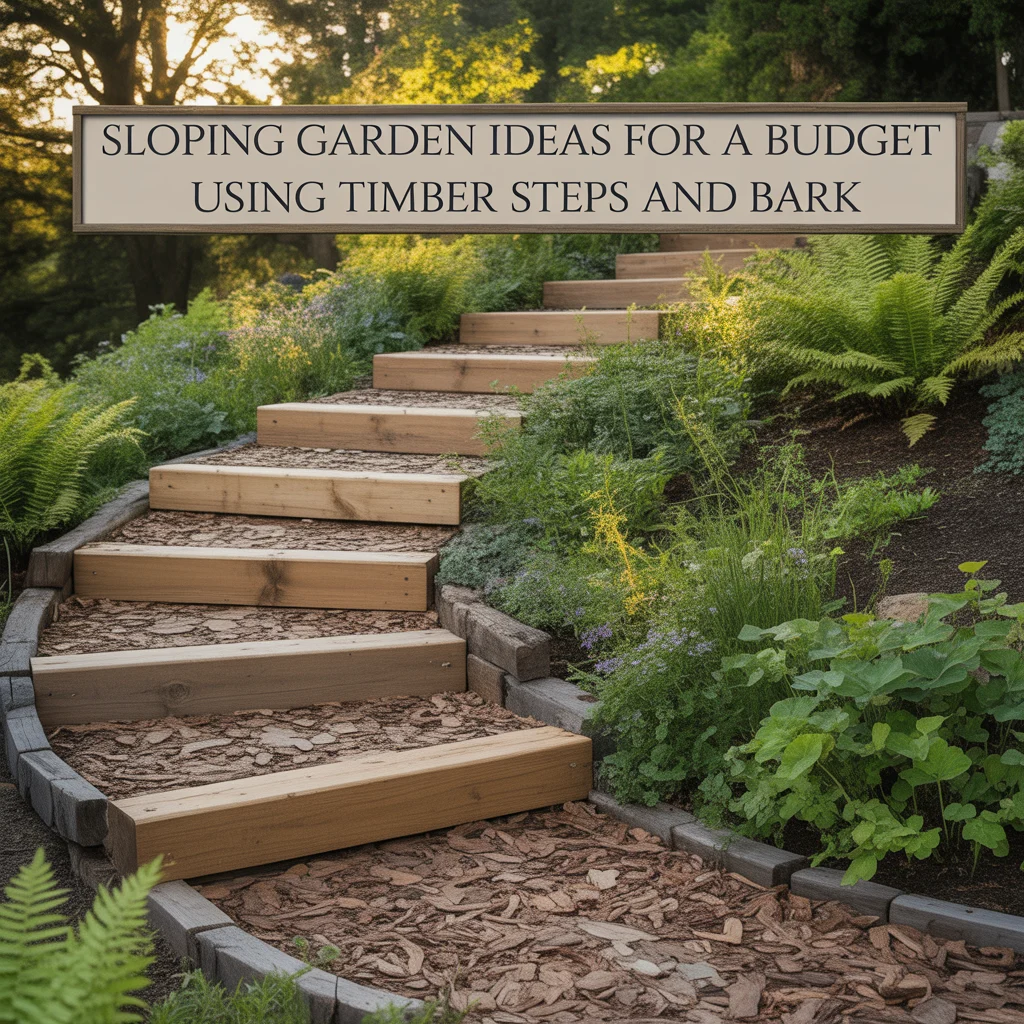
Sloping garden ideas on a budget using timber steps and bark chip treads create a complete stepped path for an uneven or sloped garden for under $100 in materials for a standard 20-foot sloped path, making this the most affordable formal stepped path solution for challenging uneven garden ground. I completed a budget sloped garden path using eight pressure-treated softwood steps at $9 each and six bags of bark chip at $8 each for a 25-foot sloped path with a total material cost of $72, and the finished path provided a safe, navigable route down a 1-in-5 garden slope that had previously been dangerously slippery in wet conditions throughout the autumn and winter months.
Budget Timber Step Construction for a Sloped Garden
Budget timber steps for a sloped garden path use 3-by-2-inch pressure-treated softwood as the riser board, fixed between two 18-inch-long 2-by-2-inch stakes driven into the slope on both ends of each riser position. The stake is driven 12 inches into the slope and the riser board is fixed to the stake face using 3-inch galvanized screws at two fixing points per stake. The tread area behind each riser is filled with bark chip at 4-inch depth, spread level between the riser board and the next step position upslope. I secure the bark chip tread with a single layer of weed membrane pinned to the slope surface before spreading the bark, which prevents the bark from washing downhill during rain events on the sloped uneven ground path.
Bark Chip Tread Maintenance on a Budget Sloped Garden Path
Bark chip treads on a budget sloped garden path require one maintenance visit per year in March to top up any bark that has compacted or washed downhill during the preceding autumn and winter weather. The top-up quantity is approximately half a bag of bark per tread for a standard 3-foot-wide by 4-foot-deep tread area, costing $4 to $6 per tread per year in material cost. I compact the top-up bark into each tread by walking across it repeatedly during the top-up process, which prevents the fresh loose bark from immediately shifting underfoot during the first few days of use after the annual maintenance top-up.
Garden Paths for Uneven Ground Near Tree Roots
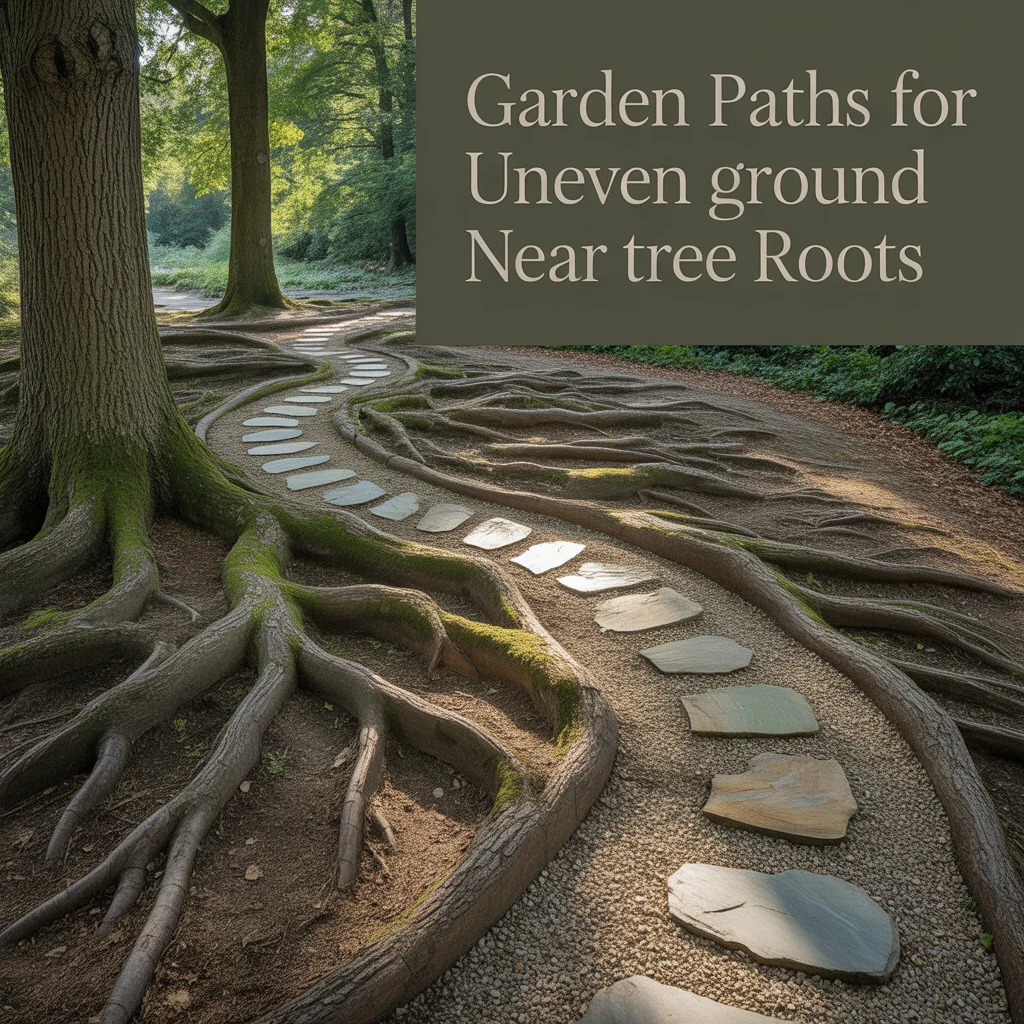
Garden paths for uneven ground near tree roots face the additional challenge of existing surface root systems that create irregular bumps, ridges, and height changes in the ground surface that cannot be excavated or removed without damaging the tree’s structural and feeder root system. I designed a garden path for uneven ground caused by surface oak tree roots at a residential project, using large irregular limestone stepping stones set between and around the root ridges without any sub-base excavation, and the stepping stone path navigated the root-disrupted uneven ground successfully while preserving the full root system of the 80-year-old oak tree throughout the installation.
Materials Suited to Paths Near Tree Roots on Uneven Ground
Large irregular stepping stones, loose bark chip, and compacted wood chip are three materials suited to a garden path for uneven ground created by surface tree roots. Large irregular stepping stones of 18 to 30 inches can be set individually on sharp sand between root ridges without requiring any excavation of the roots themselves, creating a path that navigates the uneven root-disrupted ground without any root damage during installation. Loose bark chip requires no excavation and simply covers the root-disrupted uneven surface at sufficient depth to provide a walkable surface, with the bark conforming naturally to the irregular root topography. Compacted wood chip provides a firmer surface than loose bark on root-disrupted uneven ground.
Installing Paths Near Tree Roots Without Damage
Installing a garden path near tree roots on uneven ground requires avoiding all excavation within the tree’s root protection zone, which extends radially from the trunk at a distance equal to 12 times the trunk diameter in centimeters. For a tree with a 30cm trunk diameter, the root protection zone extends 360cm, or approximately 12 feet, from the trunk center in all directions. I use hand trowels rather than spades for any soil work within the root protection zone of an established tree on an uneven ground garden path project, and I suspend any soil disturbance entirely within 3 feet of the trunk base regardless of the visible surface root positions.
Accessible Garden Paths for Uneven Ground
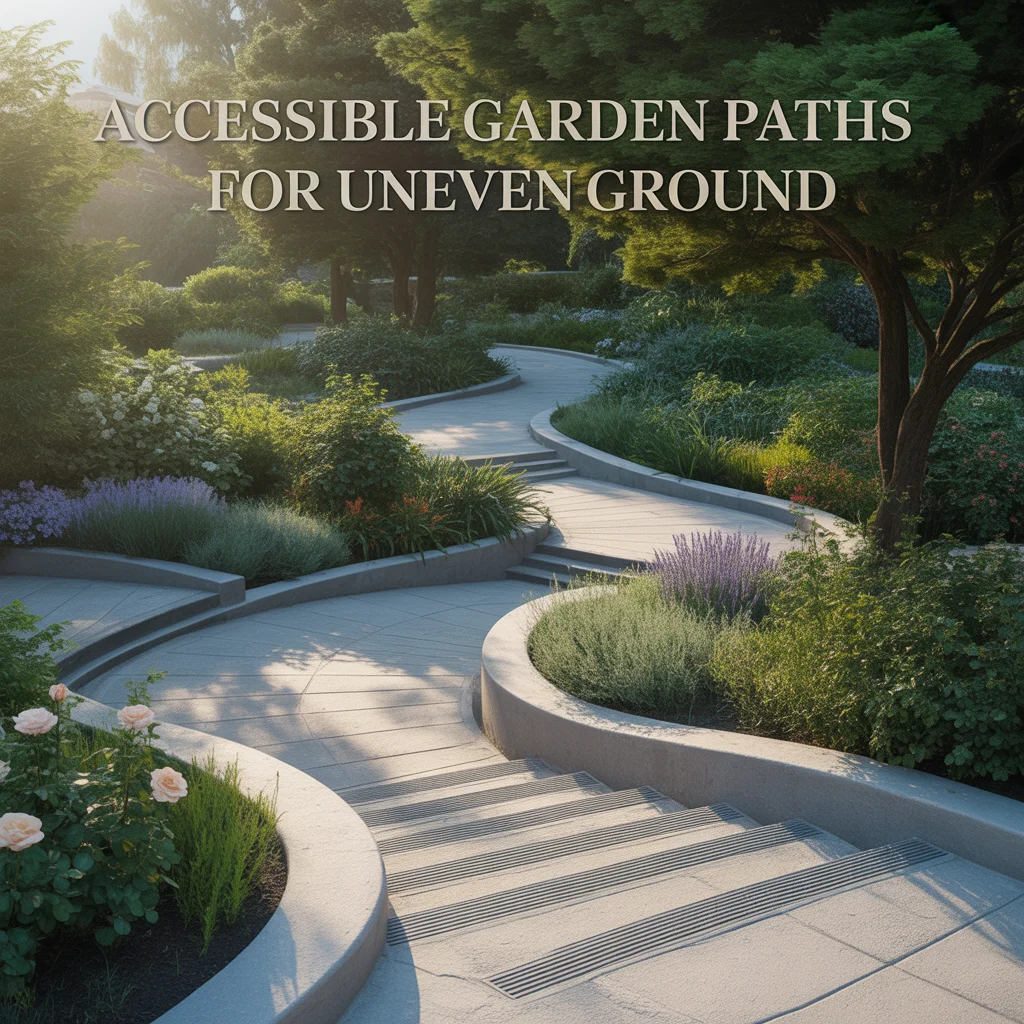
Accessible garden paths for uneven ground prioritize safe navigation for elderly users and people with limited mobility by maintaining the maximum gradient permitted for a wheelchair or mobility aid, using non-slip surface materials, and avoiding sudden level changes that present trip hazards on the uneven garden terrain. I designed an accessible garden path for uneven ground at a residential project for an elderly homeowner with limited mobility, using resin bound aggregate at 1-in-20 gradient with 100mm stainless steel handrail posts at 3-foot intervals on both sides, and the accessible path converted an unusable sloped uneven ground area into a safe, daily-use garden route for the homeowner.
Maximum Gradient for an Accessible Garden Path
An accessible garden path for uneven ground complies with BS 8300:2018, the British Standard for accessible design, at a maximum gradient of 1 in 20 for a continuously ramped path used by wheelchair users and those with mobility difficulties, or 1 in 12 for a short ramp of less than 2 meters in length. I calculate the required ramp length for a given level change by multiplying the vertical rise in millimeters by 20 for a 1-in-20 gradient or by 12 for a 1-in-12 gradient. A 200mm rise on an uneven ground path requires a ramp of 4,000mm at 1-in-20 gradient to comply with BS 8300 accessible design standards for a garden path used by mobility aid users.
Non-Slip Surfaces for Accessible Uneven Ground Paths
Resin bound aggregate, brushed concrete, and textured rubber safety matting are three non-slip surfaces suited to an accessible garden path for uneven ground. Resin bound aggregate provides a slip resistance of R11 to R12 on a wet surface and suits a permanent accessible path for uneven ground where a high-quality, long-lasting non-slip surface is the priority. Brushed concrete provides a slip resistance of R11 to R12 when the brush texture is applied in the direction perpendicular to the path slope, suiting a budget accessible path for uneven ground where the concrete can be laid by a general contractor without specialist resin bound skills. Textured rubber safety matting provides an immediate non-slip surface for temporary accessible path needs.
Sloping Garden Path Ideas for a Front Garden

Sloping garden path ideas for a front garden address the specific combination of uneven sloped ground and public-facing visibility that characterizes a front garden path on a sloped site, where the path must be both practically safe to navigate on the uneven ground and visually attractive when viewed from the street. I redesigned a front garden sloped path at a terraced property where the ground dropped 30 inches from the pavement to the front door over 15 feet, using four natural sandstone steps with planted risers of Erigeron karvinskianus to soften the stone riser face, and the stepped front garden path on the uneven ground produced a significantly more attractive street-facing entrance than the crumbling concrete ramp it replaced.
Front Garden Sloped Path Step Design Options
Planted riser steps, split-level platform steps, and curved sweeping steps are three design options suited to a front garden sloped path for uneven ground. Planted riser steps use natural stone or brick risers with a planting pocket at the base of each riser face for trailing or low-growing plants that soften the hard stone edge and add seasonal color to the sloped front garden path. Split-level platform steps create small landing areas between each step level, giving the sloped front path a more formal, deliberate appearance suited to a period property. Curved sweeping steps use a semi-circular or fanlike step layout that suits a wide sloped front garden where the path width allows the steps to spread outward as they descend the uneven ground slope.
Materials for a Front Garden Sloped Path on Uneven Ground
Natural sandstone steps, brick steps, and reconstituted stone steps are three materials suited to a front garden sloped path for uneven ground. Natural sandstone steps in buff or honey tones provide the most naturally attractive material for a front garden sloped path and suit a cottage or traditional property at $15 to $25 per square foot installed. Brick steps using clay or engineering bricks suit a Victorian or period front garden sloped path and provide a durable surface at $8 to $15 per square foot. Reconstituted stone steps provide an affordable alternative to natural stone at $8 to $14 per square foot while offering a greater range of standard sizes than natural stone for a sloped uneven ground front garden path.
Sloping Garden Path Ideas With Photography in Mind

Sloping garden path ideas with photography in mind use the natural visual drama of an uneven sloped ground surface to create a garden path that photographs well from multiple angles, exploiting the depth and perspective effects produced by a sloping path that a flat path cannot replicate. I have noticed that the most widely shared garden path photographs on Pinterest and Instagram consistently feature paths on sloped or uneven ground where the gradient produces a strong vanishing point perspective and the level changes create a sequential visual narrative as the eye moves from the path entrance to the distant terminus. A sloped garden path on uneven ground is inherently more photogenic than a flat path of identical materials.
Photogenic Design Elements for a Sloped Uneven Ground Path
Strong perspective lines, seasonal planting alongside the path, and a clear visual terminus are three design elements that make a sloped garden path on uneven ground photograph well. Strong perspective lines created by the parallel edges of the path converging toward the upper slope terminal point produce the most compelling photographic viewpoint on a sloped uneven ground garden path. Seasonal planting of lavender, ornamental grasses, or roses on both sides of the sloped path adds color, texture, and frame to the path perspective in photographs taken from the lower path entrance viewpoint. A clear visual terminus such as a gate, arch, bench, or planted focal point at the top of the sloped path provides a destination that draws the eye through the full length of the uneven ground path.
Camera Angles for a Sloped Garden Path
Low angle from the path base, elevated angle from above, and mid-path level angle are three camera positions suited to photographing a garden path for uneven ground. A low angle photograph taken from the lowest point of the sloped path at ground level emphasizes the gradient, exaggerates the perspective converging lines of the path edges, and maximizes the sense of movement upward through the uneven ground garden space. An elevated angle from above the sloped path compresses the perspective and displays the full path layout, step positions, and planting arrangement on the uneven ground surface simultaneously. A mid-path level angle taken from 5 to 6 feet height on the slope shows the path, planting, and upper garden destination in balanced proportion.
Year-Round Maintenance Plan for a Garden Path on Uneven Ground
A year-round maintenance plan for a garden path on uneven ground addresses the additional maintenance demands that uneven terrain creates compared to flat ground paths, including checking step riser fixings after winter frost cycles, re-leveling stepping stones displaced by ground movement, redistributing gravel washed toward the lower end of a sloped path by rain, and topping up bark chip treads between sleeper steps after winter settlement and decomposition. I follow a four-task seasonal maintenance plan on all uneven ground garden paths I manage, and find the annual maintenance time averages 2 to 3 hours for a standard 25-foot uneven ground path compared to 30 to 45 minutes for an equivalent flat-ground path of the same material.
Spring Maintenance for a Garden Path on Uneven Ground
Step riser inspection, re-leveling of any displaced stepping stones, gravel redistribution, and bark top-up are four spring maintenance tasks completed in March or April on a garden path for uneven ground. Step riser inspection checks each railway sleeper or stone riser for movement caused by winter frost heave, re-driving any displaced stakes and re-fixing any loose riser boards before the main path use season begins. Re-leveling displaced stepping stones involves lifting each stone, adjusting the sharp sand bed beneath, and re-tamping the stone to the correct level after winter ground movement has altered its position. Gravel redistribution rakes the path gravel from the lower path end back uphill to restore an even depth across the sloped uneven ground surface.
Autumn Maintenance for a Garden Path on Uneven Ground
Leaf removal, drainage clearance, and anti-slip treatment are three autumn maintenance tasks completed in October and November on a garden path for uneven ground. Leaf removal from a sloped uneven ground path is more urgent than on a flat path because wet leaves on a sloped surface create a significantly more hazardous slip condition than the same leaf cover on flat ground, and the gradient accelerates the movement of leaves into path hollows and step treads where they compact most dangerously. Drainage clearance removes debris from any drainage channels or French drains installed alongside the uneven ground path to prevent blockages that would cause water to run onto the path surface during winter rain events.
Related
best ground cover plants to stabilize uneven garden paths
how to add lighting to an uneven garden path safely
flagstone path ideas for managing slopes and uneven levels
Frequently Asked Questions
What is the best path material for uneven ground?
Railway sleeper steps with bark chip or gravel treads are the best path material for uneven ground because they address the two primary challenges of uneven terrain simultaneously: the need to manage level changes safely through defined step risers and the need for a stable, all-weather surface material between each level change. Gravel with flexible edging is the best choice for gently undulating ground with level changes under 8 inches. Stepping stones in grass suit very gently undulating ground with changes under 4 inches. Resin bound aggregate is the best premium low-maintenance solution for uneven ground paths requiring a permanent, professional-quality surface.
How do I make a cheap garden path for uneven ground?
A cheap garden path for uneven ground is made using pressure-treated softwood step risers at $8 to $15 each and bark chip treads at $8 per bag, producing a complete stepped path for a standard sloped garden for under $100 in materials. Stepping stones using reclaimed concrete slabs at zero cost set individually on sharp sand beds across gentle uneven ground produce a completely free path surface material. Compacted hoggin at $1.50 to $3.00 per square foot provides the cheapest continuous paved surface for uneven ground. Free wood chip from local tree surgeons spread directly over the uneven ground surface at 4-inch depth produces a walkable path with zero material cost.
How do I stop a garden path from washing away on a slope?
A garden path on a slope is prevented from washing away by installing cross-fall drainage of 1 in 60 across the path width, using step risers at gradient intervals above 1 in 12, and selecting bound or contained surface materials rather than loose aggregate on steep gradients. Hoggin compacted in two layers provides a self-binding surface that resists wash-out on gradients up to 1 in 8. Bark chip on a weed membrane with timber edging on the downhill path edge retains bark during rain on gradients up to 1 in 10. Resin bound aggregate provides complete wash-out resistance on any practical garden path gradient when installed on a properly prepared permeable sub-base.
How do I make a garden path accessible on uneven ground?
A garden path on uneven ground is made accessible for elderly and mobility-impaired users by maintaining a maximum gradient of 1 in 20 on the path surface, using non-slip materials rated at R11 or above, and installing handrail posts at 3-foot intervals on both sides of any ramp section. BS 8300:2018 specifies 1 in 20 as the maximum gradient for an accessible path used by wheelchair users in a garden setting. A vertical rise of 200mm requires a ramp length of 4,000mm to comply with this standard. Resin bound aggregate provides the best combination of non-slip performance and smooth gradient control for an accessible garden path on uneven ground.
Can I lay a garden path on uneven ground myself?
A garden path on uneven ground is a practical DIY project for a homeowner with basic tool skills when using stepping stones, bark chip, or railway sleeper steps, all of which require only a spade, spirit level, rubber mallet, and basic hand tools without specialist equipment or professional skills. Stepping stone paths on gentle uneven ground require 15 to 25 minutes per stone for leveling and setting. Bark chip paths require only spreading and raking with no excavation on mild uneven ground surfaces. Railway sleeper steps require a club hammer, drill, and galvanized screws for fixing the riser stakes, which most homeowners possess. Resin bound aggregate and formal stone steps on steep uneven ground require professional installation for a reliable, long-lasting result.