
Checkered Backyard Patio Ideas to Steal

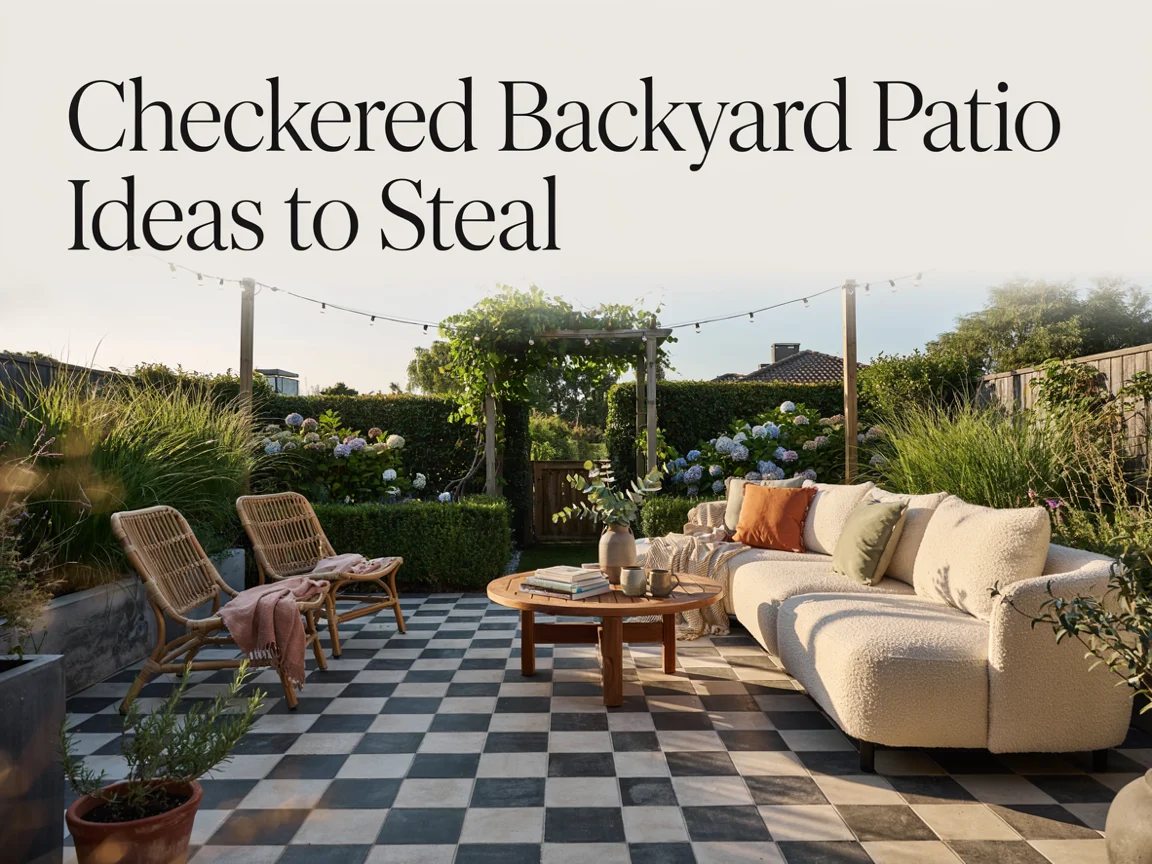
I have spent years walking other people’s patios before I ever laid a single tile of my own. That is not a confession — it is simply how a good checkered patio gets designed. Every checkered floor I have ever admired taught me something I later carried home: a way of sizing the squares so they read clearly from a seated height, a colour pairing glimpsed on a café terrace, a single clever trick for keeping a grout line straight that an old tiler showed me years ago. The best checkered patios are rarely dreamed up from nothing — they are pieced together by people who noticed a good pattern somewhere else and had the nerve to copy it. So this article is exactly that: a collection of the most brilliant checkered backyard patio ideas I have stolen, tested, and stolen again, the ones that work on almost any backyard, large or small, modern or traditional. Take all of them. Steal shamelessly. That is how a good checkered patio gets built.
Checkered backyard patio ideas are the proven pattern, material, and layout tricks that turn a plain outdoor floor into a bold, graphic centrepiece — classic black-and-white pavers, painted concrete grids, mixed-material checkers, and softened colour variations — drawn from the best patios and adaptable to almost any backyard. These ideas give a patio its striking visual identity and its sense of order, while the backyard setting gives each idea the open space, the natural light, and the surrounding greenery that make a checkerboard floor truly pop.
Over the years I have laid, painted, and studied checkered patios ranging from tiny courtyard squares to sprawling entertaining floors. I have kept the ideas that reliably impress and dropped the ones that look dated within a season, and I have watched the right checker pattern turn an ordinary concrete slab into the most photographed corner of the garden. In this article I am sharing the most brilliant checkered backyard patio ideas, covering classic patterns, colour choices, materials, scale, and the finishing touches that pull the whole look together.
The Classic Black-and-White Checkerboard
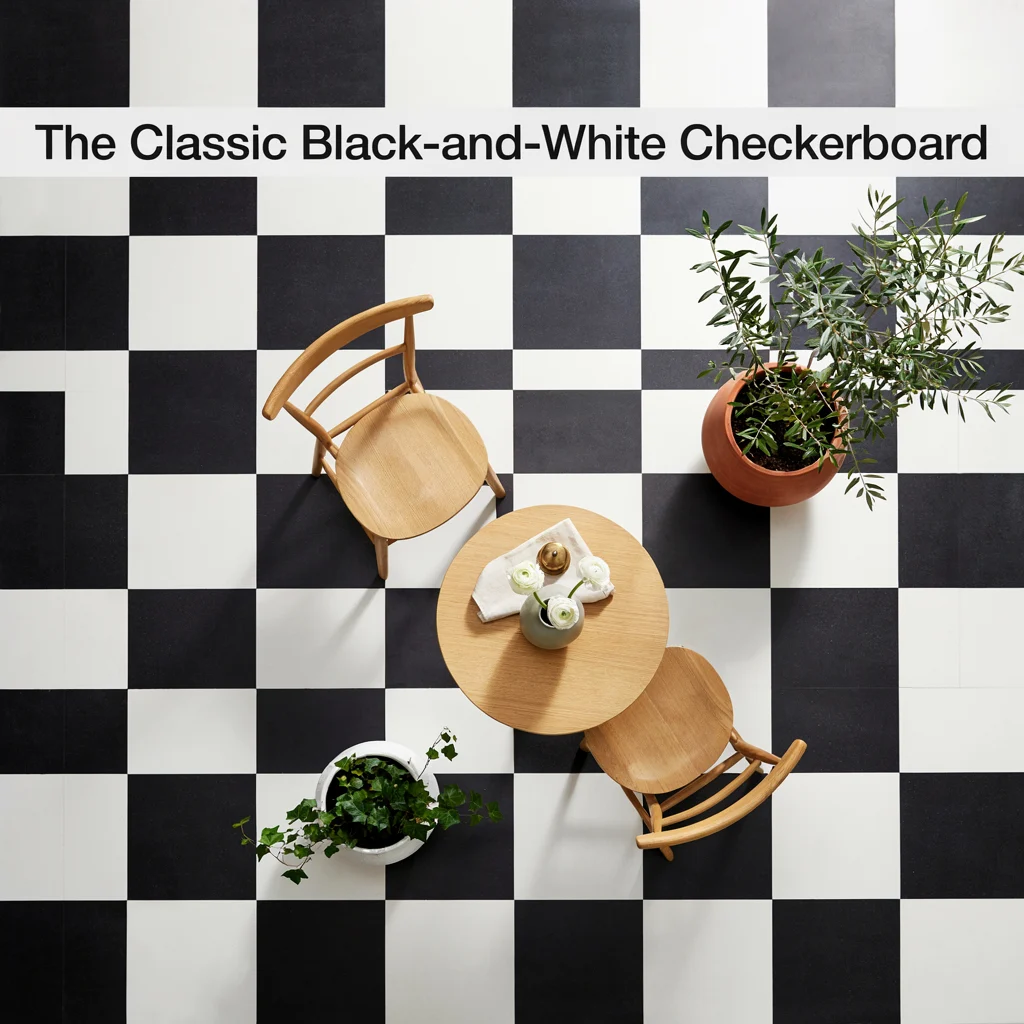
The classic black-and-white checkerboard is perhaps the single most brilliant checkered patio idea, using two high-contrast tones laid in a simple alternating grid to create instant graphic impact. I steal and use this pairing constantly, because nothing reads as cleanly or as timelessly as true black against true white, and a patio laid this way looks equally at home in a modern courtyard or a traditional cottage garden.
Why Black and White Works
Maximum contrast, timeless appeal, and easy coordination are three reasons black-and-white checker patterns work so well. Maximum contrast between the two tones makes the pattern read instantly, even from across the garden. Timeless appeal means the look never feels tied to a passing trend. Easy coordination with furniture, planting, and lighting comes from a palette that pairs with almost any colour scheme.
Getting the Proportions Right
Equal square sizing, a level base, and consistent grout lines are three details suited to a black-and-white checker floor. Equal square sizing keeps the grid feeling deliberate rather than uneven. A level base underneath prevents the pattern from looking warped once the tiles or pavers are down. Consistent grout lines throughout are what separate a crisp checkerboard from a messy one.
A Painted Concrete Checker Floor
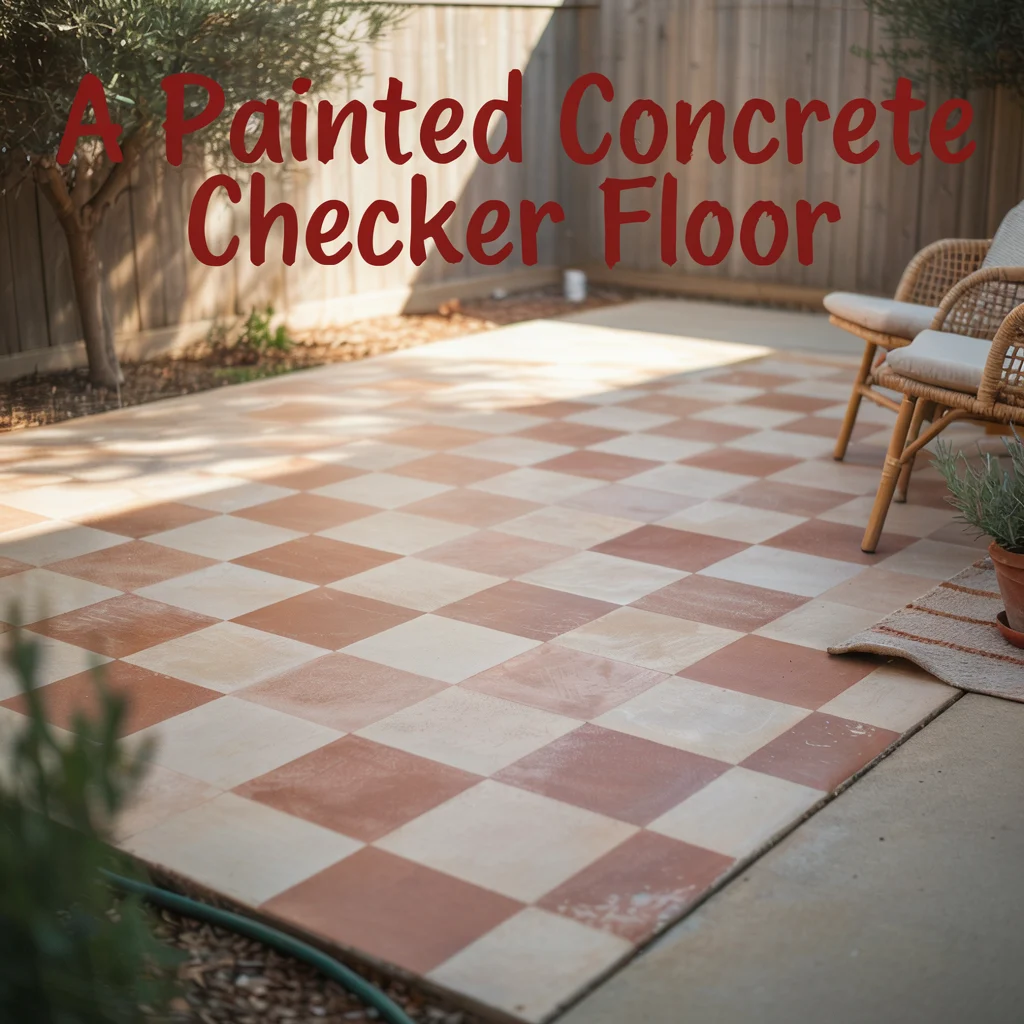
A painted concrete checker floor is the brilliant, budget-friendly idea that turns an existing slab into a striking pattern without any new material at all. I steal this trick whenever a patio already has sound concrete underneath, because a stencil and two tins of exterior paint can transform a tired grey slab into a bold checkerboard in a single weekend.
Preparing the Concrete
A clean surface, crack repair, and a primer coat are three preparation steps suited to painting concrete. A clean surface free of dirt and old sealant lets the new paint grip properly. Crack repair before painting stops small flaws from telegraphing through the finished pattern. A primer coat improves adhesion and makes the final colours look truer and more even.
Painting the Pattern
Measured chalk lines, painter’s tape, and a durable outdoor floor paint are three tools suited to painting a checker pattern. Measured chalk lines snapped across the slab keep every square accurate before a drop of paint goes down. Painter’s tape along each line gives crisp, professional edges. A durable outdoor floor paint rated for foot traffic keeps the finished pattern looking sharp through a full season of use.
Two-Tone Natural Stone Checkers
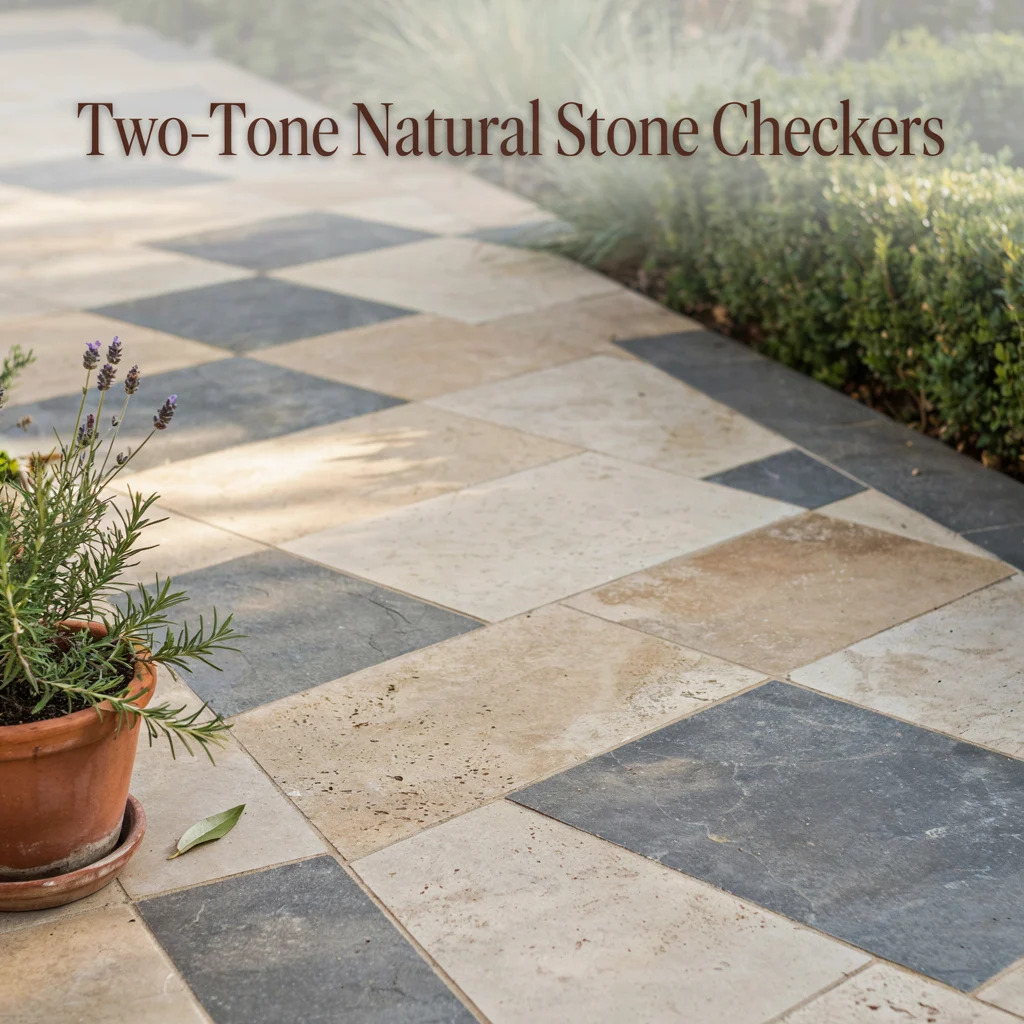
Two-tone natural stone checkers are the brilliant upgrade for anyone wanting the checkerboard look with a more organic, high-end finish, alternating two different natural stones instead of a flat painted colour. I steal this combination for patios where budget allows, because the natural variation within real stone gives the pattern depth and texture that paint or uniform pavers simply cannot match.
Stone Pairings That Work
Light limestone with dark slate, sandstone with granite, and travertine with basalt are three pairings suited to a checkered stone patio. Light limestone against dark slate creates a dramatic, high-contrast grid. Sandstone against granite offers a warmer, more rustic checker effect. Travertine against basalt brings a refined, almost Mediterranean feel to the pattern.
Working With Natural Variation
Batch matching, consistent thickness, and sealed finishes are three considerations suited to natural stone checkers. Batch matching within each stone type avoids jarring colour shifts across the pattern. Consistent thickness between the two stones keeps the finished surface level and safe to walk on. Sealed finishes protect both stones from staining and keep the contrast looking crisp for years.
Checkered Tile Inlay for a Dining Zone
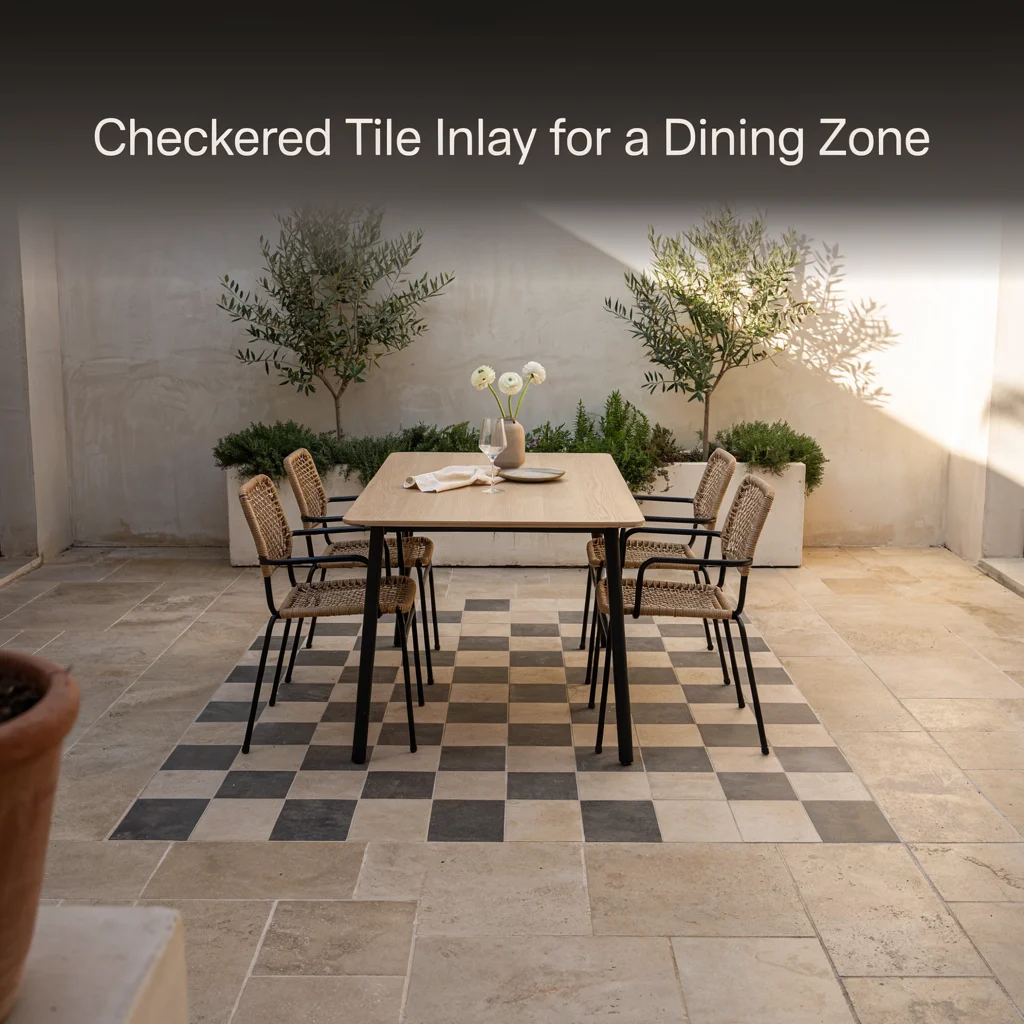
Checkered tile inlay for a dining zone is the brilliant idea that uses the pattern sparingly, framing just the dining or seating area rather than covering the whole patio. I steal this inlay approach whenever a patio serves more than one purpose, because a checkered tile insert clearly defines the entertaining zone without turning the entire floor into a single bold statement.
Sizing the Inlay Zone
A defined dining footprint, a clear border, and proportional scaling are three principles suited to an inlay zone. A defined dining footprint sized to the table and chairs keeps the pattern purposeful rather than random. A clear border, often a plain contrasting tile, frames the checker section neatly. Proportional scaling of the squares to the size of the zone keeps the inlay from feeling cramped or oversized.
Materials for an Inlay
Porcelain tile, encaustic cement tile, and outdoor vinyl tile are three materials suited to a checkered inlay. Porcelain tile offers durability and a huge range of checker-ready colourways. Encaustic cement tile brings a decorative, almost heirloom quality to the pattern. Outdoor vinyl tile provides a lightweight, budget-conscious option for a temporary or rented space.
Mixing Pavers With Grass for a Softer Checker
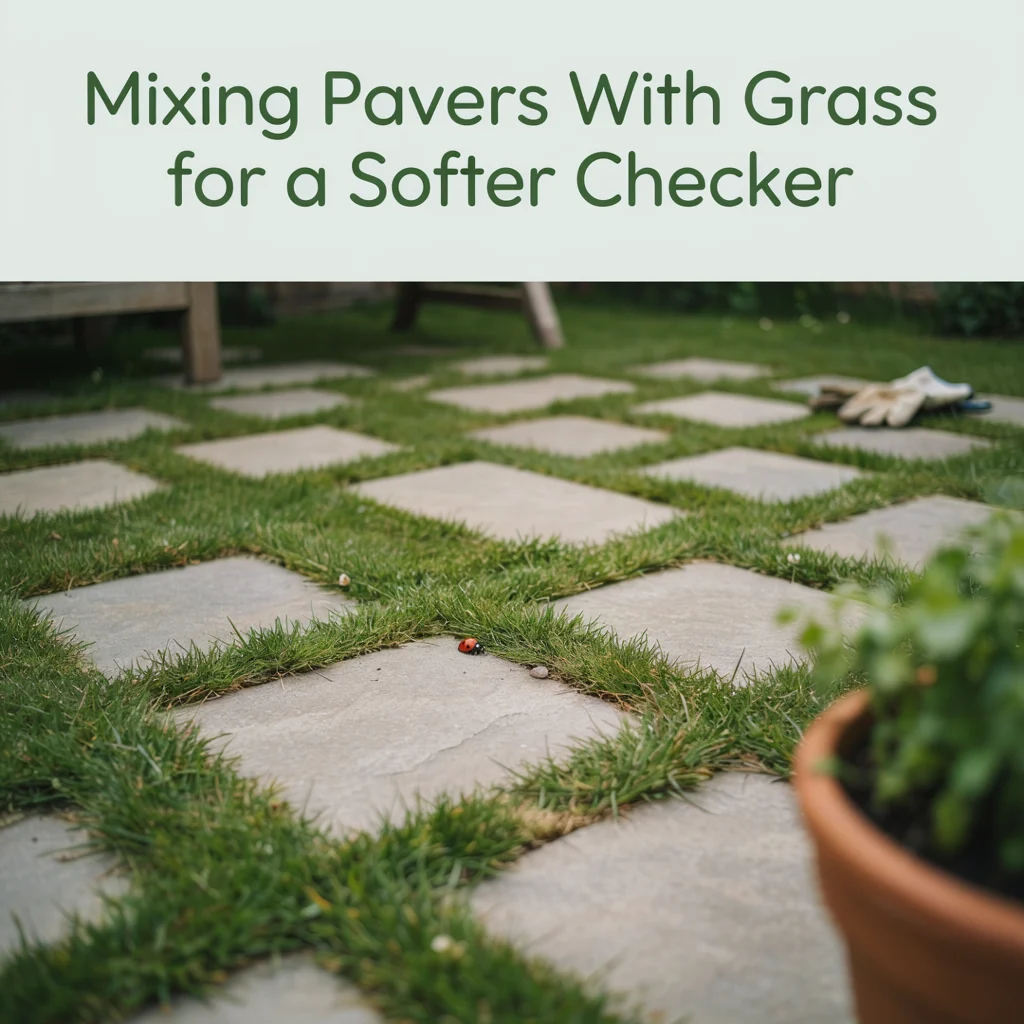
Mixing pavers with grass for a softer checker is the brilliant idea that trades hard-edged colour contrast for a living, textural grid, alternating solid pavers with squares of lawn or ground cover. I steal this combination for gardens that want the graphic structure of a checkerboard without the fully hardscaped feel, because the grass squares soften the whole pattern and let it breathe within the wider garden.
Choosing the Grass Squares
Shade-tolerant turf, low-maintenance ground cover, and gravel infill are three options suited to the grass squares. Shade-tolerant turf keeps the green squares healthy under trees or overhangs. Low-maintenance ground cover like thyme or clover reduces mowing within an awkward grid. Gravel infill is a practical substitute where grass would struggle, keeping the checker rhythm without the upkeep.
Laying a Mixed Checker
Consistent square sizing, adequate drainage, and durable paver edges are three details suited to a mixed paver-and-grass checker. Consistent square sizing between the hard and soft squares keeps the pattern reading as a true checkerboard rather than a scattered layout. Adequate drainage beneath the grass squares prevents pooling after rain. Durable paver edges stop the grass from creeping over the hard squares and blurring the pattern over time.
A Diagonal Checkerboard Layout
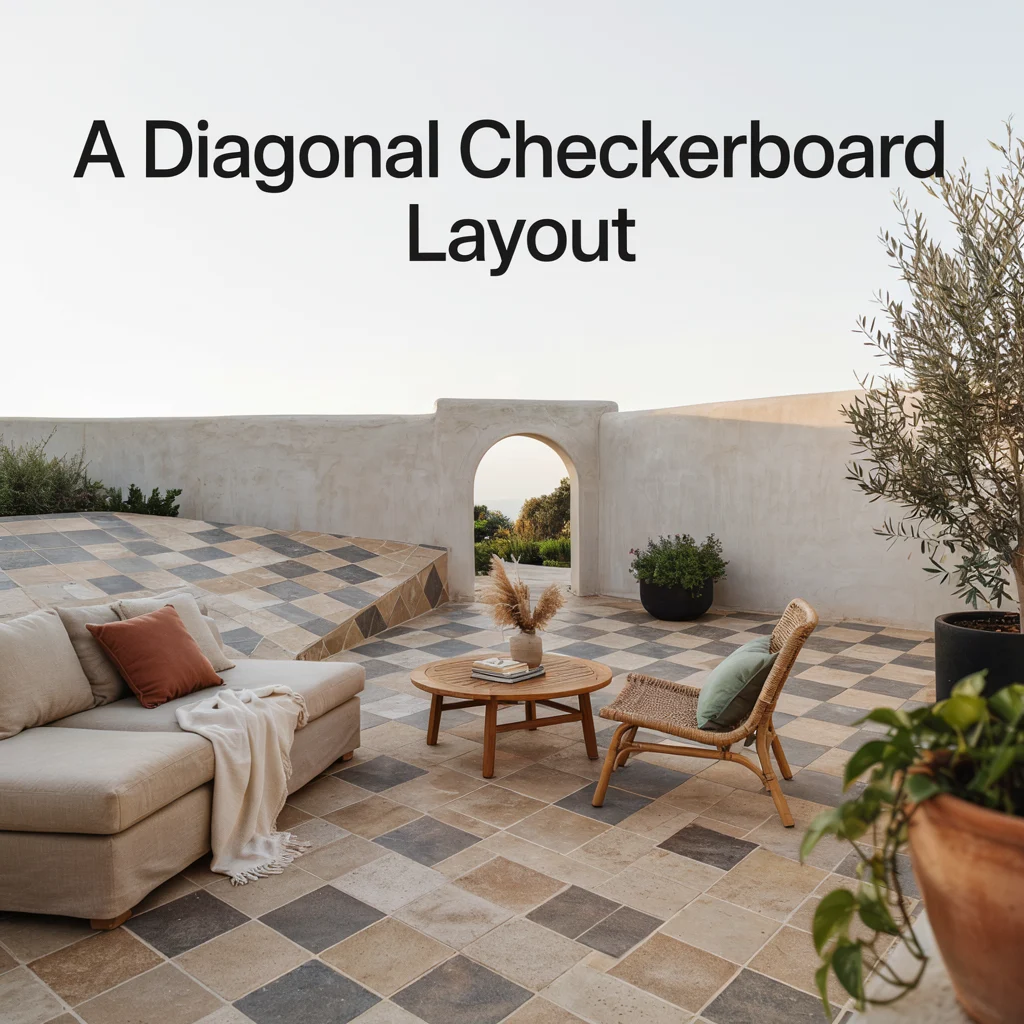
A diagonal checkerboard layout is the brilliant idea that rotates the classic grid forty-five degrees, creating a more dynamic, elongated pattern than a straight-on checker. I steal this diagonal trick whenever a patio is long and narrow, because a rotated checkerboard draws the eye across the width of the space rather than down its length, making a cramped patio feel wider than it is.
Why Diagonal Layouts Work
Visual widening, dynamic movement, and a less rigid feel are three benefits of a diagonal checker. Visual widening happens because the eye follows the diagonal lines across the space rather than along it. Dynamic movement in the pattern makes the floor feel more energetic than a straight grid. A less rigid feel suits gardens that want the checker concept without a fully formal look.
Installing a Diagonal Pattern
Precise corner cutting, extra material allowance, and a centred starting point are three considerations suited to diagonal checkers. Precise corner cutting is required at every edge of the patio, since a rotated grid rarely lines up neatly with a rectangular boundary. Extra material allowance accounts for the additional cut waste a diagonal layout produces. A centred starting point ensures the pattern looks balanced rather than lopsided once it reaches the patio’s edges.
Colour Variations Beyond Black and White
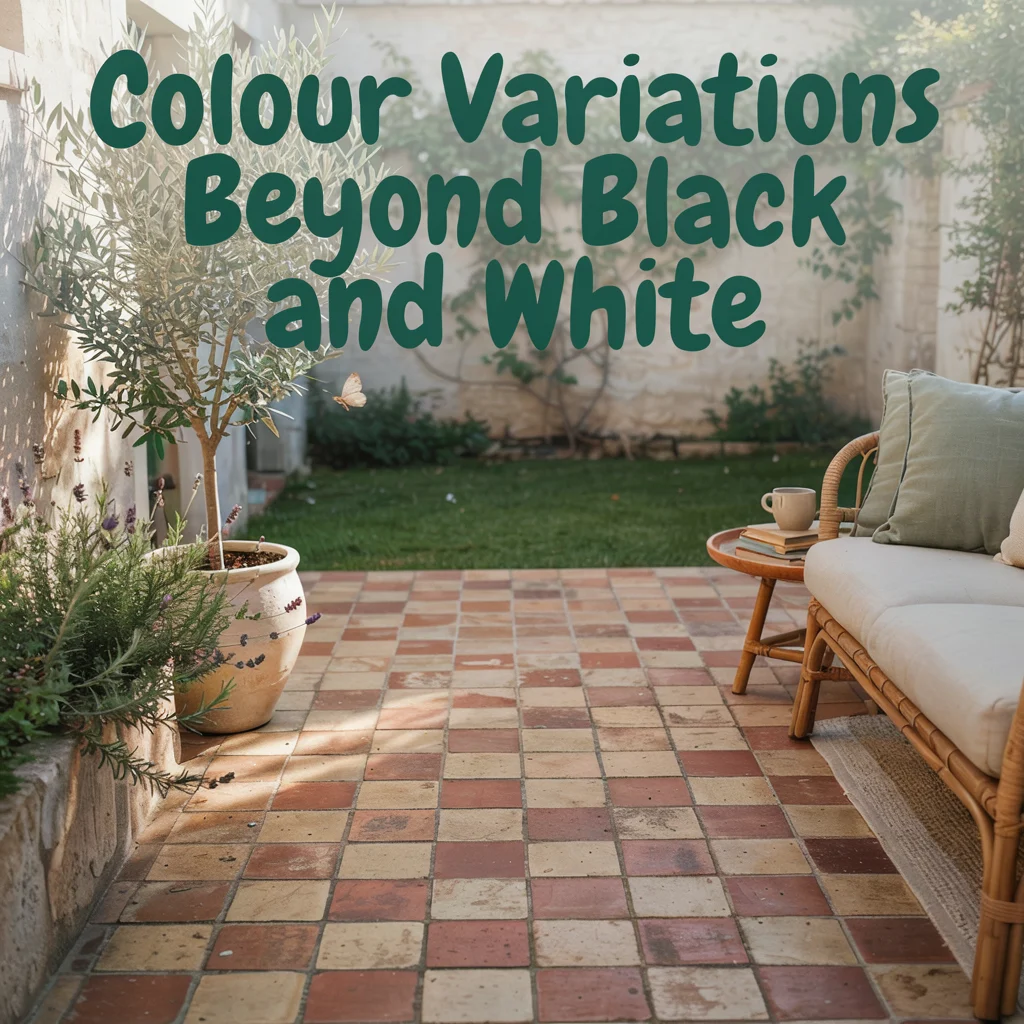
Colour variations beyond black and white are the brilliant idea that keeps the checker concept while softening its intensity, using warmer or more muted pairings like terracotta and cream, or navy and white. I steal these colour swaps constantly for gardens with a softer, more traditional palette, because the checker pattern still reads clearly even without the stark contrast of true black and white.
Softer Pairings to Try
Terracotta with cream, sage with ivory, and navy with white are three colour pairings suited to a softened checker. Terracotta with cream brings a warm, Mediterranean feel to the pattern. Sage with ivory suits a cottage-garden or countryside setting. Navy with white keeps the graphic punch of a classic checker while feeling slightly less severe underfoot.
Matching Colours to the Garden
Existing brickwork, planting tones, and furniture finishes are three references suited to choosing a checker palette. Existing brickwork on the house is a natural starting point for a coordinated colour choice. Planting tones nearby, like sage-green foliage or terracotta pots, help the pattern feel integrated rather than dropped in. Furniture finishes chosen to complement the checker colours tie the whole patio together as one composition.
Oversized Squares for a Bold, Modern Look
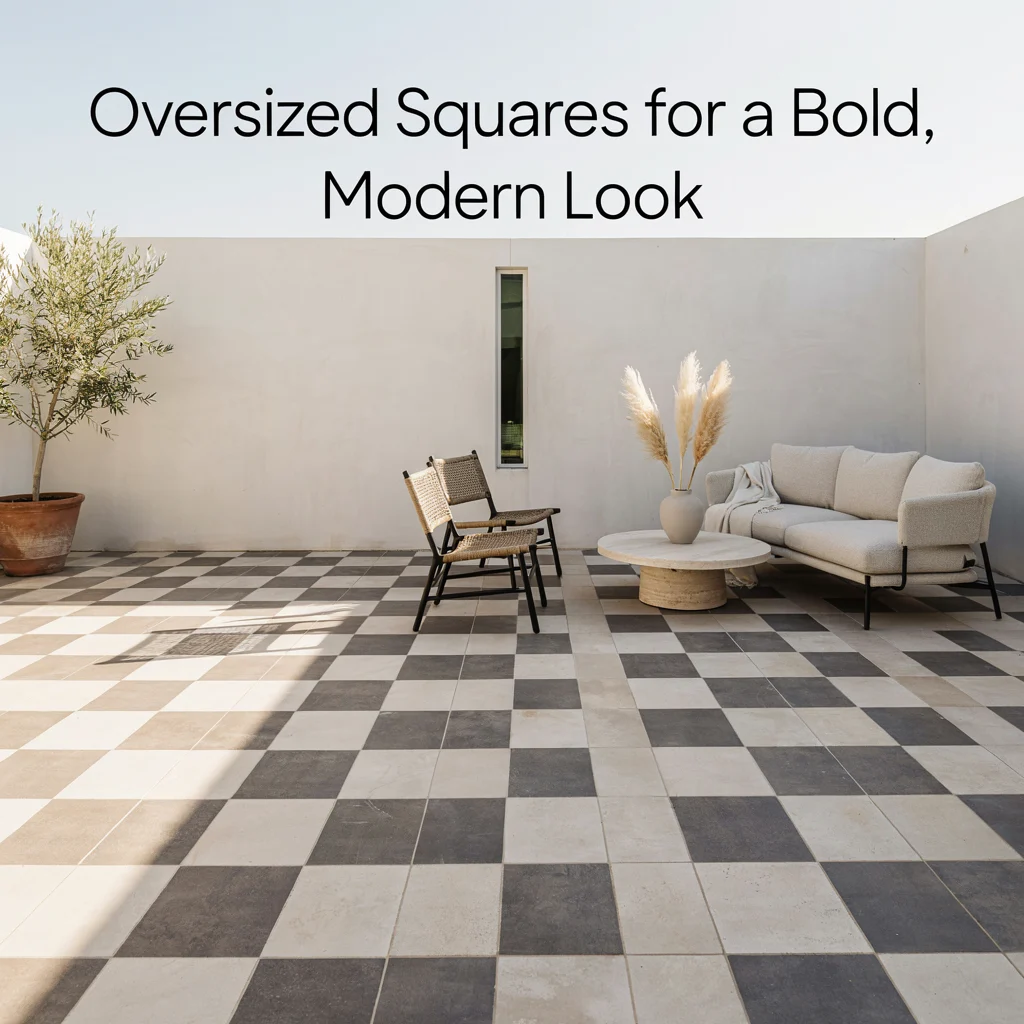
Oversized squares for a bold, modern look are the brilliant idea that scales the checker pattern up, using large-format tiles or pavers instead of the traditional small squares. I steal this oversized approach for larger, more contemporary patios, because big, bold squares feel architectural rather than decorative, and they cut down dramatically on the number of grout lines needed.
When Oversized Squares Work Best
Large patio footprints, modern architecture, and minimal furniture are three conditions suited to oversized checkers. Large patio footprints give the bigger squares room to read clearly rather than looking cramped. Modern architecture with clean lines pairs naturally with the bold simplicity of large-format checkers. Minimal furniture keeps the floor pattern as the visual focus rather than competing with it.
Practical Considerations for Scale
Fewer grout lines, heavier individual units, and careful base preparation are three practical factors suited to oversized squares. Fewer grout lines mean less long-term maintenance and a cleaner overall look. Heavier individual units require more careful handling and installation than smaller tiles. Careful base preparation underneath is essential, since large format pavers show unevenness far more obviously than small ones.
A Checkered Pathway Leading to the Patio

A checkered pathway leading to the patio is the brilliant idea that extends the pattern beyond the seating area itself, using a narrower checker walkway to introduce the theme before guests even arrive. I steal this pathway trick often, because a checkered path leading from the gate or back door builds anticipation and ties the whole journey through the garden into one consistent design.
Designing the Path
A narrower checker scale, a consistent colour theme, and a clear width for foot traffic are three principles suited to a checkered path. A narrower checker scale than the main patio keeps the path feeling proportionate rather than overwhelming. A consistent colour theme links the path visually to the patio it leads toward. A clear, generous width for foot traffic keeps the path practical as well as decorative.
Connecting Path and Patio
A shared border material, a transition threshold, and matching grout colour are three details suited to connecting the two areas. A shared border material along both the path and patio edges reads as one continuous design. A transition threshold, such as a change in paver size, marks the shift from walkway to gathering space without jarring the eye. Matching grout colour throughout keeps the whole route feeling like a single considered plan rather than two separate projects.
Lighting That Highlights the Pattern After Dark
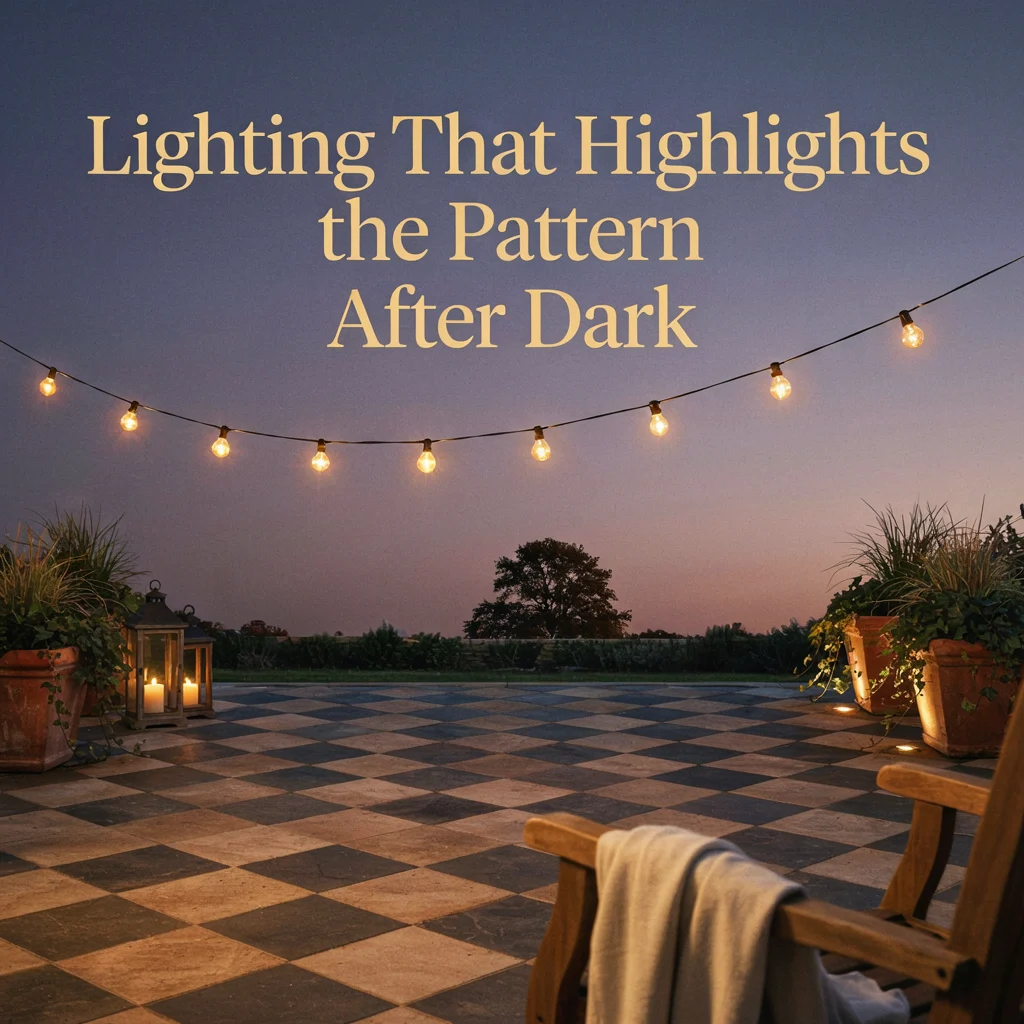
Lighting that highlights the pattern after dark is the brilliant idea that keeps a checkered patio impressive well past sunset, using low, angled lighting to throw the grid lines into relief. I steal this lighting trick for every checkered patio I finish, because a pattern this striking deserves to be visible at night, not just lost in shadow once the sun goes down.
Lighting Techniques for a Checker Floor
Low-level edge lighting, uplighting on nearby planting, and warm-toned bulbs are three techniques suited to a checkered patio at night. Low-level edge lighting along the patio’s border grazes across the surface and picks out the grid lines. Uplighting on nearby planting frames the pattern within the wider garden after dark. Warm-toned bulbs keep both light and dark squares looking true to their daytime colours rather than washed out.
Avoiding Common Lighting Mistakes
Overhead-only lighting, cool white bulbs, and uneven placement are three mistakes to avoid with checkered patio lighting. Overhead-only lighting flattens the pattern and loses the contrast that makes a checker floor special. Cool white bulbs can make warm tones like terracotta or cream look dull and grey. Uneven placement leaves some squares brightly lit and others in total shadow, breaking the visual rhythm of the grid.
Furniture That Complements the Checker Pattern

Furniture that complements the checker pattern is the brilliant finishing idea that keeps the strongest visual statement on the floor rather than competing with it, using simple, solid-coloured furniture against a bold pattern below. I steal this restraint constantly, because a checkered floor is already doing most of the visual work, and furniture in a single calm tone lets the pattern remain the star of the space.
Furniture Choices That Work
Solid neutral upholstery, simple metal or timber frames, and one accent colour are three furniture choices suited to a checkered patio. Solid neutral upholstery avoids clashing with the strong graphic floor beneath it. Simple metal or timber frames keep the furniture from adding another competing pattern to the mix. One accent colour, echoed in cushions or planters, ties the furniture back to the checker palette without overwhelming it.
Arranging Furniture on a Checker Floor
Aligned placement, breathing room around the grid, and grouped seating are three arranging principles suited to a checker patio. Aligned placement with the pattern’s grid lines keeps furniture looking intentional rather than randomly scattered. Breathing room left around the edges of the pattern lets the checker floor be seen and appreciated, not just walked over. Grouped seating arranged to face inward keeps the gathering feel of the space while still showing off the floor beneath.
Frequently Asked Questions
What are the best checkered backyard patio ideas?
The best checkered backyard patio ideas combine a strong pattern choice with the right scale and colour for the space, including a classic black-and-white checkerboard, a painted concrete floor for a budget-friendly version, and two-tone natural stone for a more upscale finish. Softer colour pairings like terracotta and cream work well for traditional gardens, while oversized squares suit larger, more modern patios, and a diagonal layout can make a narrow space feel wider. The single most important detail across every version is consistent square sizing and grout lines, since that precision is what separates a crisp, intentional checkerboard from a pattern that looks uneven or accidental.
How do I choose colours for a checkered patio?
Choose checkered patio colours by starting with what already exists nearby, such as brickwork on the house, nearby planting tones, or the finishes on your outdoor furniture. Classic black and white gives the boldest, most timeless contrast, while softer pairings like sage and ivory or navy and white suit a more traditional or cottage-style garden. The goal is enough contrast between the two tones for the pattern to read clearly from a distance, without clashing with the colours already established elsewhere in the backyard.
What is the cheapest way to create a checkered patio?
The cheapest way to create a checkered patio is to paint an existing concrete slab rather than installing new tiles or pavers. A clean, crack-free surface, a primer coat, and a durable exterior floor paint applied within taped-off squares can transform a plain slab into a full checkerboard for a fraction of the cost of new materials, and the same stencil-and-paint approach can be refreshed every few years as the finish wears.
Can a checkered pattern work on a small patio?
A checkered pattern can absolutely work on a small patio, provided the scale of the squares is kept proportionate to the space. Smaller squares generally suit tighter patios better than oversized ones, and using the pattern only as an inlay under a dining or seating zone, rather than across the entire floor, keeps a compact space from feeling overwhelmed by the design. A diagonal layout can also help a small or narrow patio feel more spacious than a straight-on grid would.
Does a checkered patio need special maintenance?
A checkered patio generally needs the same maintenance as any hard-landscaped floor, though the visual impact of the pattern makes upkeep more noticeable when it slips. Sealing natural stone or painted concrete protects the colour contrast from fading or staining, and keeping grout lines clean prevents the crisp grid from blurring into a duller, less defined pattern over time. Re-sealing or repainting every few years keeps the checker effect looking as sharp as the day it was installed.